(To learn the basics about options and modifiers and how to set them up, see this article.)
Introduction
When an option group is created, this option group can be assigned to multiple items. Not all options are required to be offered for every of those items and for each location. Now, it is possible to deactivate an option for individual items per location.
Use case example
Let’s say, there are two locations of one restaurant called Fruit Paradise – Beverly Hills and Central Park. At Beverly Hills site, they offer Crispy Chicken in packages of 2, 4 or 6 pieces. At Central Park, they offer only 2 or 4 pieces.
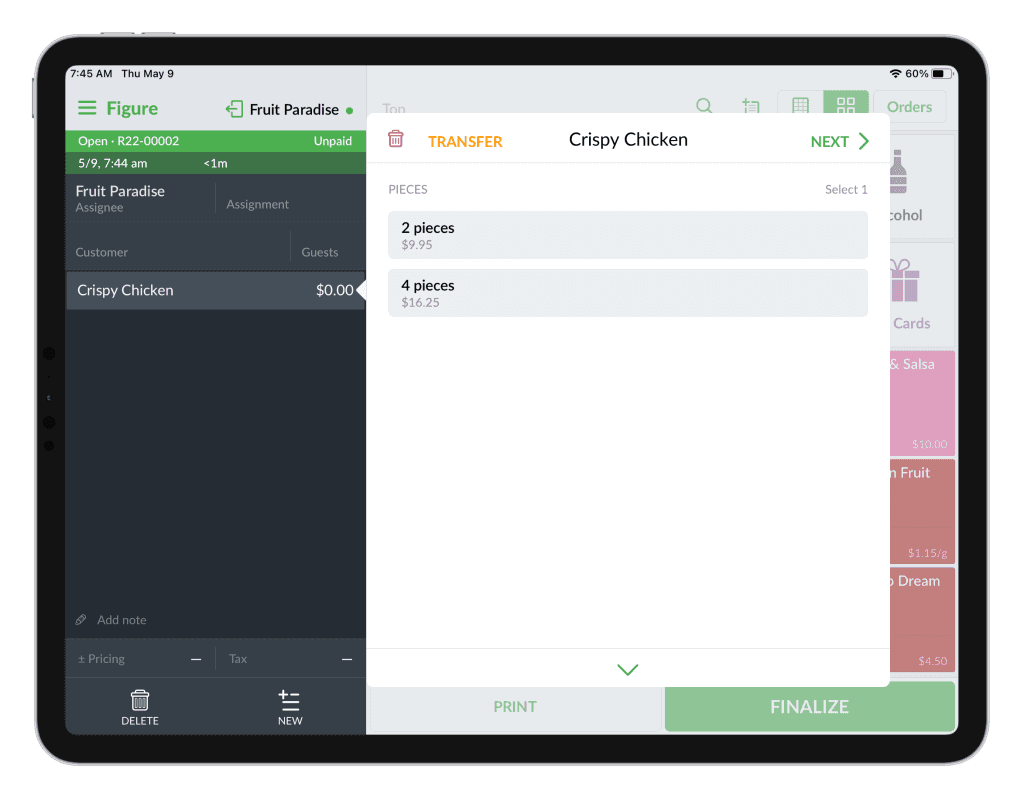
In this case, the same option group can be used. At Central Park, the option of 6 pieces will be deactivated, which means it will no longer be displayed by the item in POS, Make It Butter or Kiosk.
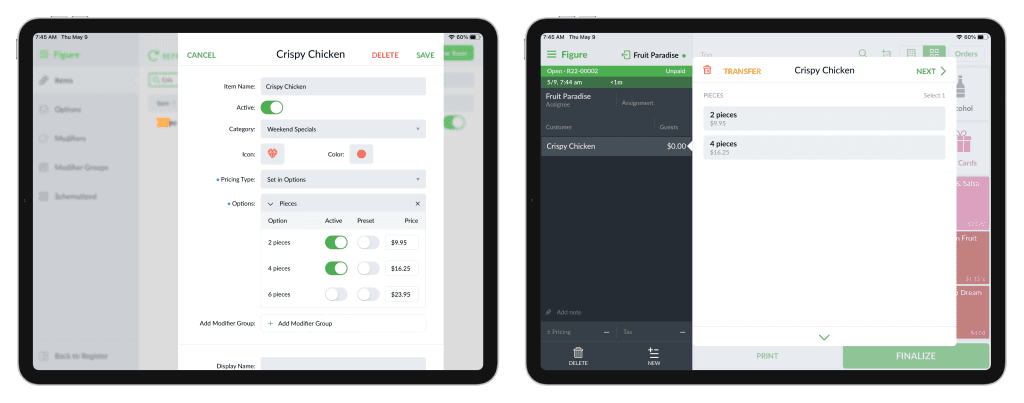
How to deactivate an option per item / per location
This change can be done in Figure Manage or POS. See both of the ways described below.
In Figure Manage
[1] Go to Figure Manage > Items & Categories and find an item for which you’d like to deactivate an option.
[2] Click on the item to open the item detail
[3] Choose a location at the top right corner – even when there is only one location, switch it from the Master List to that location (when done on POS, the change will be done for that particular location only).
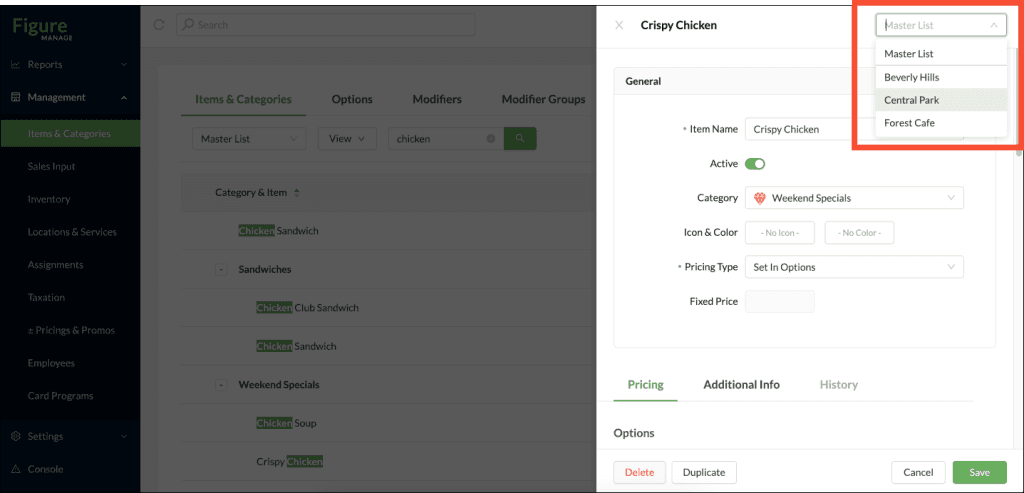
[4] Scroll down to the Options section and activate / deactivate an option
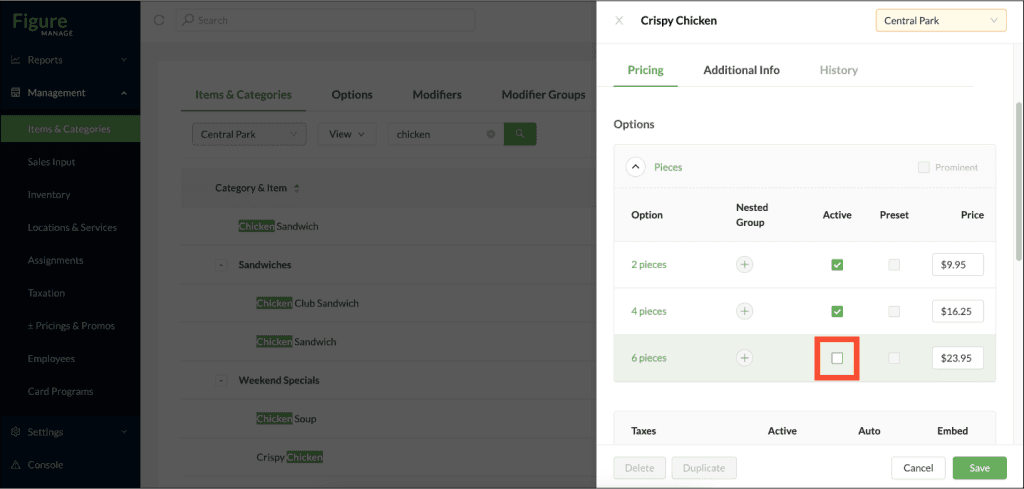
[5] Press Save
This will be the result – the deactivated option is not shown:
In POS
[1] Go to POS > Menu (top left) > Configuration > Items
[2] Search for an item you want to adjust
[3] Open the item detail
[4] Deactivate an option by switching the green button to grey
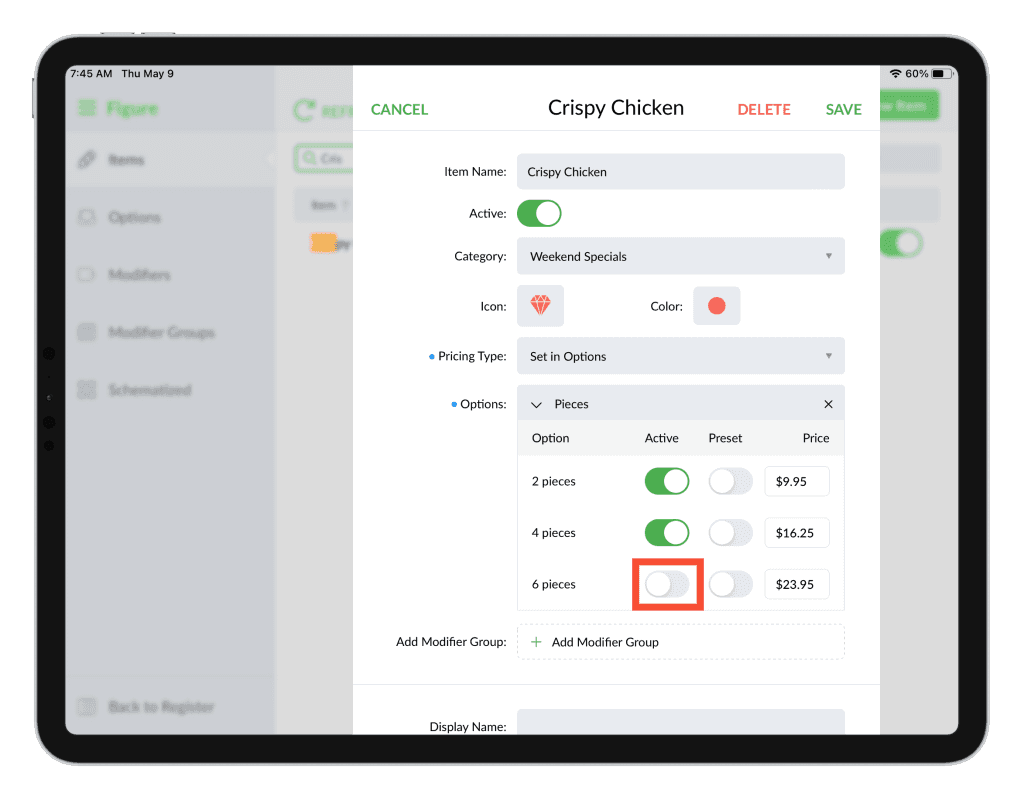
[5] Press Save
This will be the result – the deactivated option is not shown: