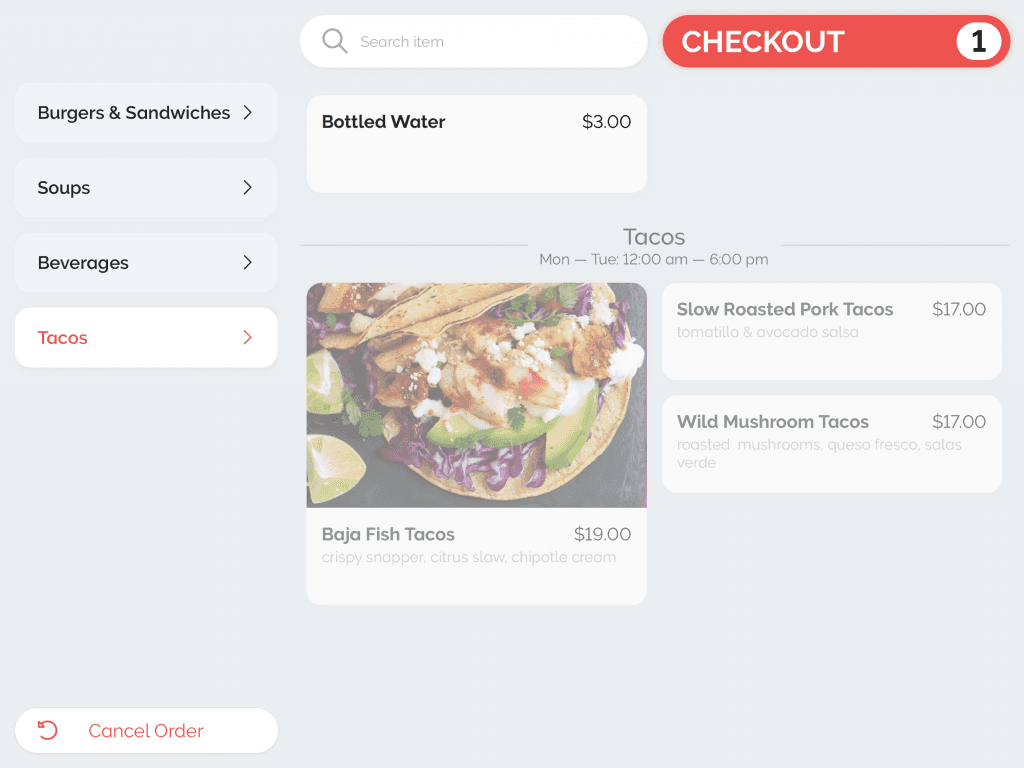
Figure Manage SALES INPUT = agenda where you can create and adjust menus
Create KIOSK Menu
[1] Go to Management -> Sales Input
[2] Choose Kiosk Tab
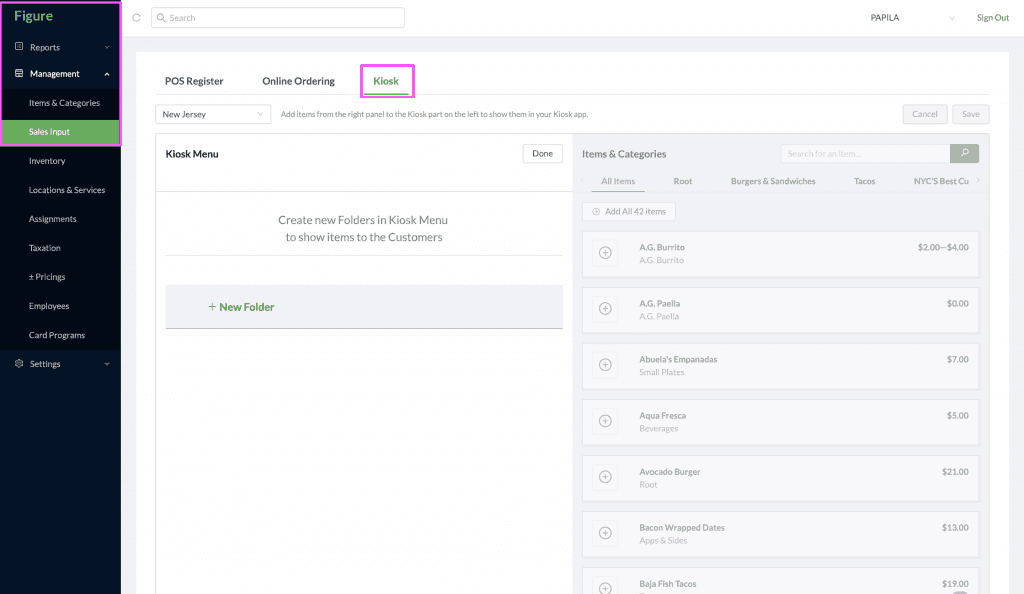
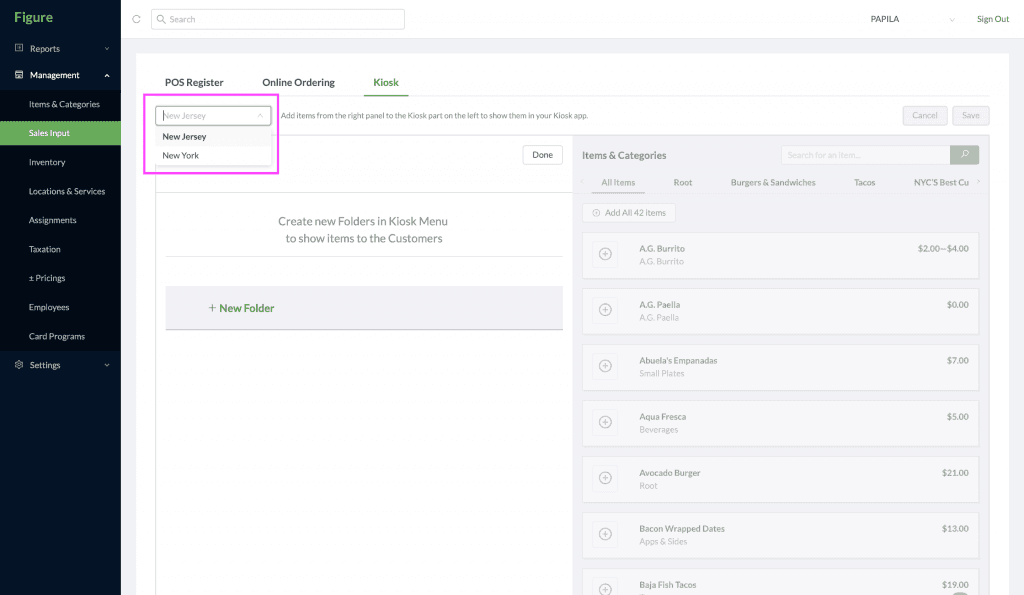
[3] Choose the correct Location: the changes will be made just for that location
[4] Click on “+ New Folder”
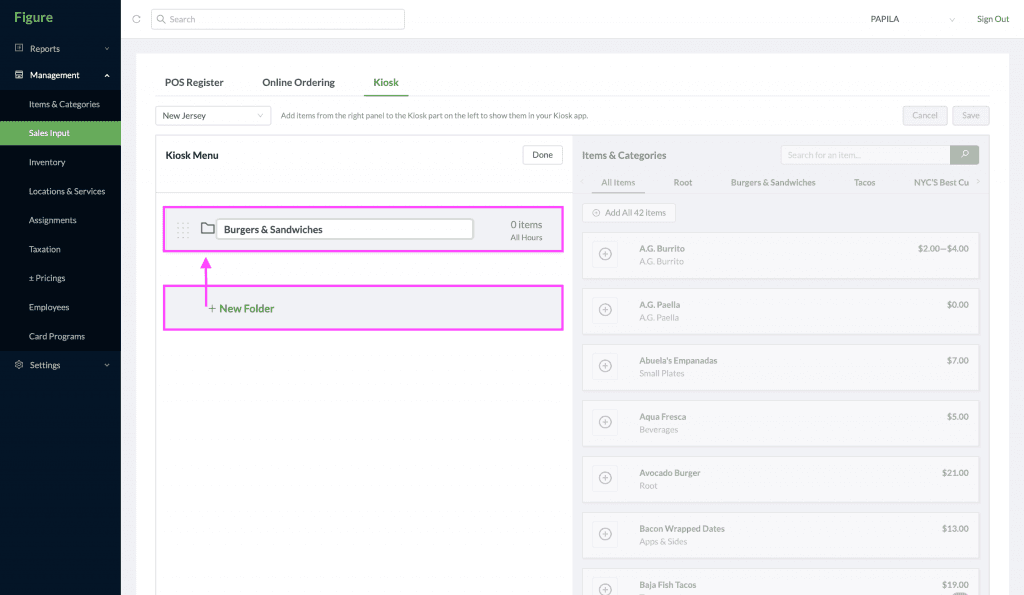
[5] Create as many folders as you need
[6] After you create the folders, click on Done: now the folders’ content can be edited
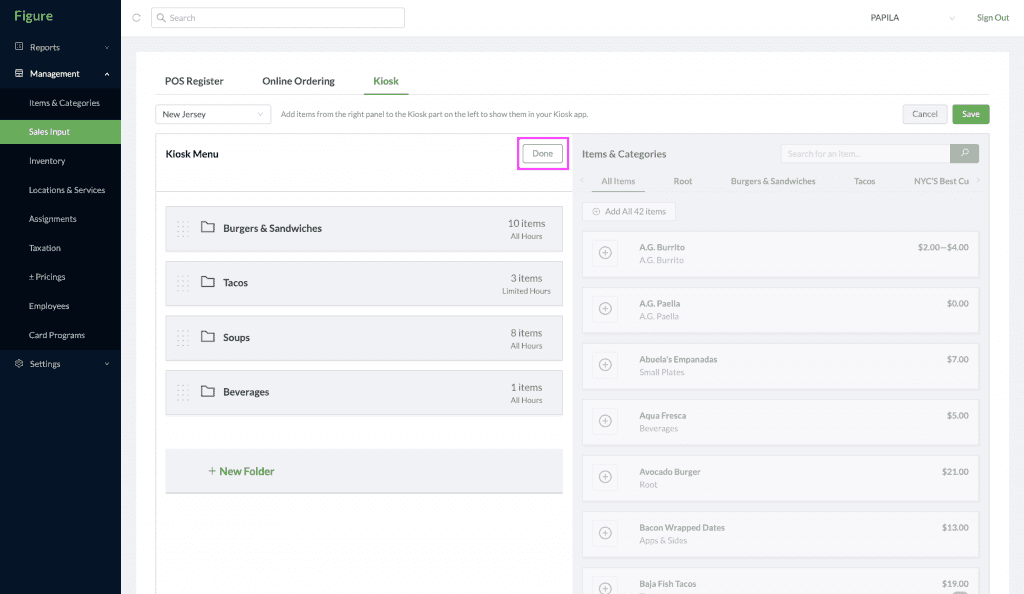
[7] Add items to your Folders
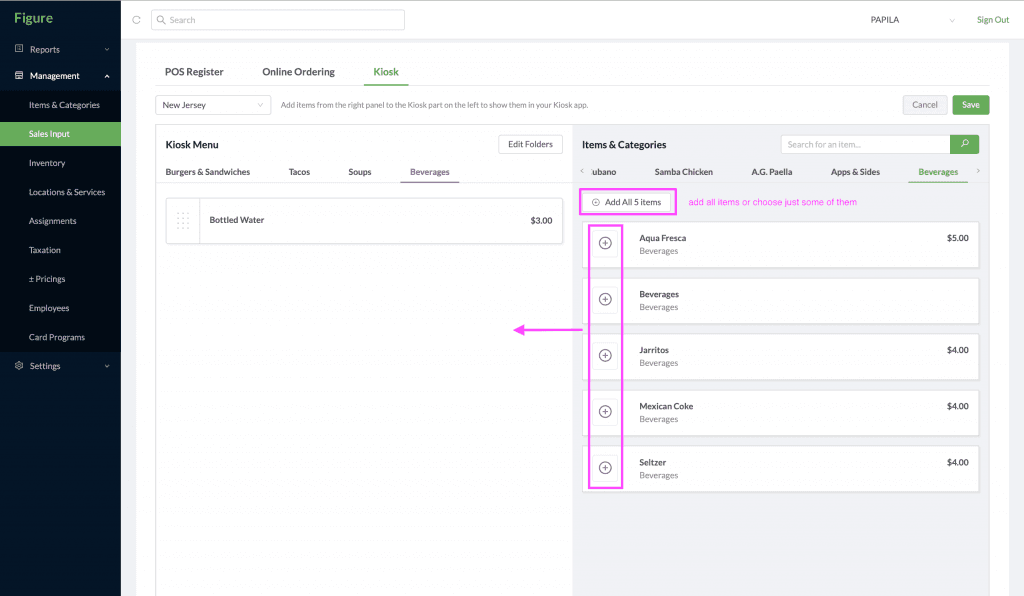
Select a folder from the ones you just created by clicking on it
From the right side, select a folder also or stay in All items selection
Choose if you want to add All items from that folder: Click on Add All x items
If you want to add just one item: click on the plus next to the item
Tip: Search for an item by typing its name in the search bar
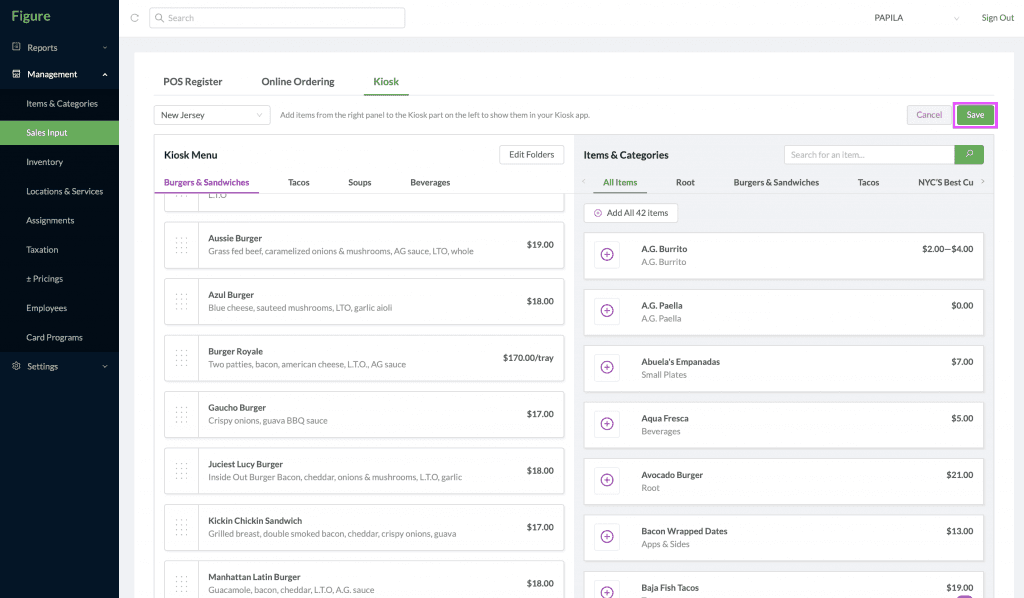
[8] Click Save, after you have finished completing your Kiosk Menu
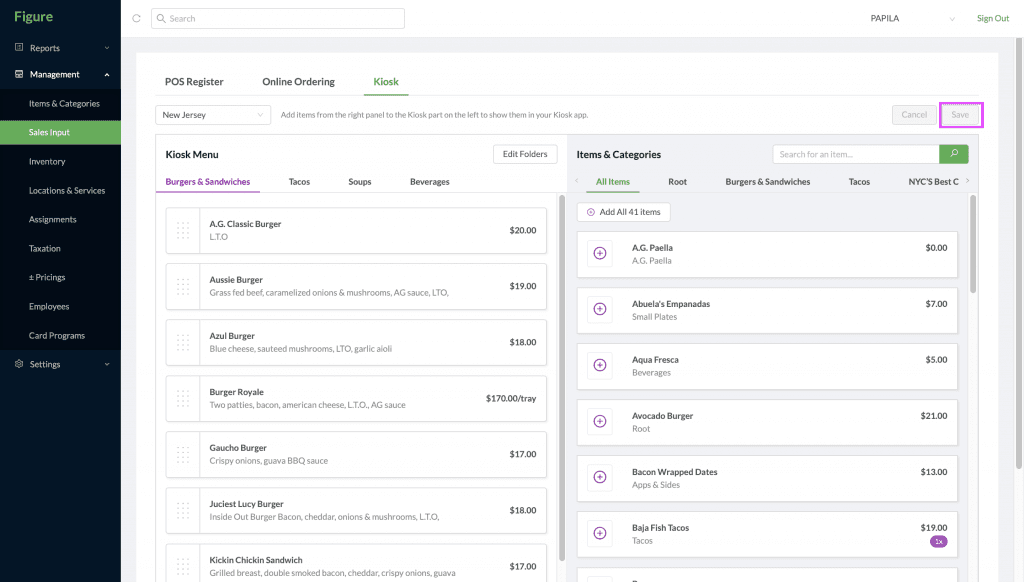
!! Make sure that the Save button is Grey: this means that you have no unsaved changes!!
Delete items from folders (KIOSK menu)
[1] Go to Management -> Sales Input
[2] Choose Kiosk Tab
[3] Choose the correct Location where you want to make menu changes
[4] Click on Done
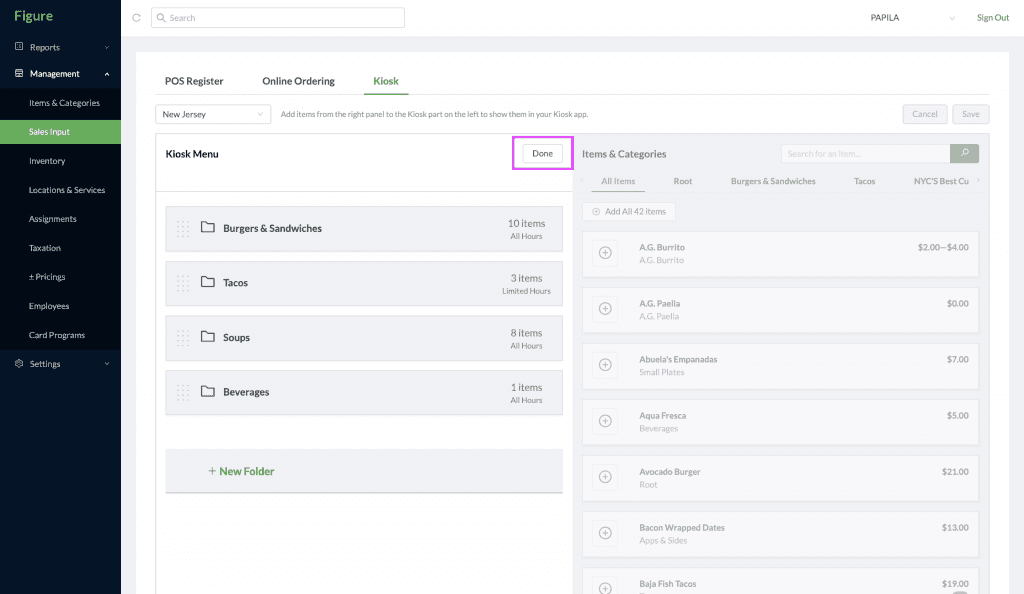
[4] Select one folder
[5] Hover over the item you want to delete and click on the bin icon
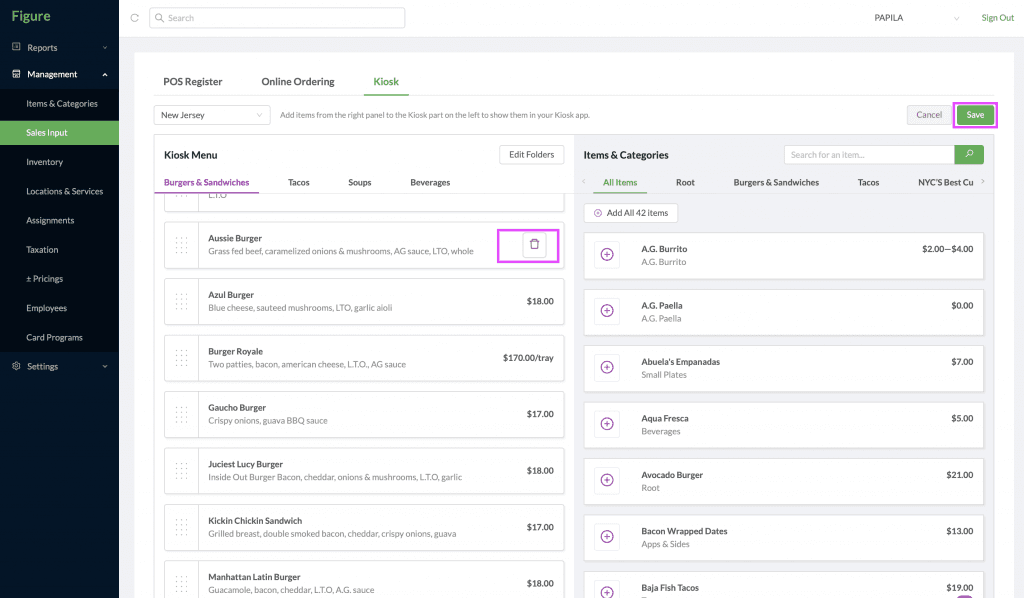
[6] Confirm the deletion
[7]Click on Save
Don’t forget to hit save at the end of your changes!
Edit existing Kiosk Menu
If your kiosk menu is already created, this is how to edit it:
[1] Go to Management -> Sales Input
[2] Choose Kiosk Tab
[3] Choose the correct location: the changes will be made just for that location
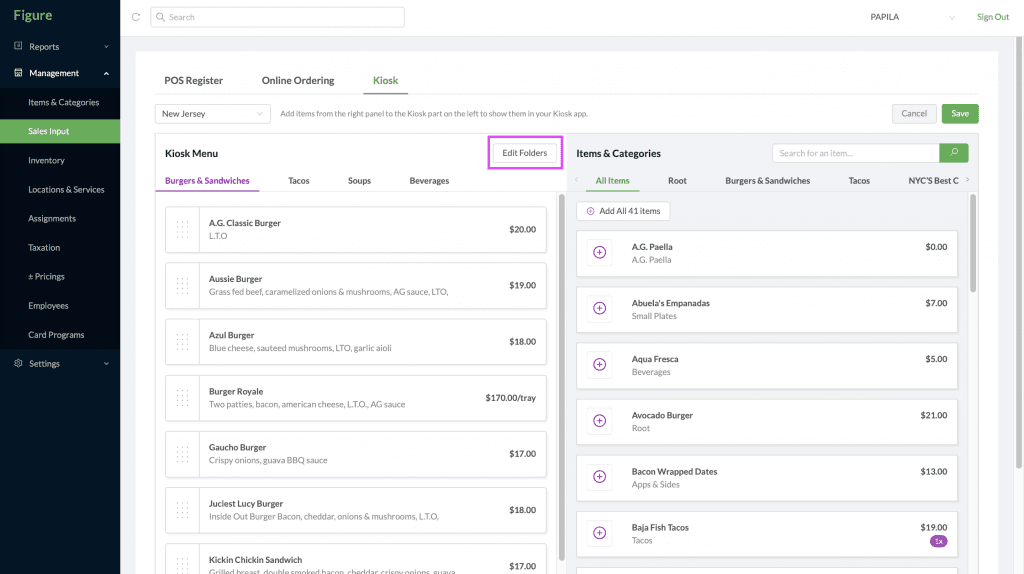
[4] Click on Edit Folders: this will enable you to add new folders or delete existing ones
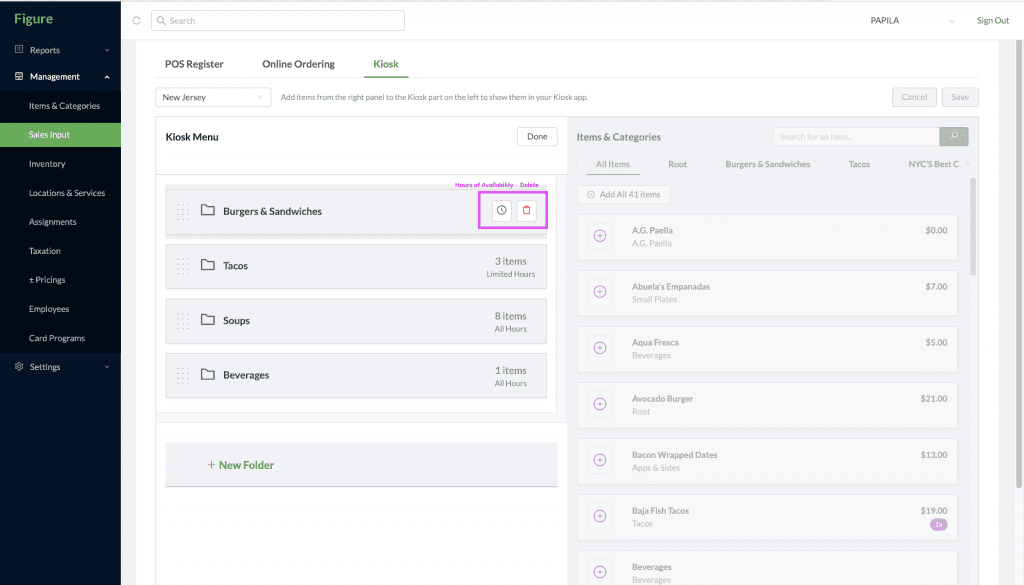
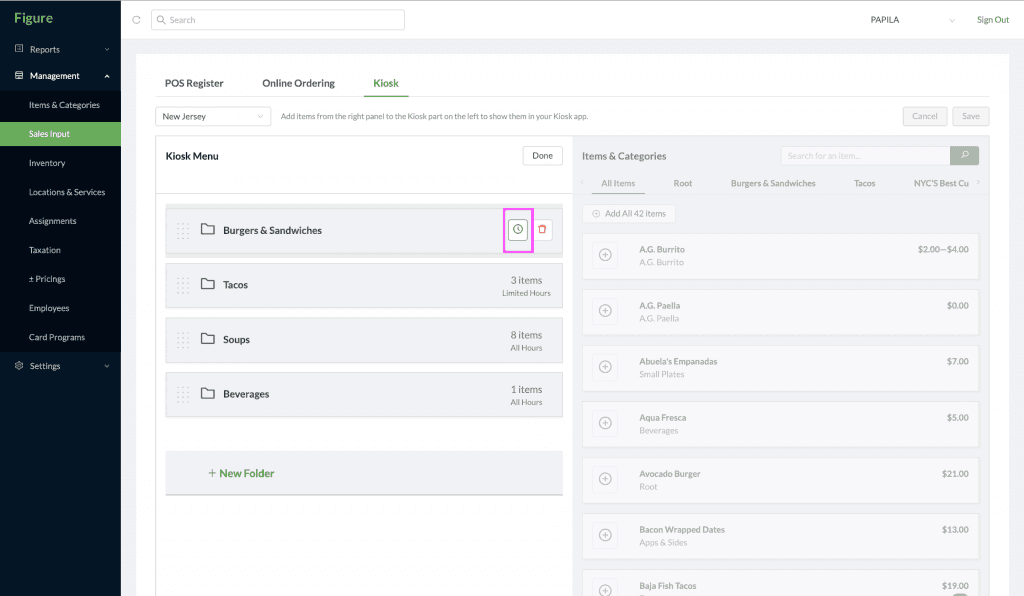
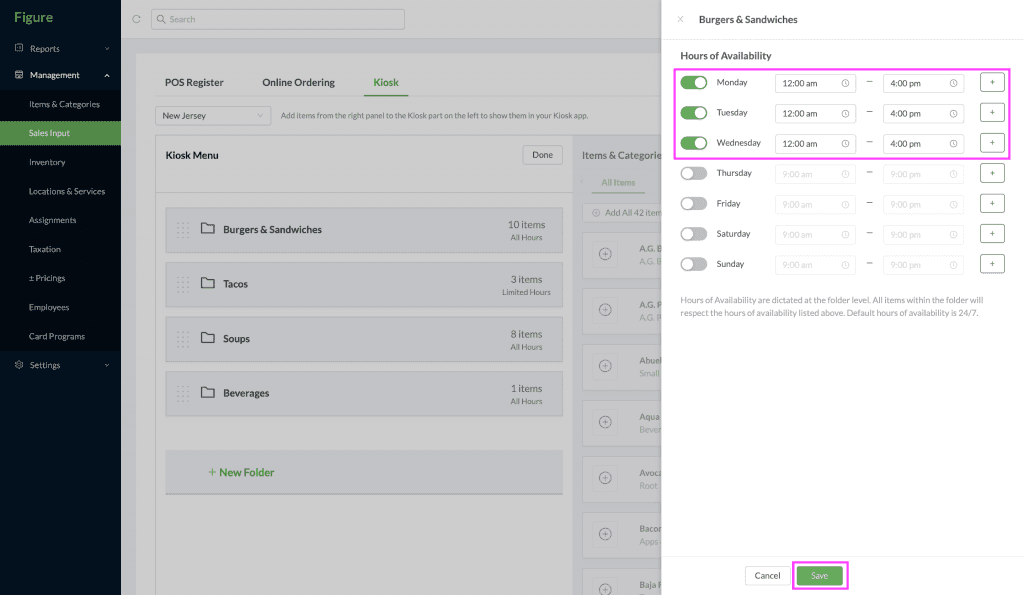
[5] Here you can also add Hours of Availability to your folders
click on the time icon
select the days of week where this folder should be available
edit the time slots between which this folder should be available
click on Save
[5] Click on the main Save button after you finished editing folders
Example of KIOSK menu
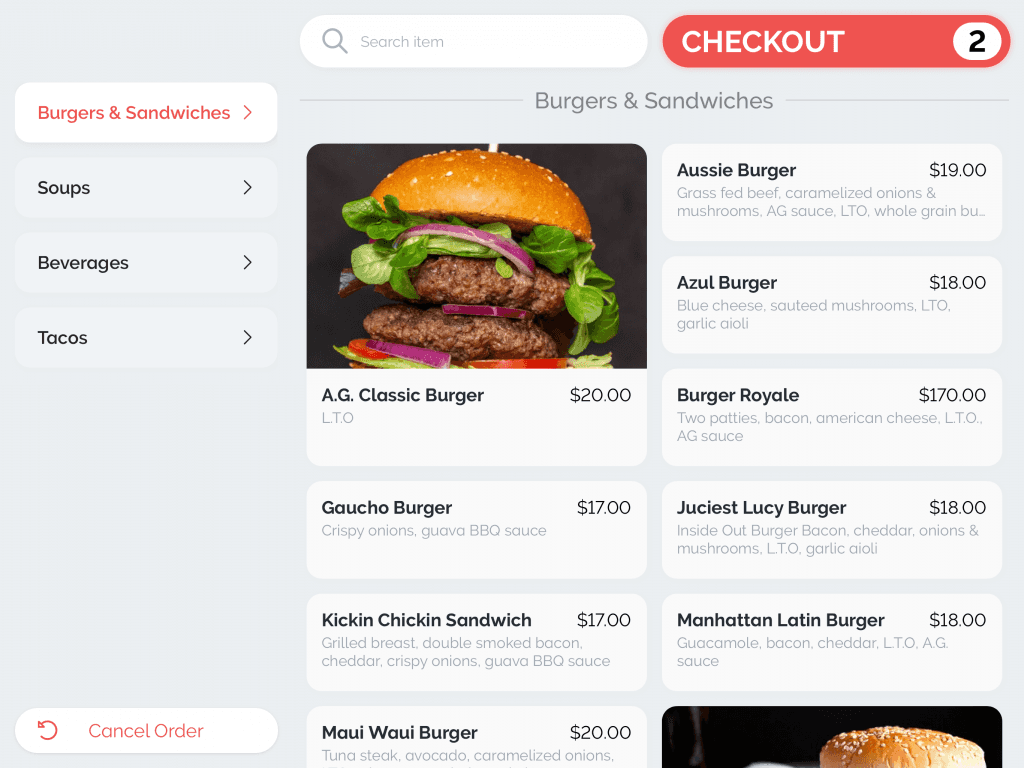
Example of Limited Hours of Availability on Kiosk