Introduction
With Figure, you can use barcode scanners to easily add items to an order. We support bluetooth and USB connected scanners.
✅ Bluetooth (BT) – Teemi
✅ Any barcode scanner that acts as a HID (Human Interface Device) — like an external keyboard – USB or bluetooth – any brand that passes the compatibility test
How To Connect a Barcode Scanner
Follow the steps based on if you are connecting a Teemi bluetooth scanner or a USB (or other scanner working as human interface device [HID])
Connecting the bluetooth barcode scanner (Teemi)
Connecting a USB barcode scanner or any barcode scanner that acts as HID
Connecting the Bluetooth Barcode Scanner (Teemi)
This guide shows how to connect the Teemi barcode scanners connected by bluetooth.
[1] Power on the barcode scanner – keep pressing the scan button
[2] Scan this barcode:

[3] Go to iPad settings > Bluetooth and find the device, it is usually named as TMSL* and click it
[9] Click Pair
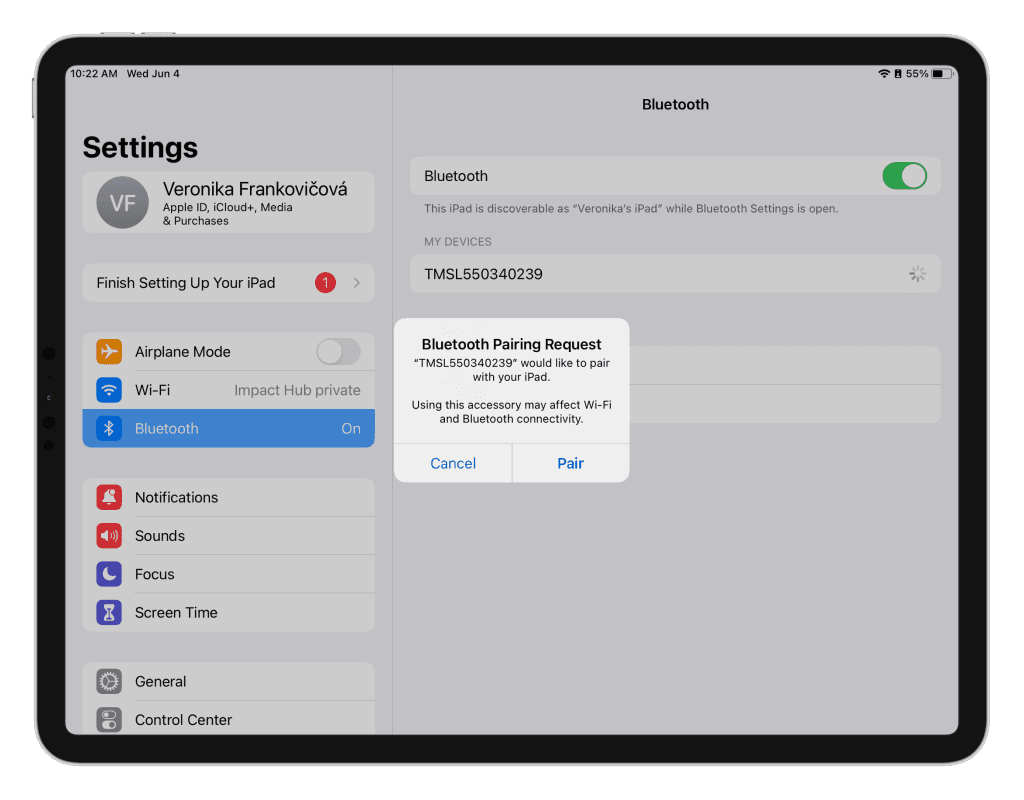
Now, the barcode scanner is connected to the iPad and POS.
Reconnecting a Bluetooth Barcode Scanner
When experiencing any issues with the barcode scanner, it can be helpful to reconnected the device. See below how.
[1] Forget the device from the iPad: Go to the iPad Settings > Bluetooth
[2] In section MY DEVICES find the Teemi device and click the "i" icon / button by the device name
[3] Click Forget This Device
[4] Scan the barcode below to factory reset the scanner

[5] Scan the barcode below to power off the scanner

[6] Power on – keep pressing the scan button device
[7] Scan this barcode:
[8] Go to iPad settings > Bluetooth and find the device, it is usually named as TMSL* and click it
[9] Click Pair
Now, the barcode scanner is connected to the iPad and POS.
Connecting a USB barcode scanner (or any barcode scanner that acts as HID)
This guide explains how to use barcode readers that act as HID (Human Interface Device – like an external keyboard) with our POS system on iPads. It is possible to use any USB or bluetooth barcode scanner brand if they pass the compatibility test below.
[1] Connect the barcode reader to your iPad using USB or Bluetooth.
[2] Compatibility test – check if your barcode reader acts as an HID device
open the Notes app (or any app where you can type text) and place the cursor in the text input field to make the keyboard appear.
Scan a barcode.
If the barcode data (such as numbers) appears in the text input field just like typing on a keyboard, your device is an HID device = OK, the device will work with our POS.
If the data doesn’t appear, the device will not work with our POS.
If the device passed the compatibility test, you can use the barcode scanner with our POS.
How HID Barcode Readers Work
HID barcode readers behave like BT Teemi readers with one key difference:
When text input is focused, the barcode reader will place the scanned data into the text field.
Otherwise, the barcode reader’s data is available for the POS system to read directly.
How to show the virtual keyboard even when the 'HID scanner' is connected
When an HID device is connected, the iPad treats it like an external keyboard and hides the on-screen keyboard. If you need the virtual keyboard to remain visible, follow these steps:
On your iPad, go to Settings > Accessibility > Touch > AssistiveTouch.
Enable AssistiveTouch
Enable Show Onscreen Keyboard
Disable Always Show Menu
With these settings, the keyboard will remain visible even when the HID device is connected.
⚠️ Note: These settings may reset when the HID device is disconnected and reconnected. If this happens, toggle Show Onscreen Keyboard and Always Show Menu twice to reactivate the virtual keyboard.
How to use a barcode scanner
In order to use the barcode scanners, barcodes need to be firstly assigned to items. Then, the items can be added to the order by scanning their barcodes.
Assign barcodes to items
Barcodes can be assigned to each item through POS or they can be imported already pre-assigned to items while importing the menu [Learn how here]. Now, let's see how to assign barcodes through POS:
[1] Go to POS > Main menu > Configuration
[2] Open an item you want to assign a barcode to – at the bottom you can see if there is any barcode already assign or not
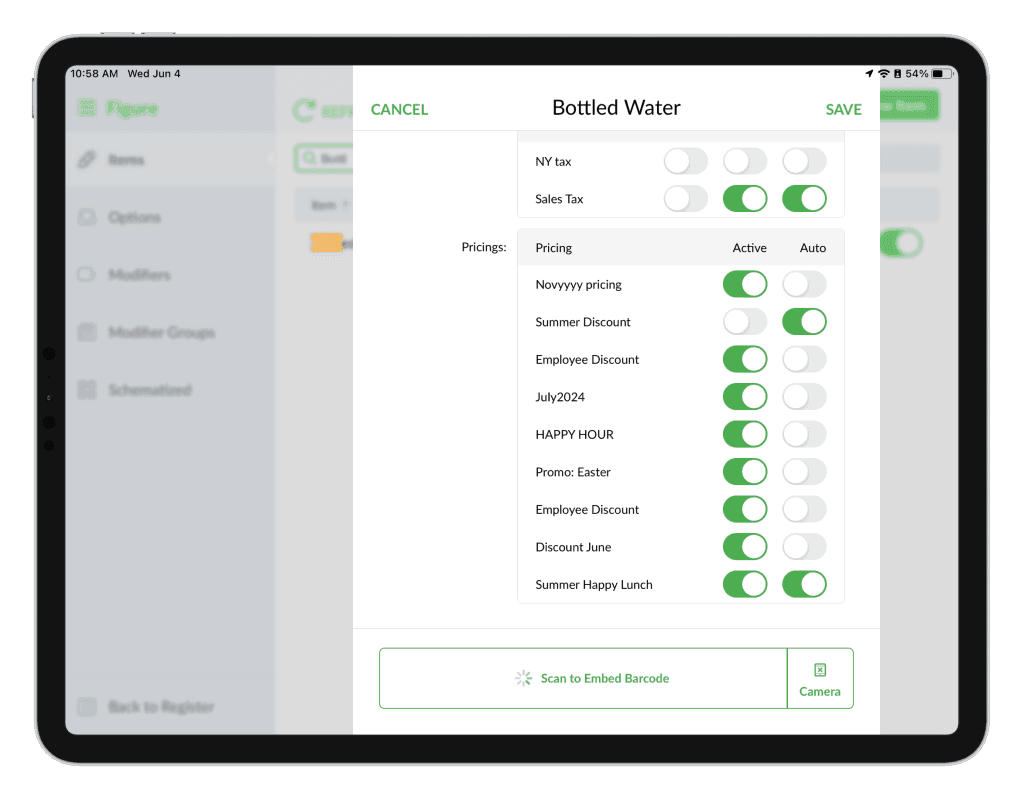
[3] Scan the item's barcode by using the barcode scanner (or the iPad's camera – to trigger the camera, scroll down in the item detail and press the camera button). You will see that the barcode is Embedded.
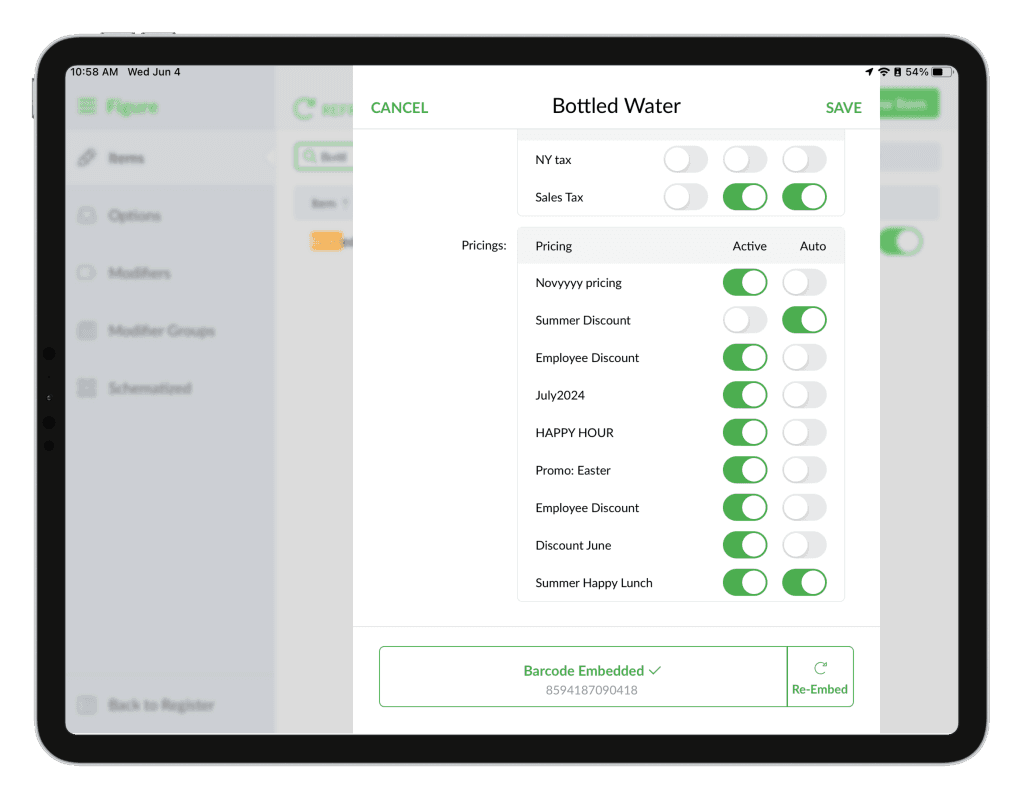
[4] Press SAVE
Add items to the order by scanning their barcodes
To add items to an order, simply open a new order in the POS and scan the item’s barcode. The item will be added automatically. Make sure the barcode scanner is turned on and that the barcode is already assigned to an item.
Other useful configurations
No Sleep Mode: Scan the code below to restrict the scanner getting into the sleep mode (the scanner will always stay ON)

Continue Scan: Scan the code below to enter 'Continue Scan' mode – no trigger is required to keep scanning.

Full official documentation for teemi barcode scanners:
See the full documentation for the Teemi devices for more tips and modes here: https://www.teemistore.com/pages/user-manual