Enable Cash Payments for POS
You can enable cash payments directly from your POS or in Figure Manage.
From POS:
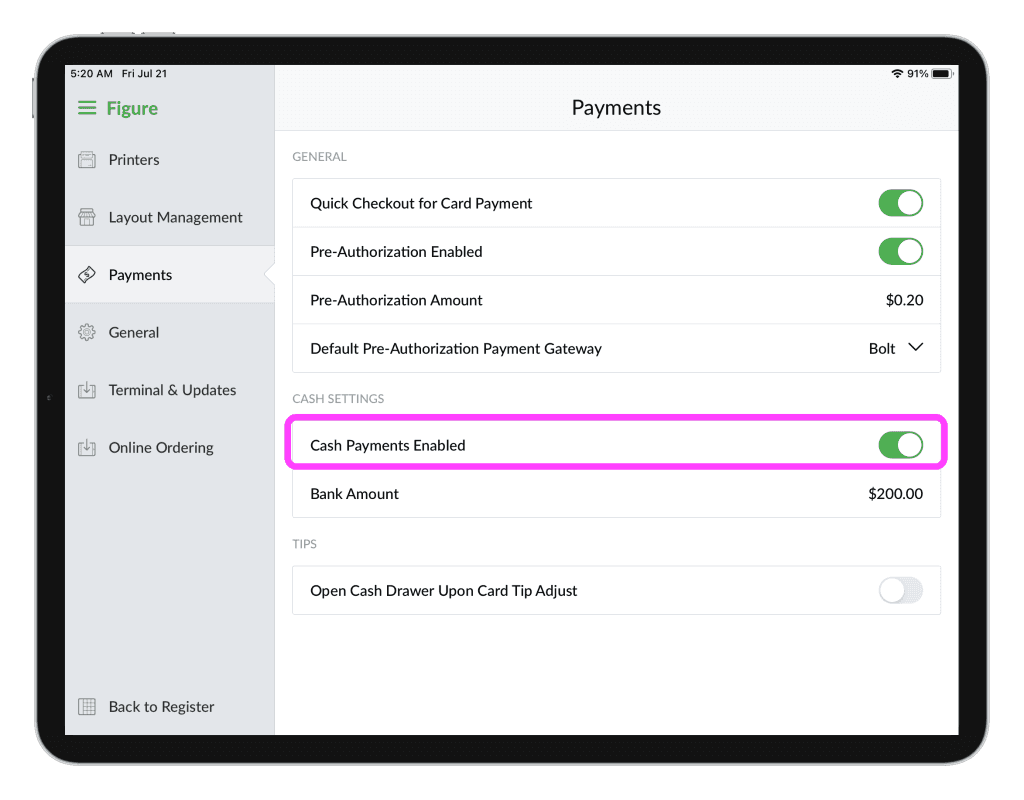
[1] Go to POS > Menu (top left corner) > Settings > Payments
[2] Enable the 'Cash Payments Enabled'
From Figure Manage:
[1] Go to Figure Manage > Settings > Payments > Cash Payments
[2] Select a terminal you want to enable cash payments for
[3] Enable the 'Enable Cash Payments'
[4] Hit Apply Settings
Cash Register Balance
Set the default Cash Register balance
You can set the Cash Register Balance directly from your POS or in Figure Manage.
From POS:
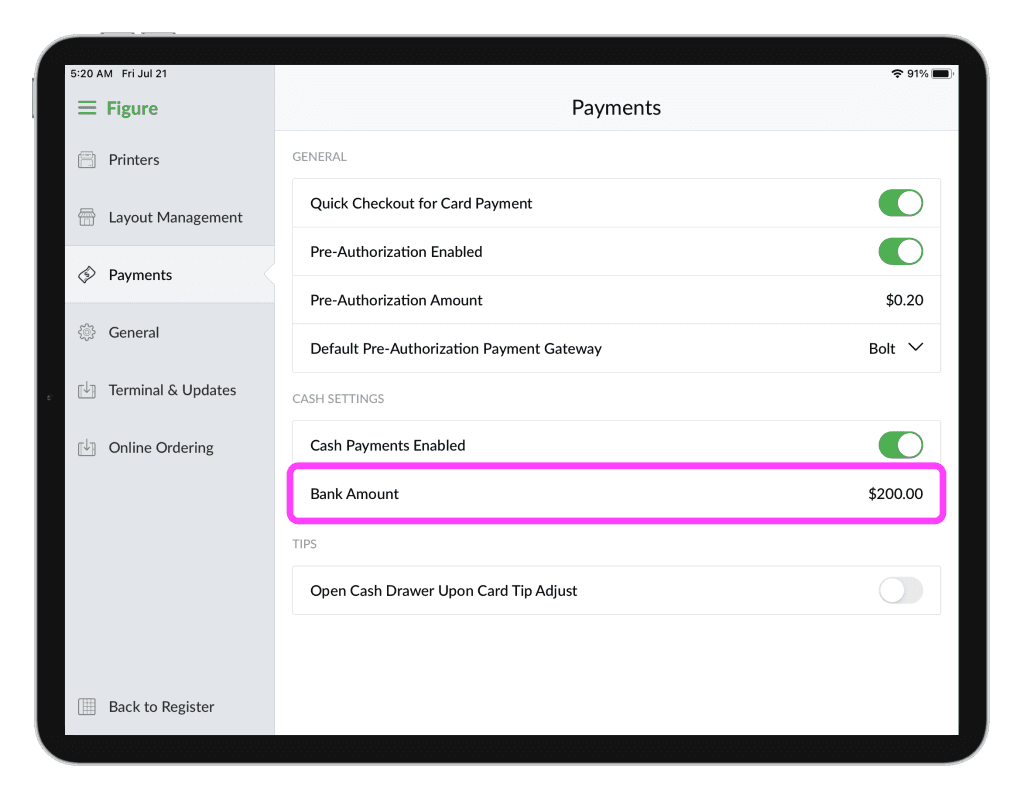
[1] Go to POS > Menu (top left corner) > Settings > Payments
[2] Set the Bank Amount to the desired default balance
From Figure Manage:
[1] Go to Figure Manage > Settings > Payment > Cash Payment
[2] Select a terminal you want to set the balance for
[3] Set the 'Default Cash Register Balance'
[4] Hit Apply Settings
How to check the current Cash Register balance
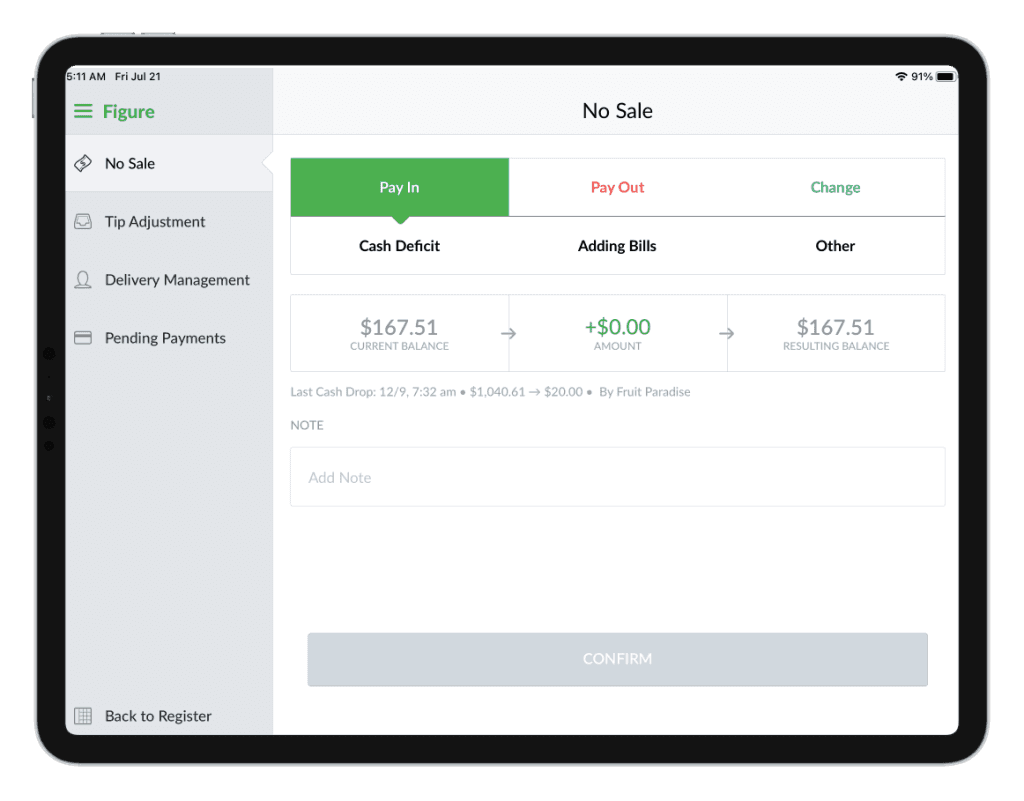
Go to POS > Menu (top left corner) > Operations > No Sale
There, you can see the current balance.
No Sale transactions
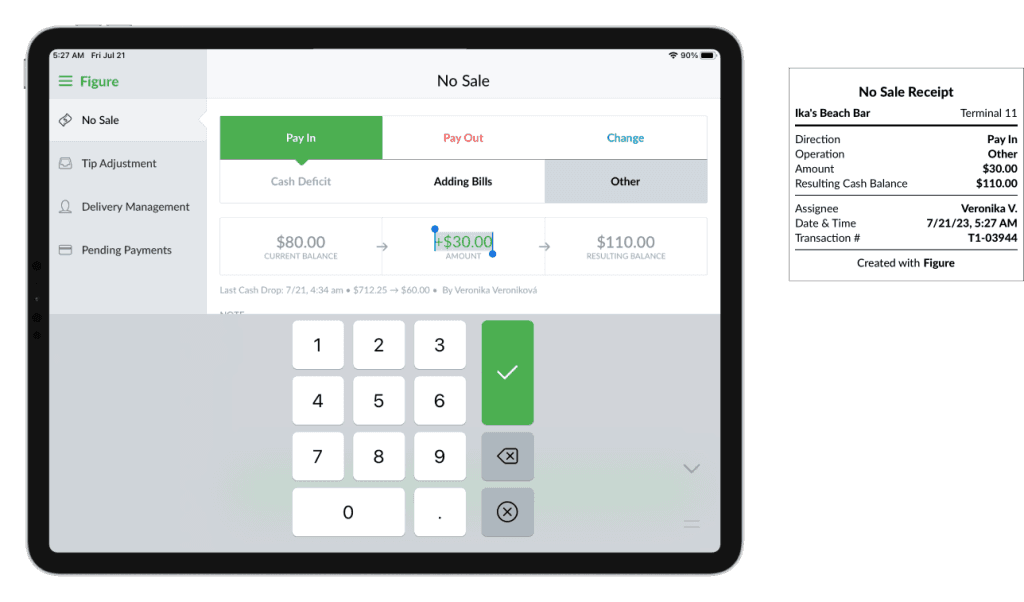
See below the specific options described. After any action is confirmed, a receipt gets printed as shown below.
Pay In
[1] Go to POS > Menu (top left corner) > Operations > No Sale
[1] Tap Pay In
[2] Choose the Pay In type:
Cash Deficit
Adding Bills
Other
[4] Enter the amount and hit CONFIRM
The paid in amount will be added to the balance and a No Sale receipt will be printed.
Pay Out
[1] Go to POS > Menu (top left corner) > Operations > No Sale
[2] Tap Pay Out
[3] Choose the Pay Out type
Cash Drop = the cash balance will reset to default
Petty Cash
Tips
Other
[4] Enter the amount (except the Cash Drop which will automatically calculate the amount in order to reset the cash balance to default)
[5] Hit CONFIRM
The paid out amount will be deducted from the balance and a No Sale receipt will be printed.
Change
[1] Go to POS > Menu (top left corner) > Operations > No Sale
[2] Tap Change
[3] Choose the Change type
Denomination Change
Other
[4] Hit CONFIRM
The balance will not change and a No Sale receipt will be printed.
Cash Reports
Cash reports in POS – on screen & printed
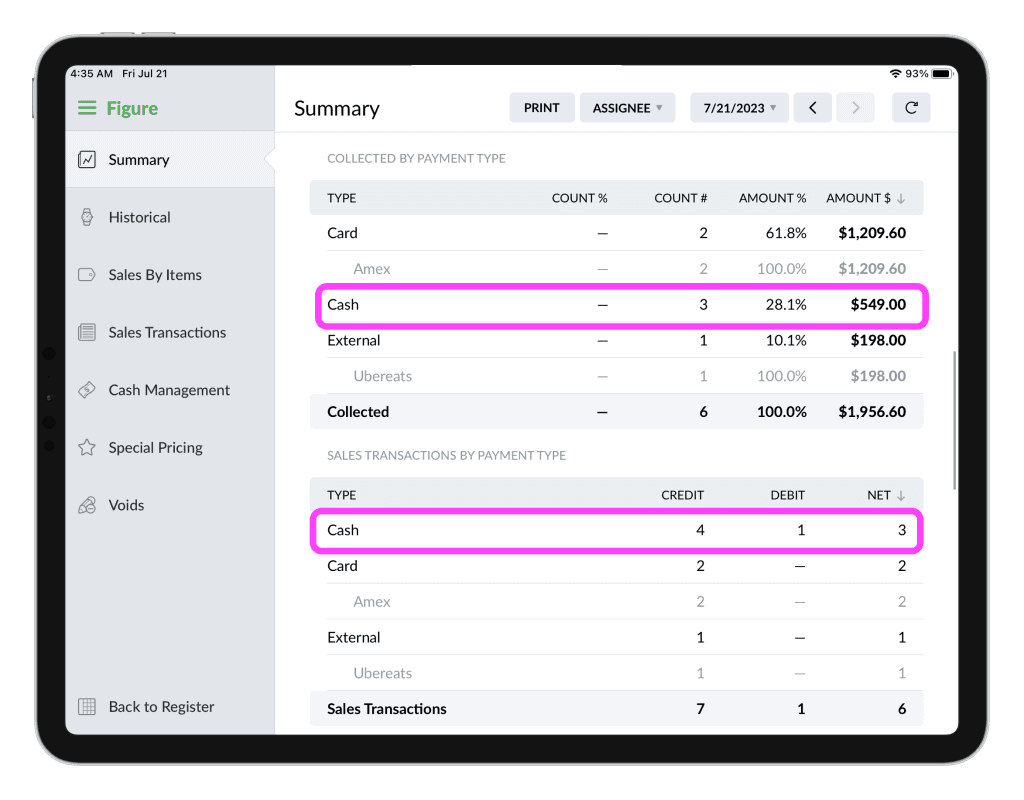
Go to POS > Reports. Then, cash transactions are shown in Summary report and in Cash Management report.
Summary report
In Summary report, you can see the totals of cash transactions.
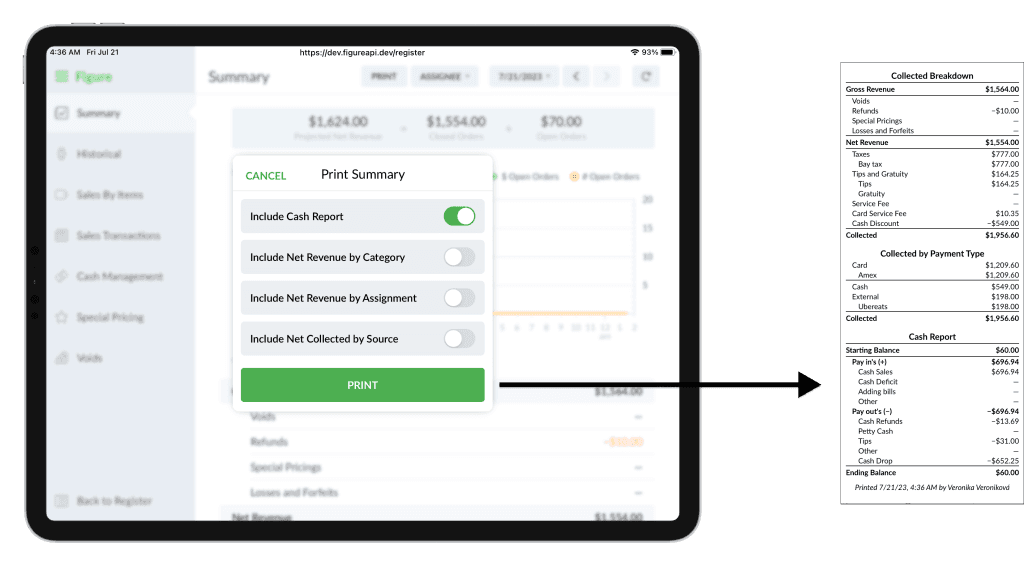
From Summary report, you can also print a Daily Summary Report by tapping the PRINT button at the top.
After tapping the PRINT button, choose what reports you would like to print – enable the Include Cash Report to see the detailed Cash Report on the print.
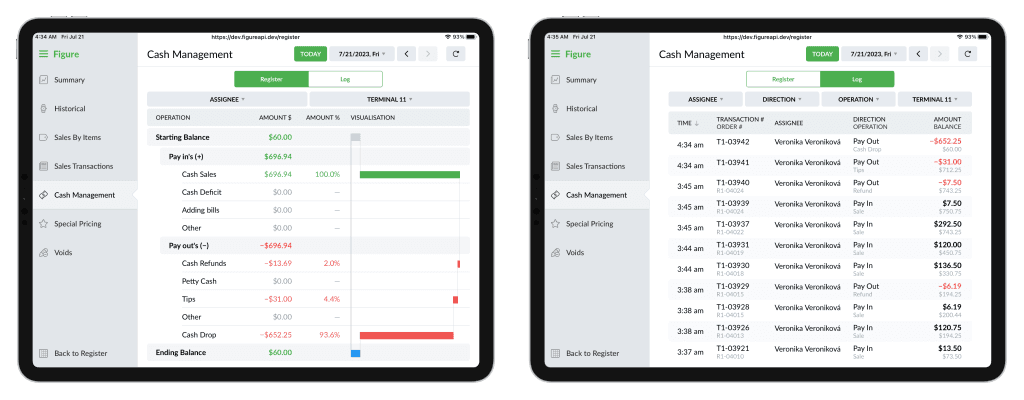
Cash Management report
In Cash Management report, you can see the detailed information about cash payments - such as the balance or log of actions. Both are displayed per terminal and and can be displayed also for a specific assignee which you can select at the top.
Cash reports in Figure Manage (on screen & CSV)
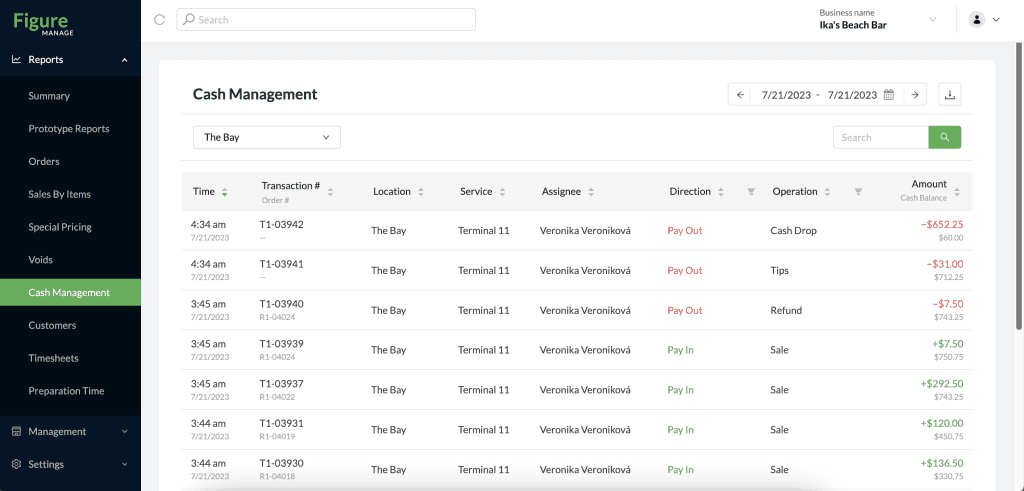
Go to Figure Manage > Reports. Then, cash transactions are shown in Summary report and in Cash Management report.
Summary report
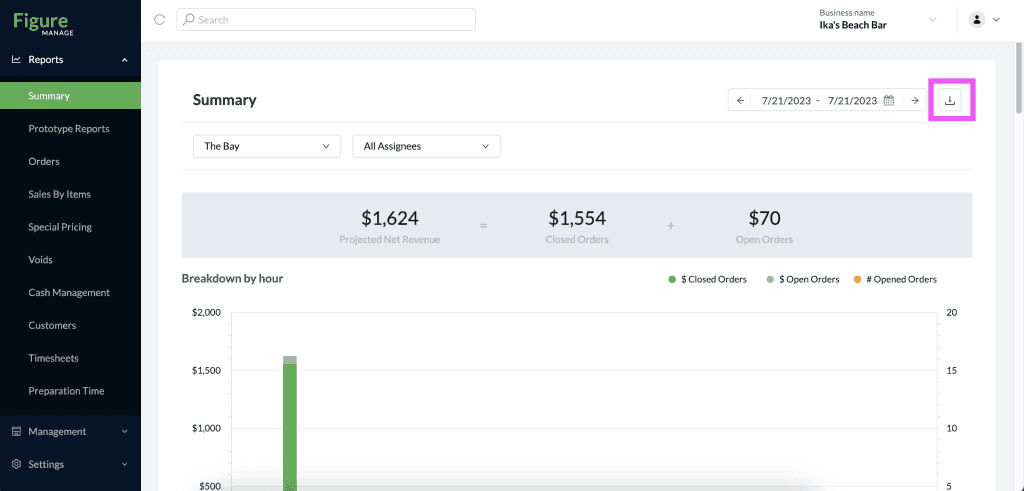
In Summary report, you can see the totals of cash transactions.
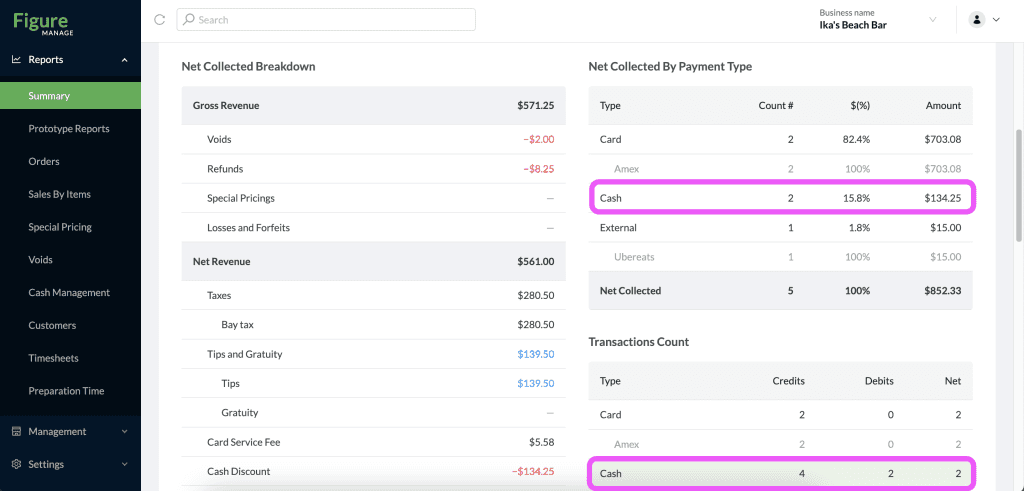
From Summary report, you can also download a CSV with a detailed report by tapping the download button:
Cash Management report
In Cash Management report, you can see the log of cash actions.
Process a cash transaction
[1] Create an order as usual
[2] Hit Charge
[3] Choose an amount that the customer gave you in cash or insert a custom amount
If you have a Cash Discount enabled, you can keep it active for the order or disable it by tapping on the cash discount text.