Introduction
After you have the printer assigned (see how), set items that should be printed from this terminal on the selected printer.
All configuration can be found in POS > Main menu (top left corner) > Settings > Printers.
Please note that items need to be configured separately for each printer and each terminal. If you use the same setup across multiple terminals, you can take advantage of our Copy Printer Behavior feature.
You can configure the items that will be printed on each kitchen printer based on
assignment
items and options
modifiers
Then, for better visibility, you can also add ***Other Items*** section on the kitchen receipt to display items that are
Routed to Other Kitchen Printers – items configured for other kitchen printed
Non-Routed Items – items not configured for any kitchen printer
Assignment-based Printing
Choose which order assignment (e.g., To Go, Delivery, etc.) should trigger items to be printed on this kitchen printer. All items in orders with the selected assignment will be printed on the respective printer / KDS.
[1] Tap All Assignments
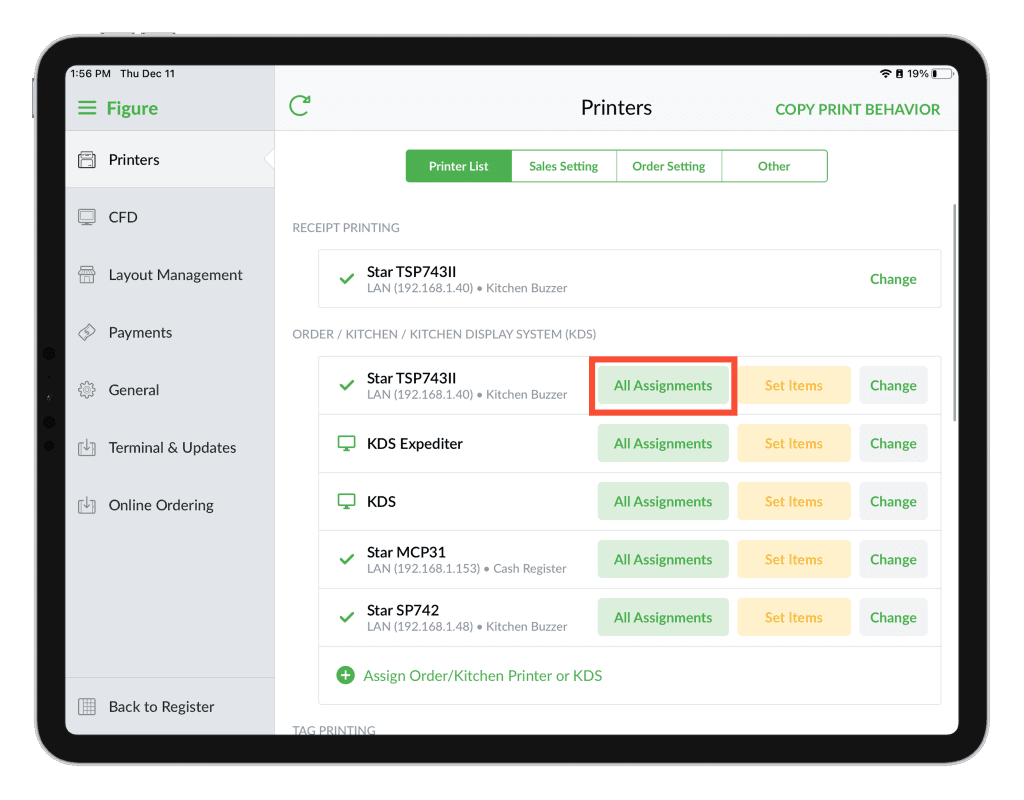
[2] Select assignments

Item and Option-based Printing
[1] Tap Set Items
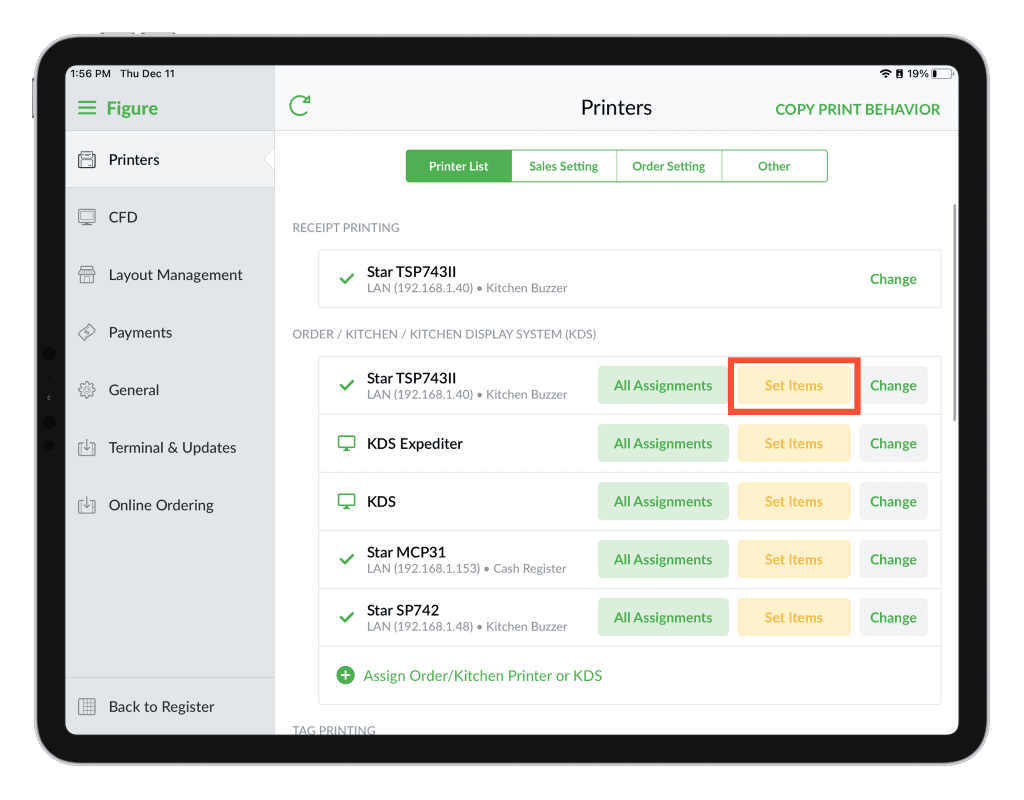
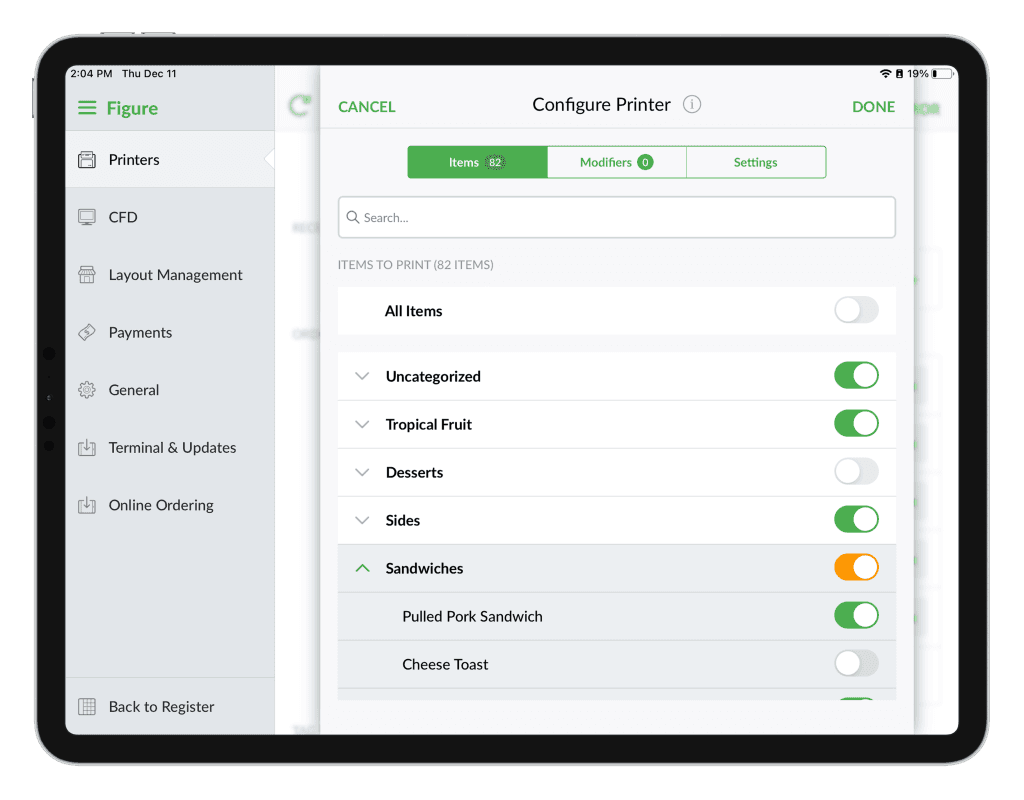
[2] You can select all items or only specific ones for printing – either enable whole folders or choose individual entries.
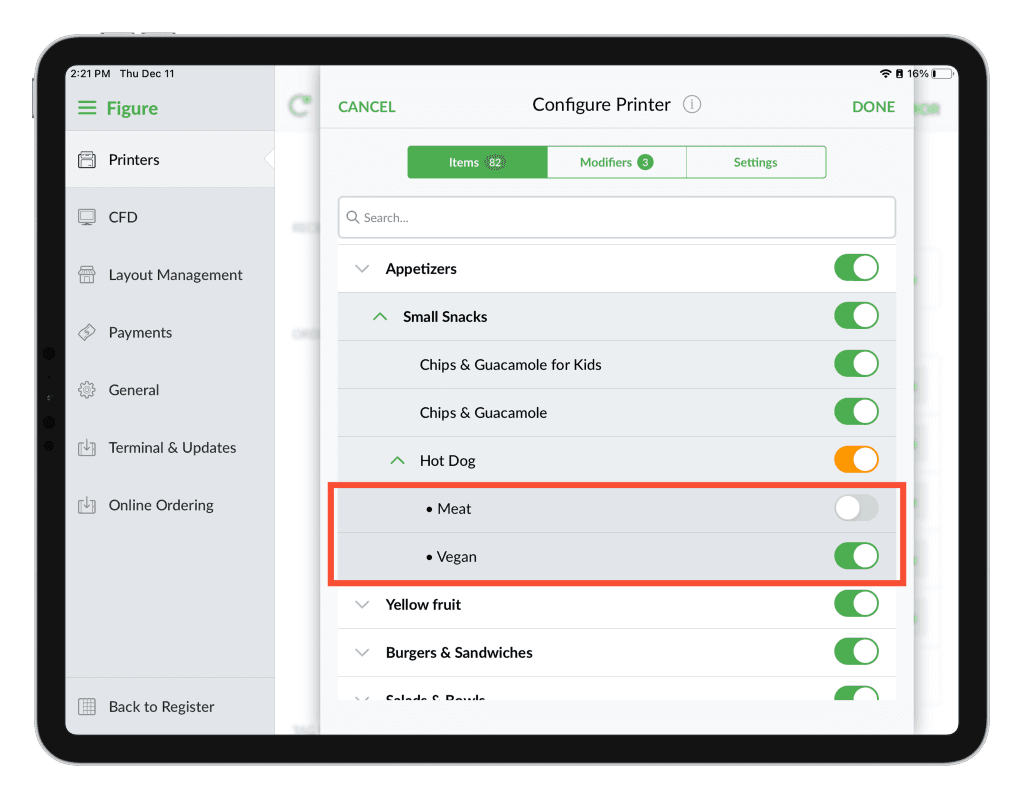
[3] For items that have options, you can select only some of the options to be printed
Modifier-based Printing
You can fine-tune which modifiers and their respective items print at each kitchen printer or KDS.
[1] Tap Set Items
[2] Switch to Modifiers tab
[3] Select modifiers that should be printed on that respective printer.
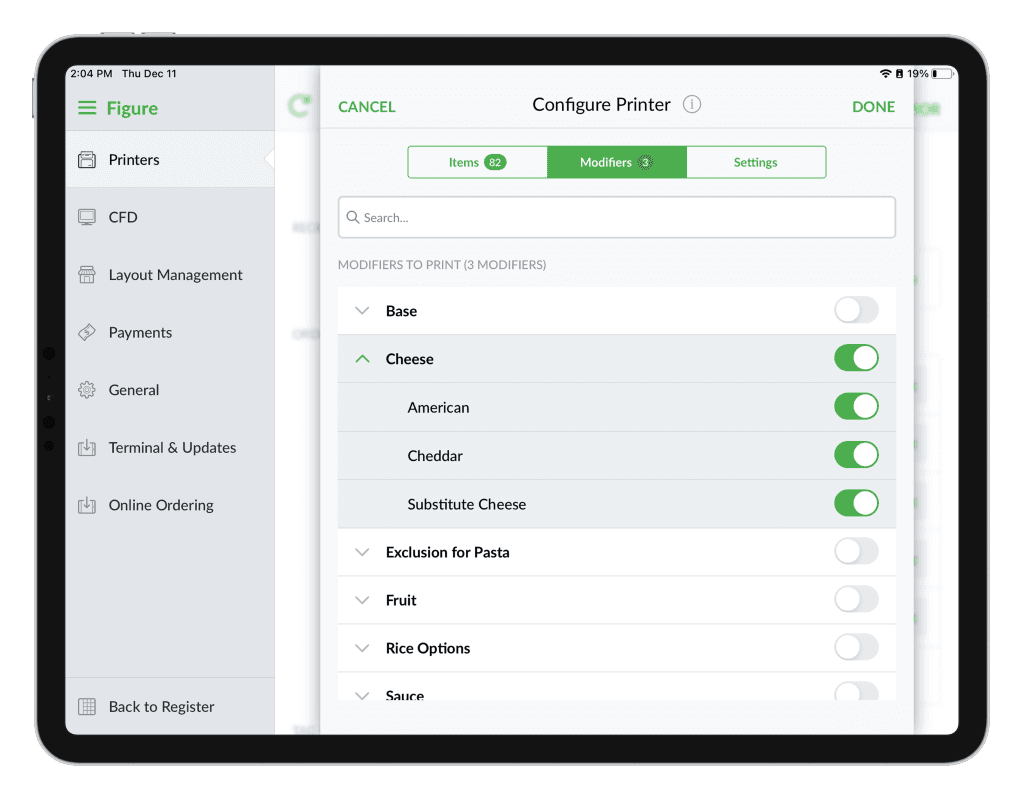
Items with the selected modifiers will be printed on the respective kitchen printer.
Print *** Other Items ***
Note: this is applicable only for kitchen printers – it is not applicable for Kitchen Displays.
You can configure each kitchen printer to include a special section on the receipt that lists additional items, even if those items are normally routed to a different kitchen station—or not configured to be printed at any kitchen printer at all.
Sometimes, when items are sent to one station, the chef needs visibility into all other items within the same order, including those not assigned to any kitchen printer, to coordinate preparation effectively. With these settings, each station can see all relevant items, promoting better alignment and a smoother workflow.
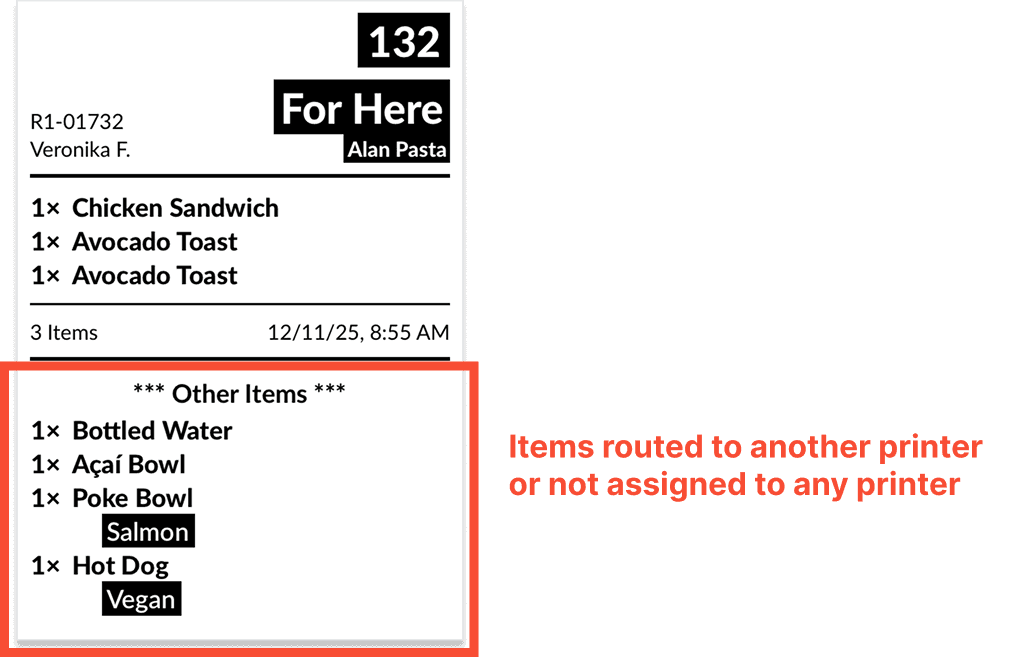
There is a separate setting for each option—you can enable printing of non-routed items, printing of items routed to other kitchen printers, or both.
Print Items Routed to Other Kitchen Printers
This setting allows a kitchen printer to include items on its receipt that are normally sent to other kitchen stations, helping chefs see the full order and better coordinate preparation.
How to enable this feature:
[1] Go to Figure POS > Main menu (top left corner) > Settings > Printer
[2] This setting must be configured separately for each printer. In the row corresponding to the printer you want to enable it for, click Set Items if no items have been set yet, or click the ** Items button (e.g., “84 Items”) to adjust the list of items that should be printed on that printer.
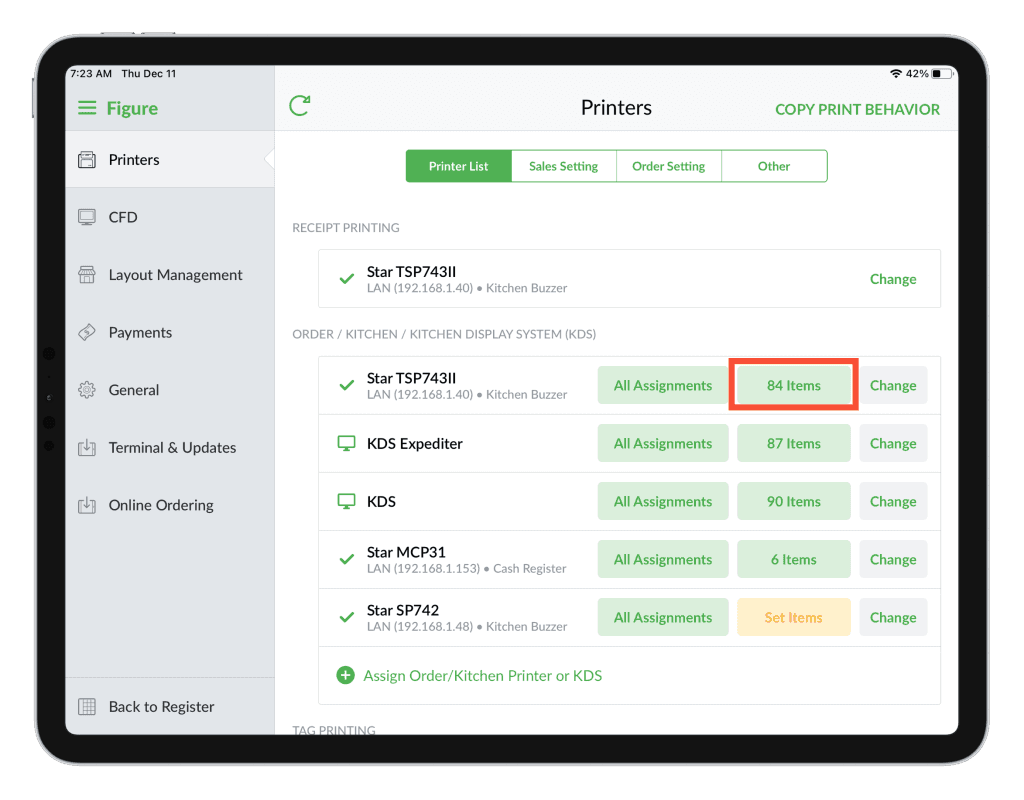
[3] In the Configure Printer go to Settings
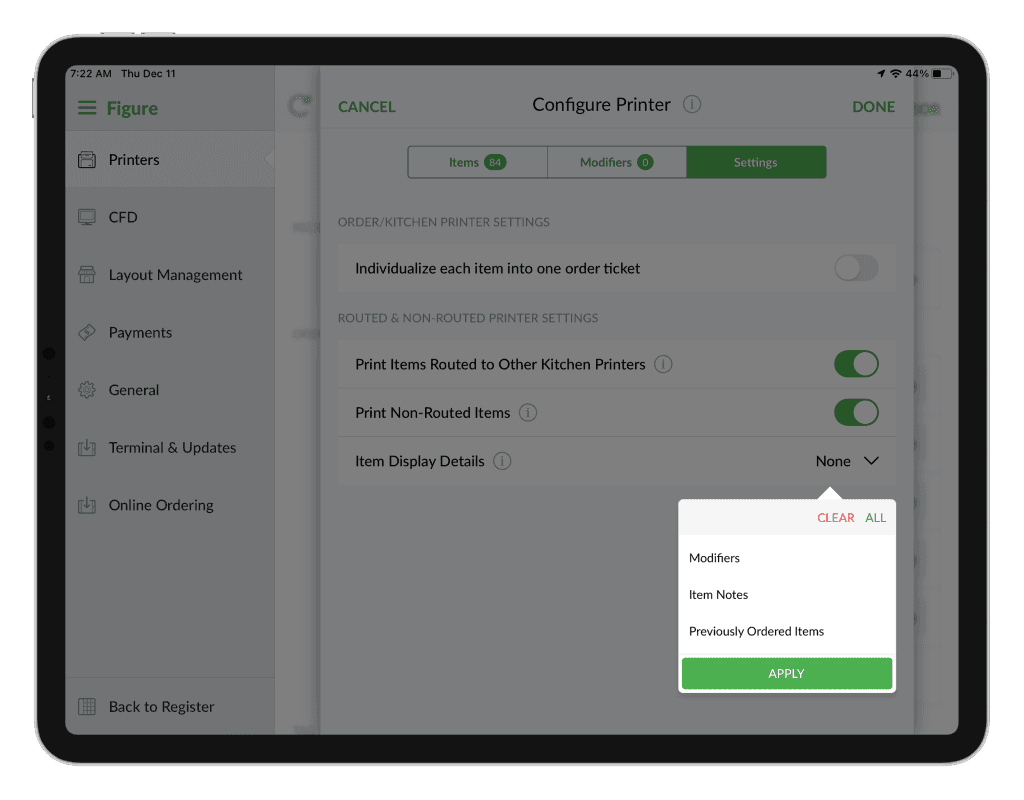
[4] Enable the 'Print Items Routed to Other Kitchen Printers'

[5] Choose which details are displayed in the special section of the receipt for these extra items. Options include:
None – No detailed information will be shown in the special section.
Modifiers – Extra items will include their modifiers.
Item Notes – Extra items will display any associated item notes.
Previously Ordered Note – Items will show a note indicating they were previously ordered.
Print Non-Routed Items
This setting enables a kitchen printer to print items that are part of an order but not assigned to any specific kitchen station, giving chefs visibility of all unassigned / unordered items for better preparation.
How to enable this feature:
[1] Go to Figure POS > Main menu (top left corner) > Settings > Printer
[2] This setting must be configured separately for each printer. In the row corresponding to the printer you want to enable it for, click Set Items if no items have been set yet, or click the ** Items button (e.g., “84 Items”) to adjust the list of items that should be printed on that printer.
[3] In the Configure Printer go to Settings
[4] Enable the 'Print Non-Routed Items'
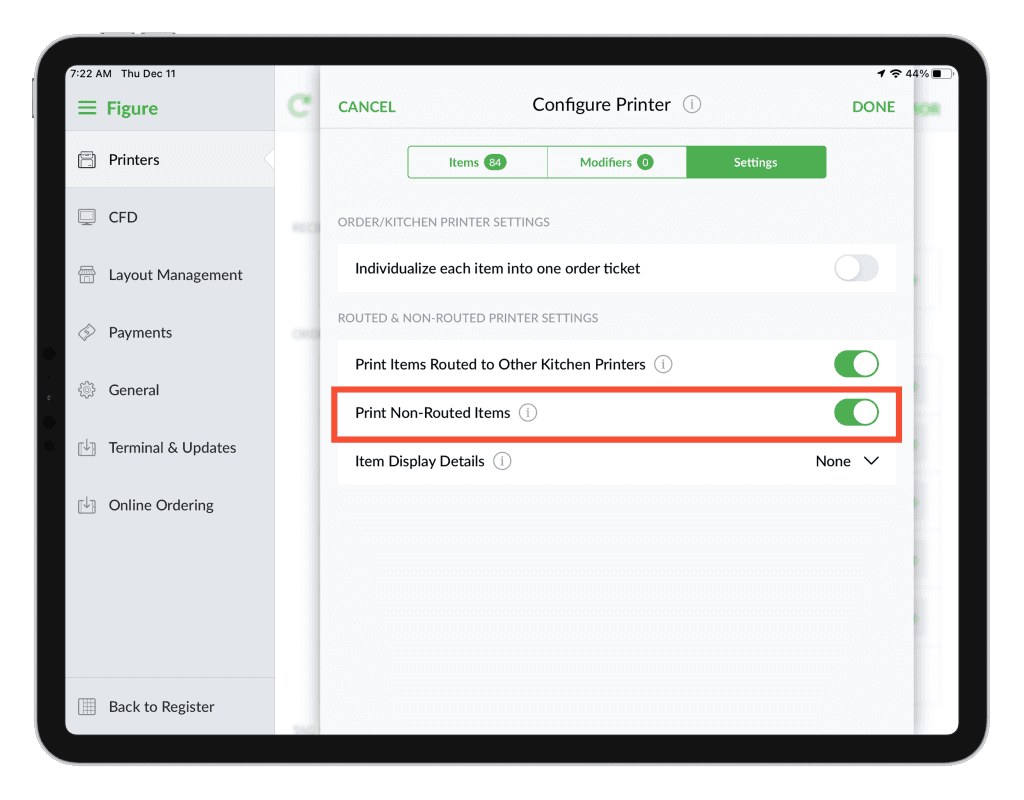
[5] Choose which details are displayed in the special section of the receipt for these extra items. Options include:
None – No detailed information will be shown in the special section.
Modifiers – Extra items will include their modifiers.
Item Notes – Extra items will display any associated item notes.
Previously Ordered Note – Items will show a note indicating they were previously ordered.