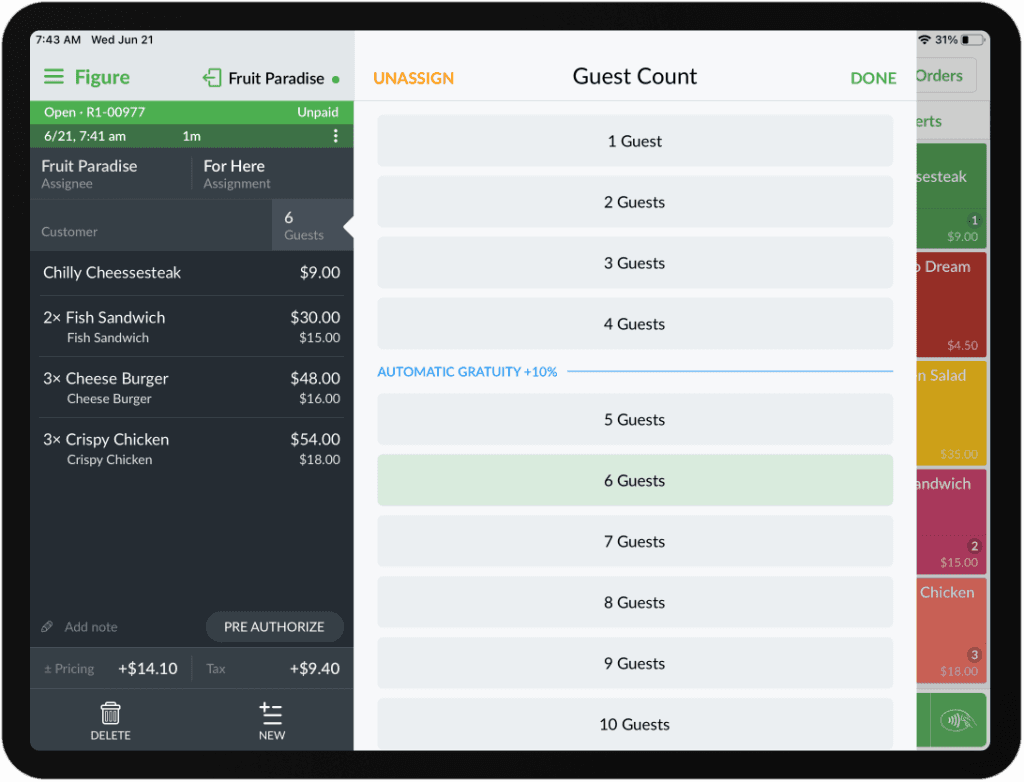
Gratuity can be automatically applied based on the number of guests.
Set Up Gratuity
To activate auto-gratuity, it needs to be properly set up in Figure Manage. Along with that, the Guest Count has to be enabled.
Gratuity Settings
[1] Go to Figure Manage > Settings > General > Gratuity Settings
[2] Select a terminal for which you want to set the gratuity
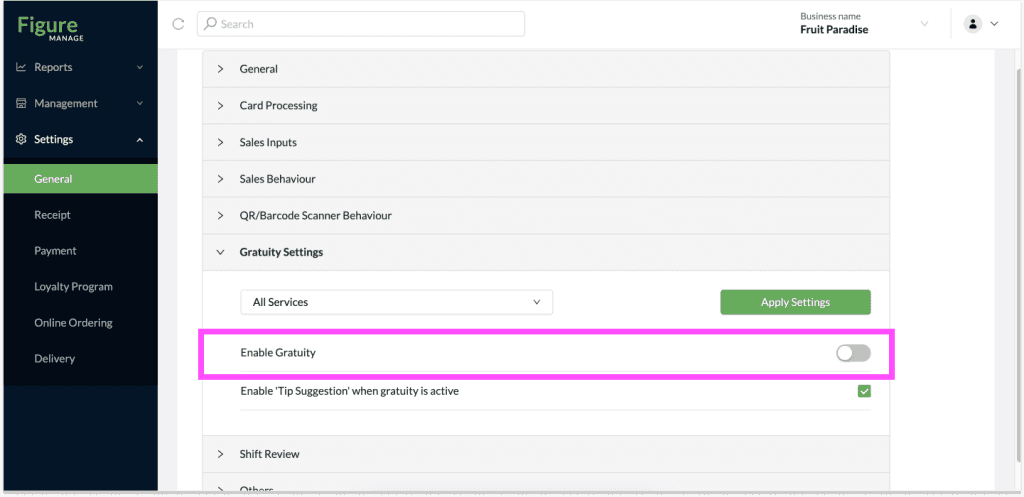
[3] Enable Gratuity
[4] Configure gratuity:
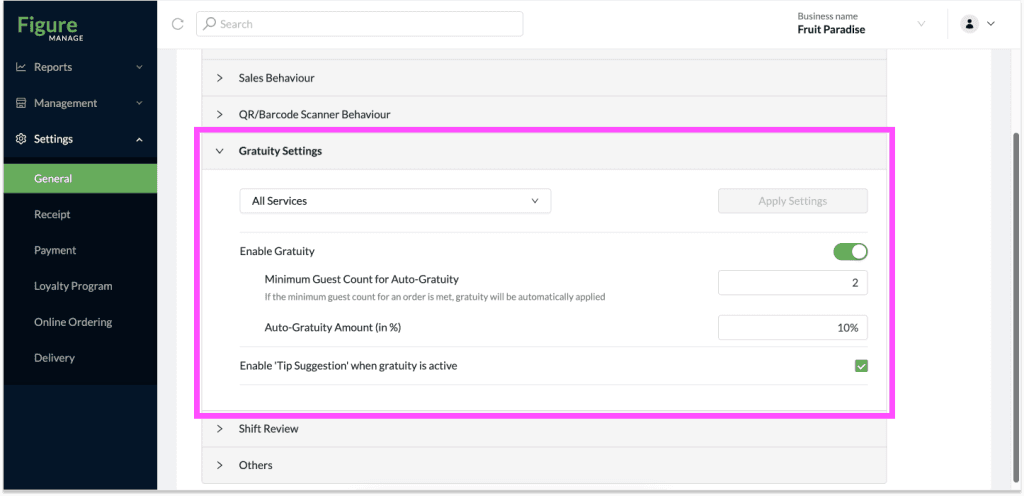
Minimum Guest count for Auto-Gratuity = enter a number of minimum guest count for which the gratuity will be automatically applied
Auto-Gratuity Amount (in %) = set an percentage of the total order amount that will be added as gratuity
Enable 'Tip Suggestion when gratuity is active' = if enabled, the tip suggestion will be still printed on the sales receipt – customers can add an additional tip by their choice
[4] Press Apply Settings
Guest Count
[5] Go to Figure Manage > Settings > Sales Behaviour
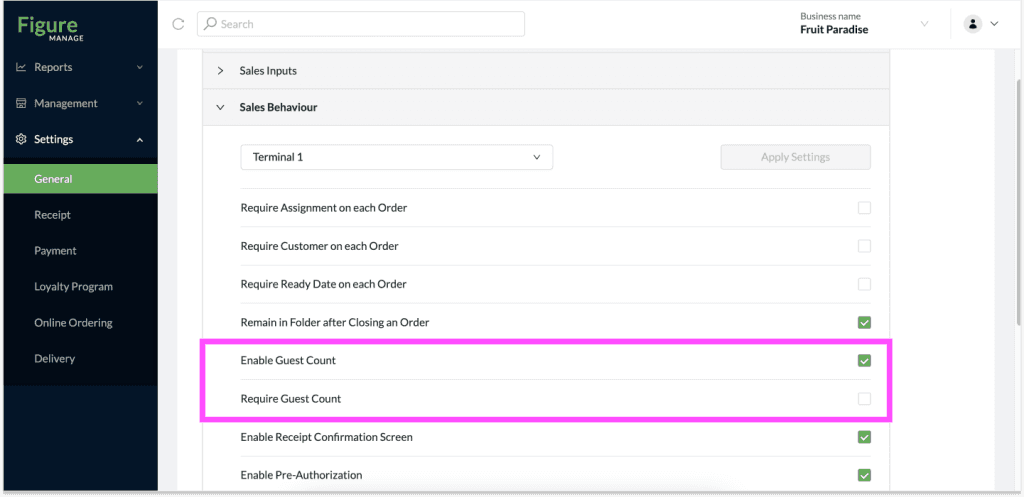
[6] Select the terminal you want to enable the Guest Count for
[7] Enable the Enable Guest Count + choose whether the Guest Count should be required with every order, if so, enable the Require Guest Count as well
Custom Gratuity
Enable employees to apply custom gratuity amount to an order by adjusting the automatically added gratuity amount or manually adding gratuity to an order.
Note: to enable Custom Gratuity, the Gratuity feature has to be enabled as described above (in Figure Manage > Settings > General > Gratuity Settings).
Grant permission for Custom Gratuity
Only employees with this permission will be able to apply custom gratuity. Otherwise a manager PIN will be required to confirm the action.
[1] Go to Figure Manage > Management > Employees > Roles & Access
[2] Open the Role for which you would like to enable the Custom Gratuity
[3] Find the Special Pricing permission section – if the Special Pricing section is not enabled, enable it by switching the toggle button to green.

[4] Enable the Ability to apply Custom Gratuity (and enable/disable other permissions in the Special Pricing section as needed)

[5] Click Save
How to apply Custom Gratuity
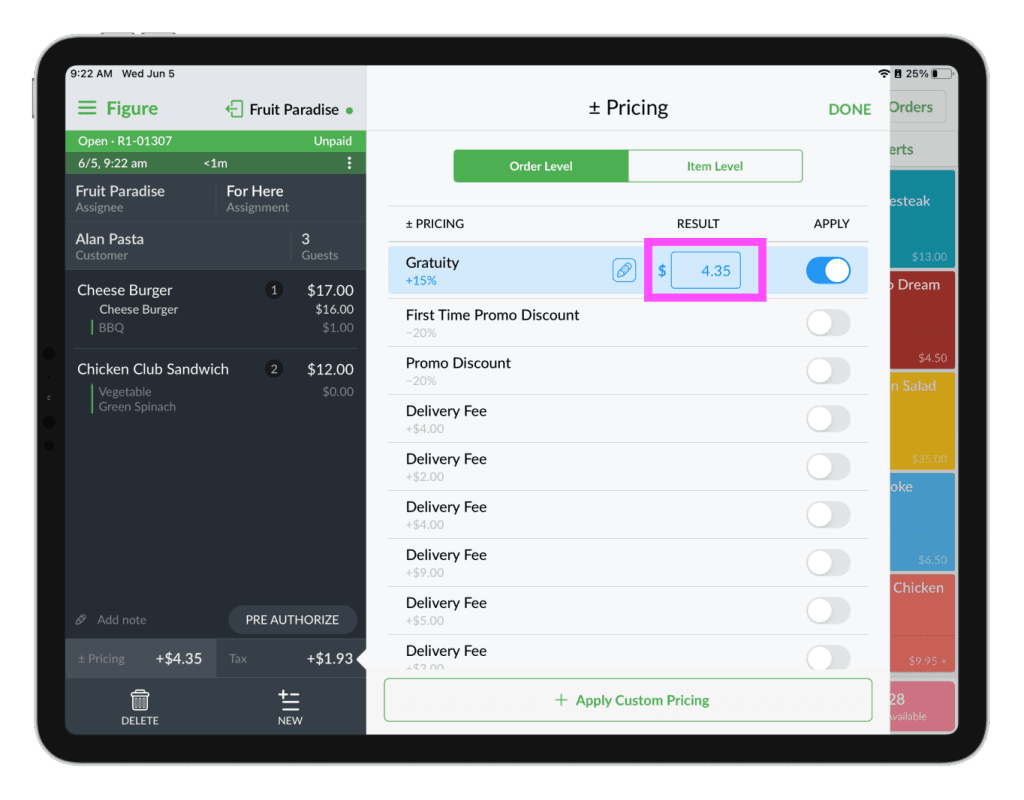
[1] Open an order for which you would like to adjust or add a gratuity
[2] Click the Pricing button at the bottom left corner
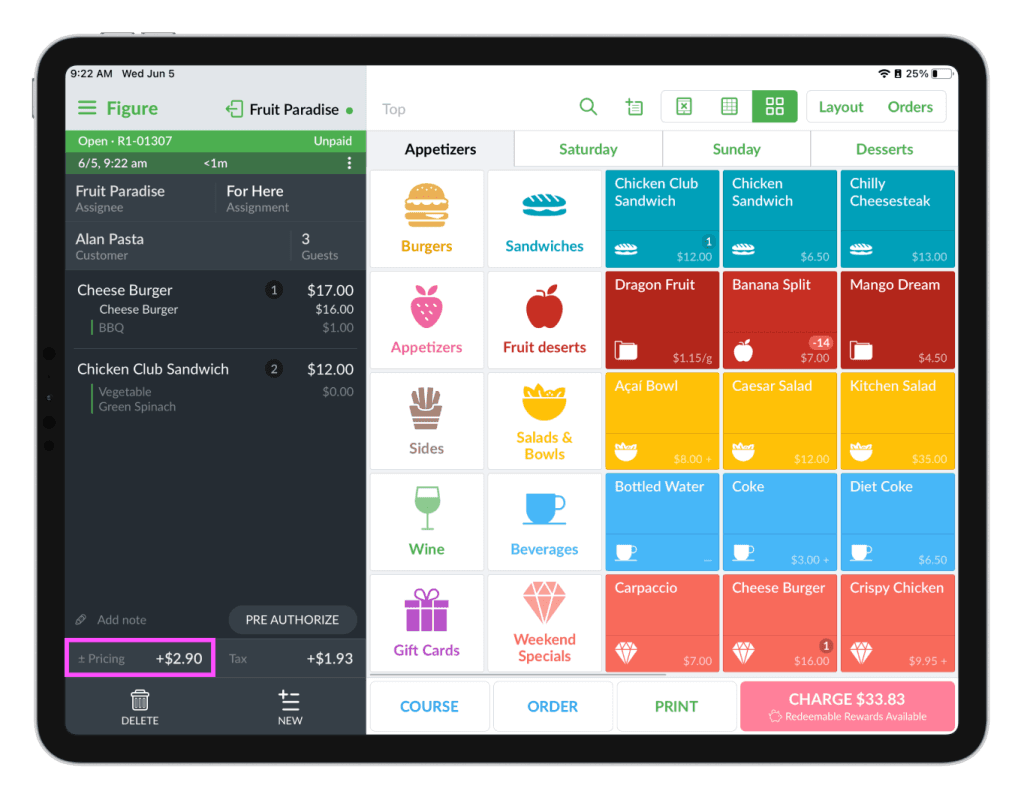
[3] Tap on the Gratuity line
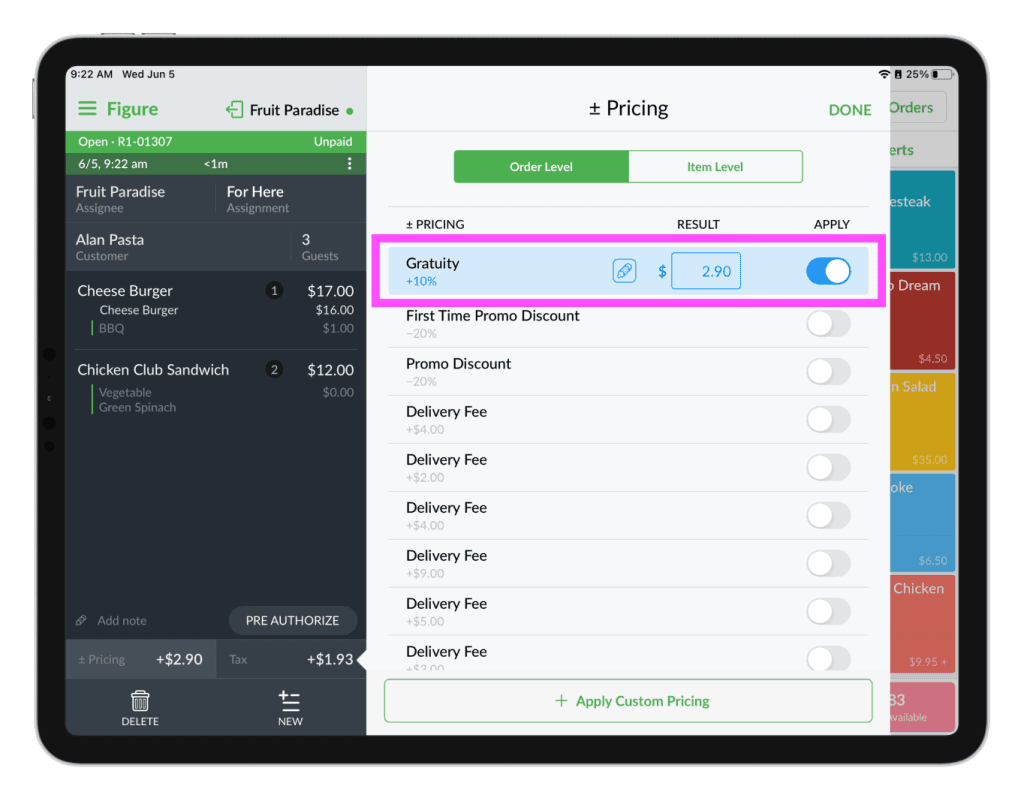
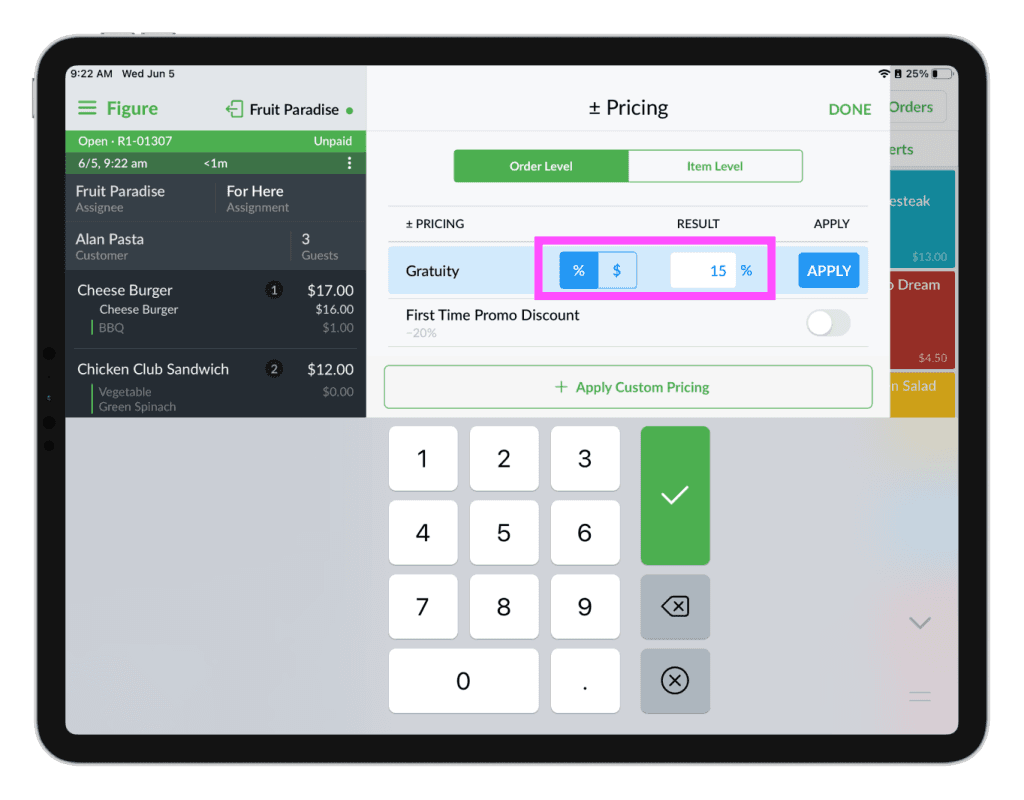
[4] Select percentage (%) or fixed dollar ($) amount and add enter the amount
[5] Press APPLY
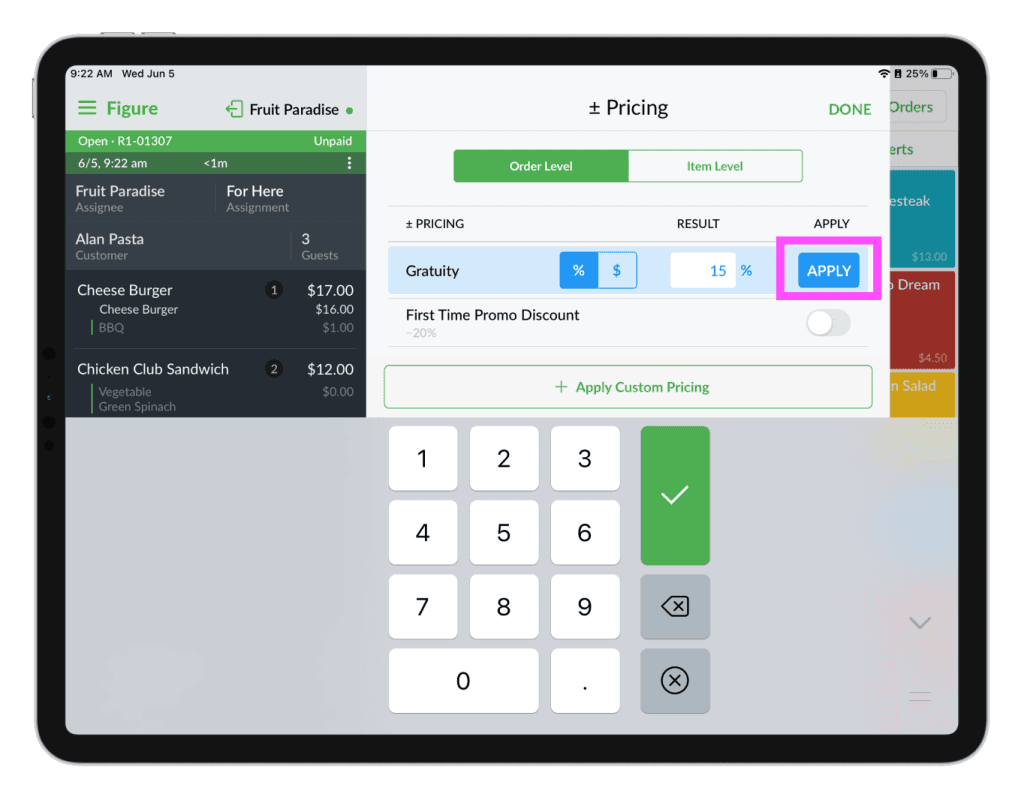
If the percentage was adjusted, the gratuity dollar amount will be recalculated.
Gratuity in Reports
You can see the applied gratuity in reports in Figure POS and in Figure Manage.
Gratuity in POS reports
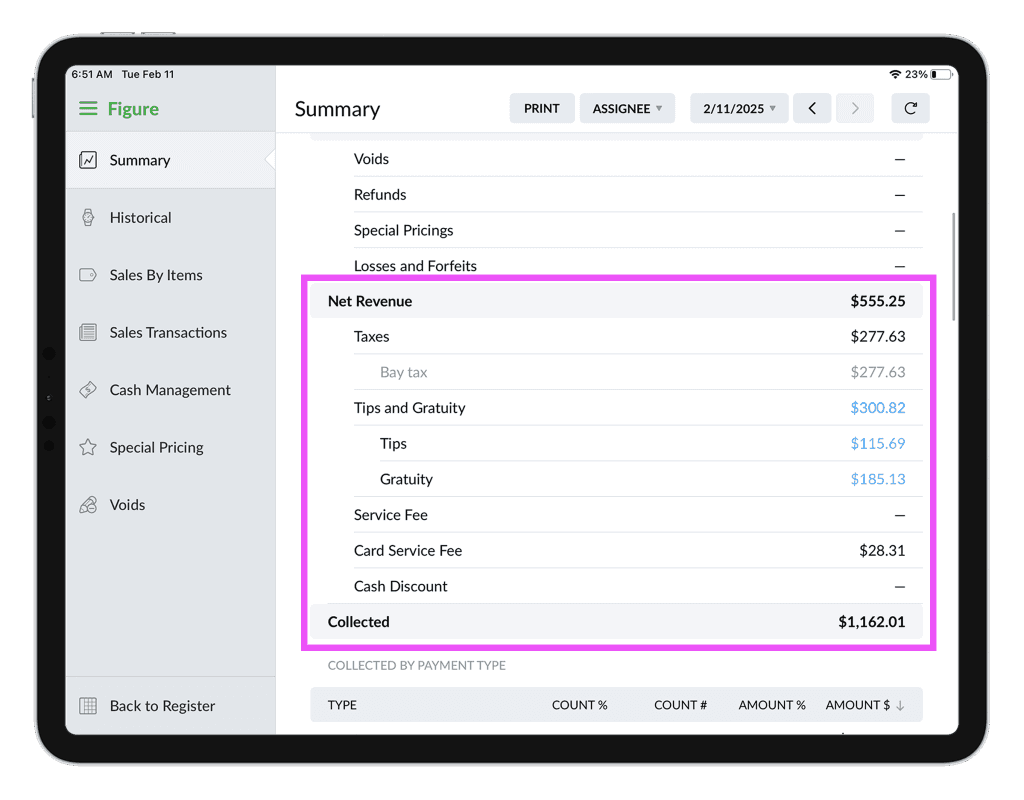
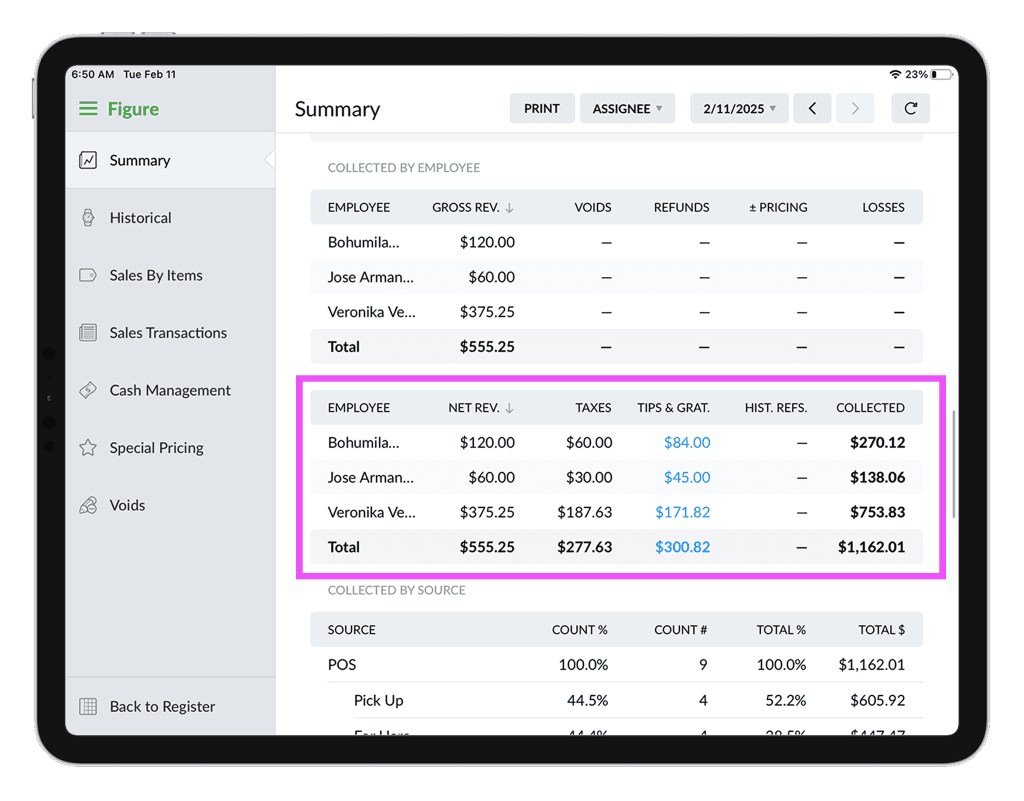
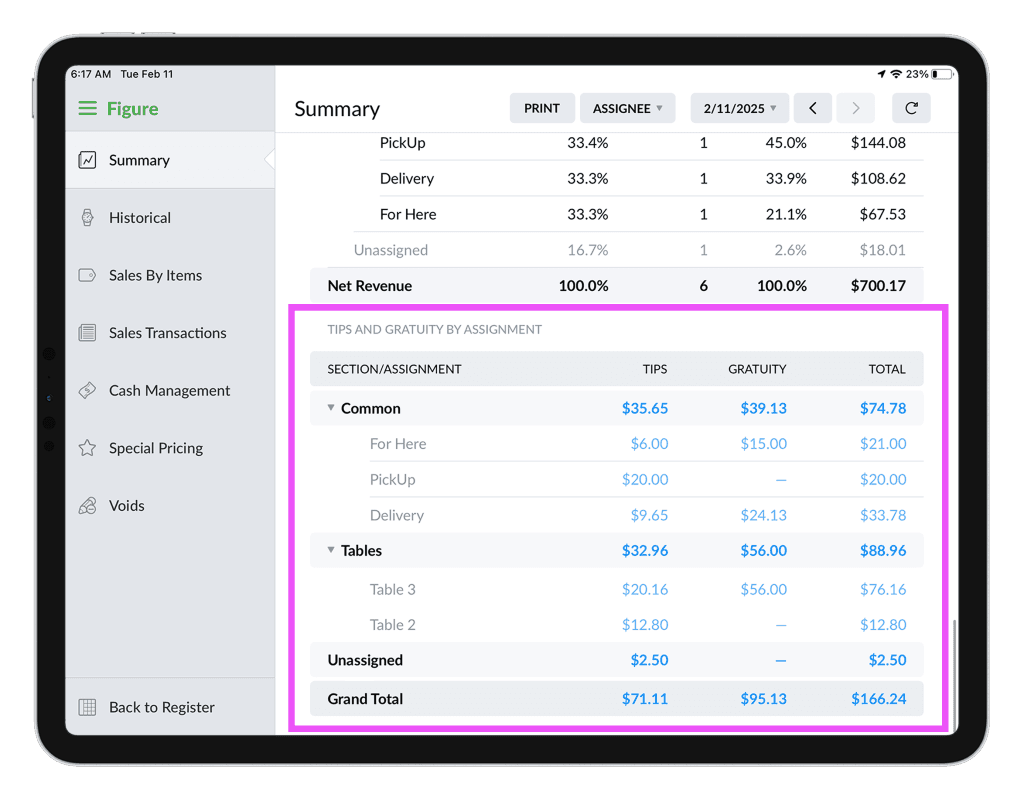
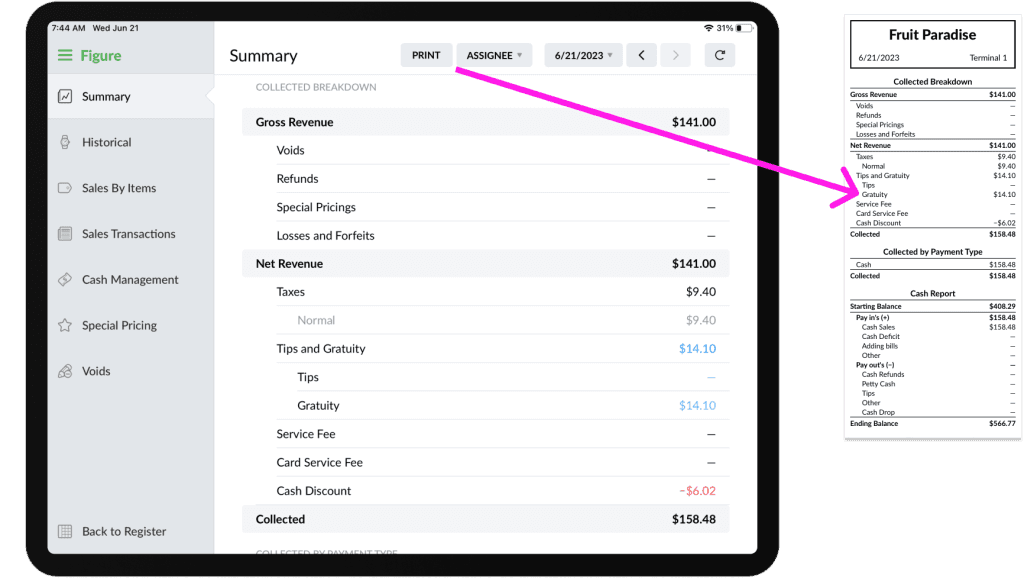
You can see Gratuity in reports by going to POS > Menu > Reports. There, you can see it as a row in COLLECTED BREAKDOWN section and as well in the breakdown for each employee in COLLECTED BY EMPLOYEE or TIPS AND GRATUITY BY ASSIGNMENT (NEW).
Gratuity is as well in the report printed from POS.
COLLECTED BREAKDOWN – Net Revenue section:
COLLECTED BY EMPLOYEE:
TIPS AND GRATUITY BY ASSIGNMENT
Printed report:
Gratuity in reports in Figure Manage
To see Gratuity in Reports in Figure Manage go to Figure Manage > Reports > Summary.
You can see the Gratuity listed in the Net Collected Breakdown and Net Collected Breakdown By Employee.
Net Collected Breakdown:
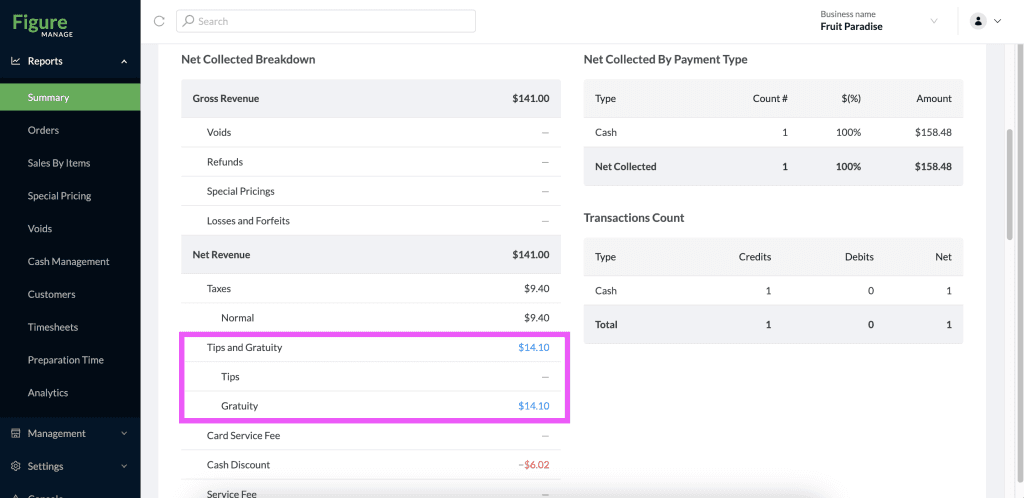
Net Collected Breakdown:
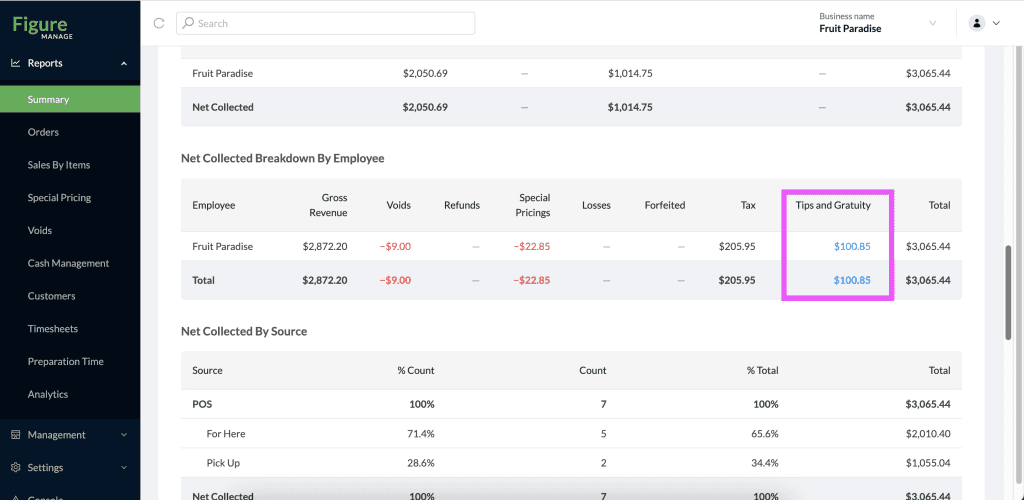
FAQ
Can I have a multiple gratuity options set at one time?
There can be only one gratuity set up at a time. If a gratuity is needed to be changed, you can do it by following the steps above.
Can I create another gratuity options as Special Pricing?
This is not recommended as the Gratuity created as a custom Special Pricing will not be reflected as Tips & Gratuity column in reports. It will be under Special Pricings instead.