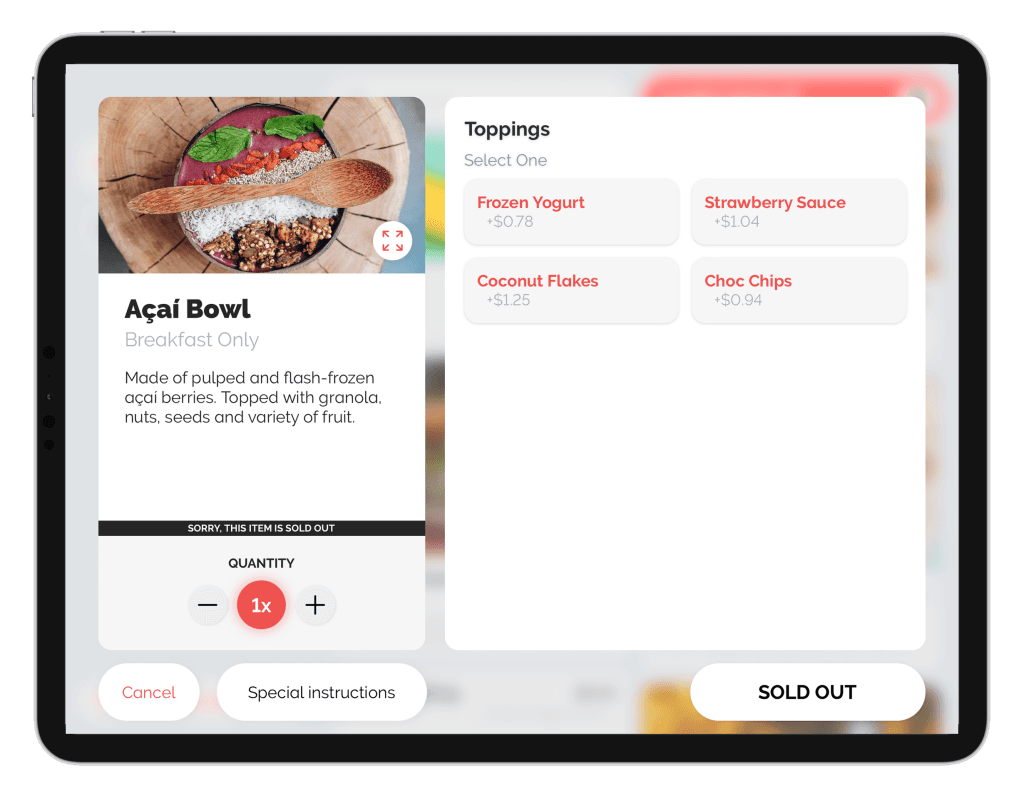
This feature helps you proactively manage your inventory, ensuring you're aware of low stock levels and can take timely action to avoid running out.
Introduction
You can easily keep a close eye on your inventory levels and receive a helpful heads-up when your stock is running low. Simply set your preferred low-stock threshold, and our system will monitor your supplies for you.
When an item's stock falls below this threshold, here's how it will be reflected across your sales channels:
Point of Sale (POS): While the POS will always allow you the flexibility to complete a sale, even if an item is out of stock, this low-stock indicator serves as a valuable reminder to replenish soon.
Make It Butter & Kiosk: These platforms will clearly display the remaining quantity of an item once it drops below your specified threshold. When an item is completely out of stock, it will be clearly marked as "Sold Out" to your customers.
Inventory can be managed through both Figure Manage and POS.
Grant access to the Inventory
To enable your employees to view and manage Inventory agendas within Figure Manage and POS, you'll need to grant them the necessary access. Here's how to do it:
[1] go to Figure Manage > Management > Employees > Roles & Acces
[2] Select the Role you want to grant access to Inventory for
[3] Enable 'Inventory' access. For access within the POS system, also activate 'Operations' – this is where you'll find the Inventory agenda.
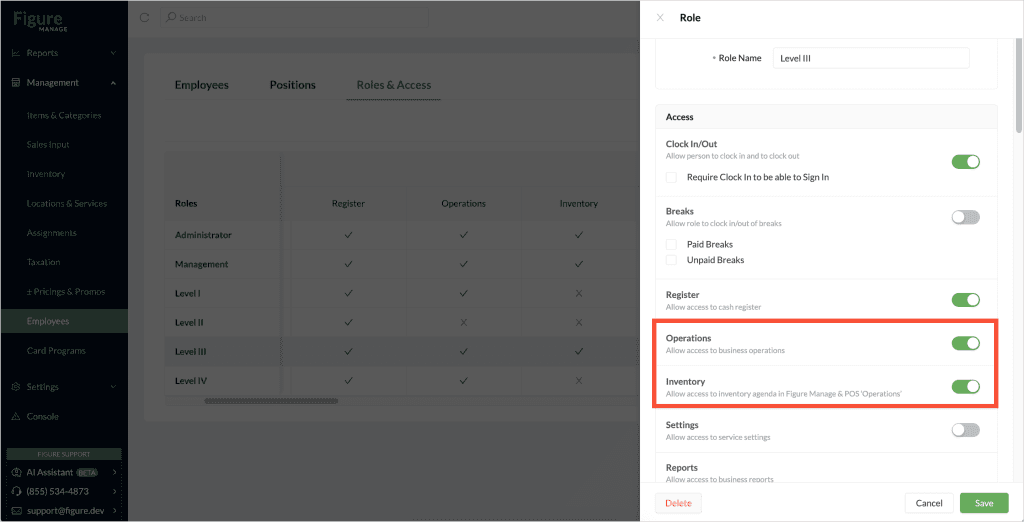
Manage Inventory in Figure Manage
Add an item to Inventory in Figure Manage
[1] Go to Figure Manage -> Management -> Inventory (note that a permission is required to access Inventory agenda)
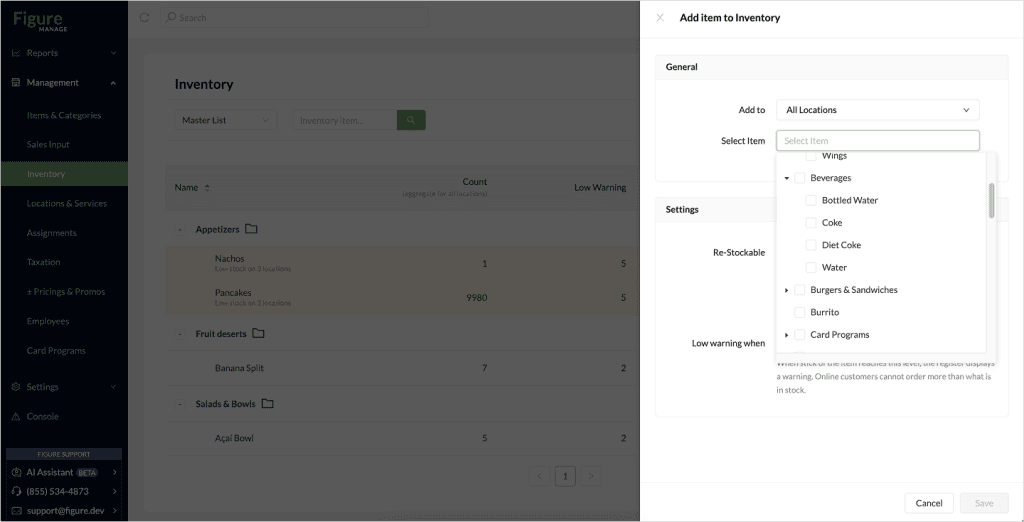
[2] Click Add Item to Inventory and select an item from the item list
[3] Once you've selected an item, complete its inventory configuration details:
Choose the Location: Select where you want to track stock (note that 'Settings' apply to all locations using Inventory for this item).
Select Item: Select an item you want to track
Re-Stockable: Indicate if it's restockable and if voids/refunds affect stock.
Low Stock Threshold: Set the level for low stock warnings.
Please note that the 'Re-Stockable' and 'Low Warning' settings are universal. Once configured for this item, they will automatically apply to any location where this item is added to the Inventory.
[4] Click Save
[5] Add quantity: Now, the item was added to the list of items in Inventory and it shows as there is 0 in stock. You can click on the item and change the quantity across locations.
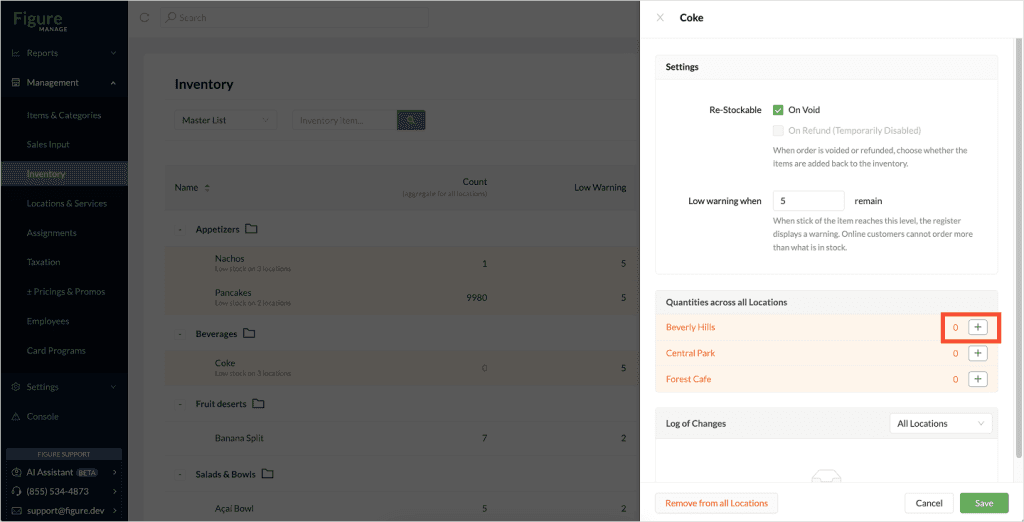
Or you can just click the '+' icon by the item, which is a shortcut for re-stocking.
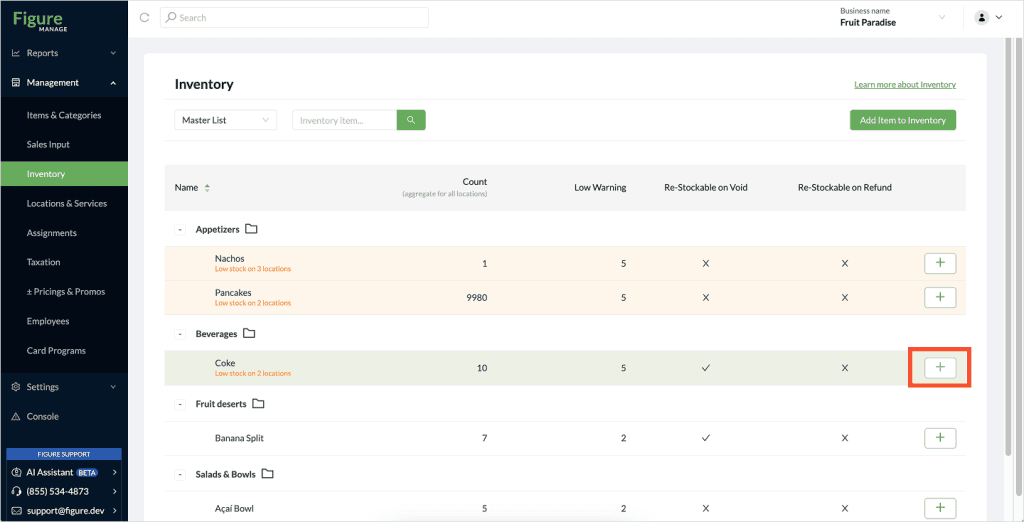
The full process in one recording:
Re-stock an item in Figure Manage
You can re-stock items anytime – no matter if they are sold out or not.
[1] Go to Figure Manage -> Management -> Inventory
[2] Click on the '+' icon by the item you already added to the Inventory management following the steps above
[3] Choose a location you want this change to apply to and add the amount you are adding to the Change field.
[4 ] Click Re-stock
Manage Inventory in POS
Add an item to Inventory in POS
[1] Go to POS > Menu (top left corner) > Operations > Inventory (note that a permissions are required to access the Operations and Inventory agenda)
[2] To add an item to Inventory, you can either scan the item with a barcode scanner, use the camera or click 'Add Item' and select the item from the list of all items.
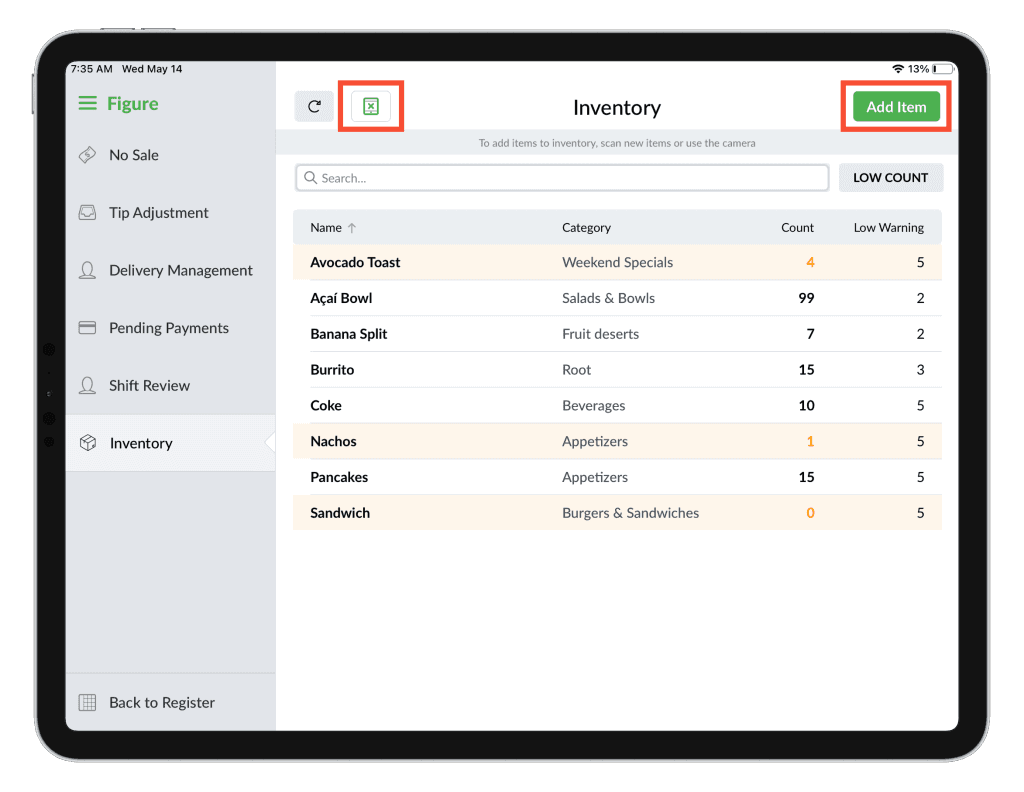
[3] Once you've selected an item, complete its inventory configuration details:
Item Count: the current count of the item in stock
Re-Stockable: Indicate if it's restockable and if voids/refunds affect stock.
Low Stock Threshold: Set the level for low stock warnings.
Please note that the 'Re-Stockable' and 'Low Warning' settings are universal. Once configured for this item, they will automatically apply to any location where this item is added to the Inventory.
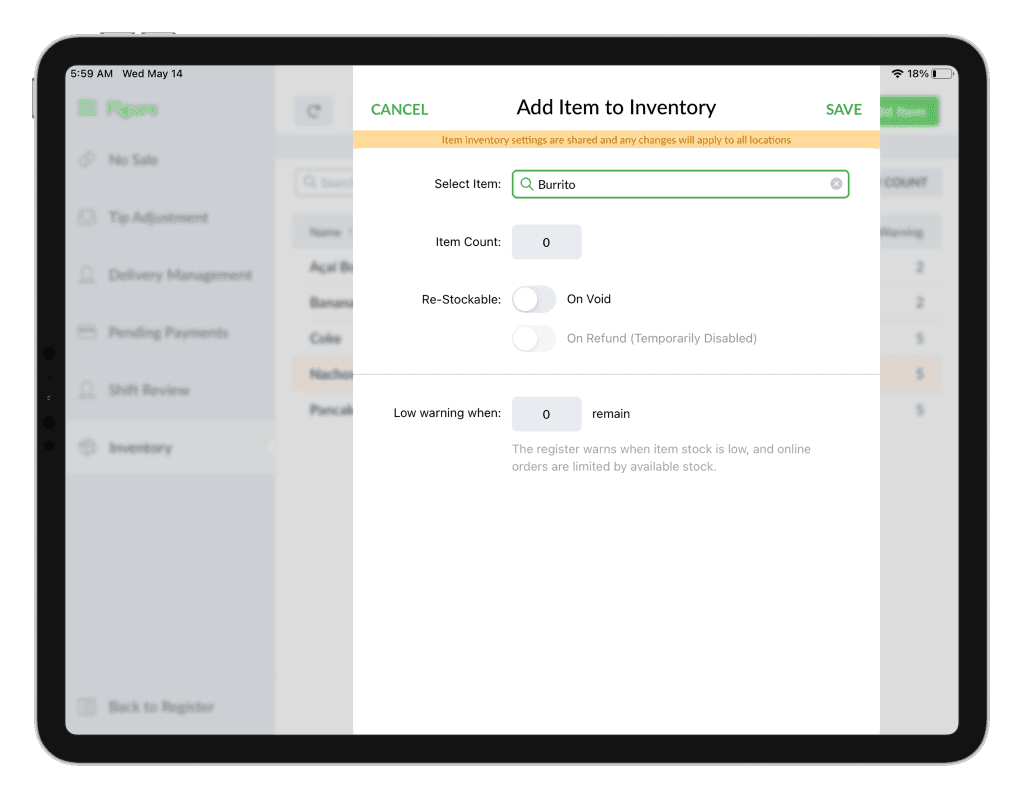
[4] Click Save to apply.
You can change the settings for an item any time by opening the item detail in the Inventory agenda and going to Inventors Settings.
Re-stock item in POS
[1] Go to POS > Menu (top left corner) > Operations > Inventory (note that a permissions are required to access the Operations and Inventory agenda)
[2] Click the item you want to re-stock
[3] Adjust the inventory count:
Use the Adjustment Buttons: Quickly increase or decrease the count by tapping one of the preset buttons: -10, -5, -1, 0, +1, +5, +10. This is a fast way to make common changes.
Click the "0" Button to Enter a Custom Adjustment: Tapping the 0 (center) button opens a field where you can manually enter a specific number to increase the current count by a custom amount. This is useful if the restock amount doesn’t match the preset options.
Manually Enter a New Count: If you'd like to set a specific number of the total count, simply type the desired amount into the Resulting Count.
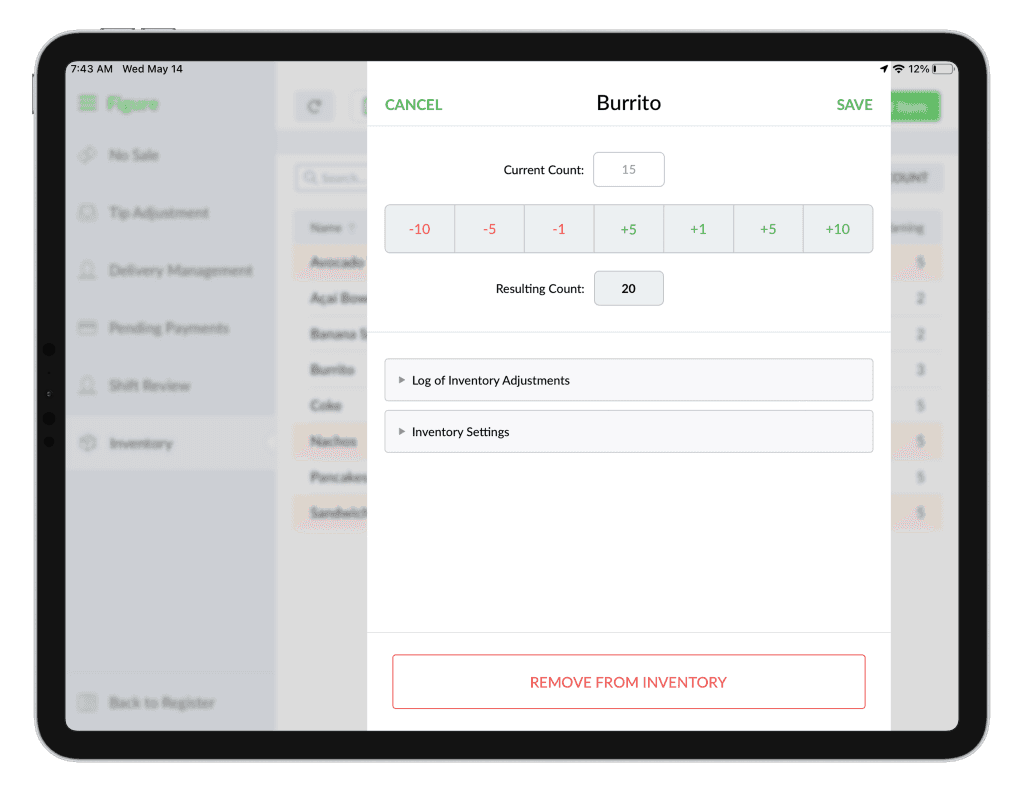
[4] Once you're finished, tap SAVE in the top right to apply your changes.
Tips
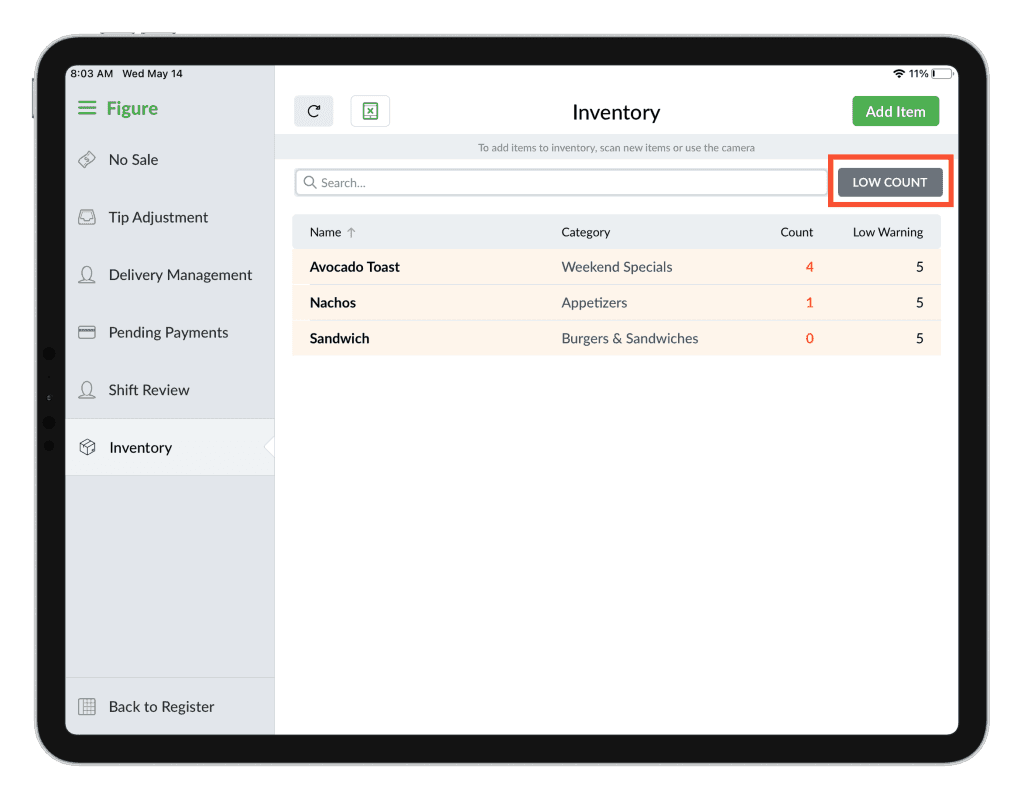
Filter: Click the LOW COUNT button to easily identify items that need restocking. This filter helps you quickly see which products are running low.
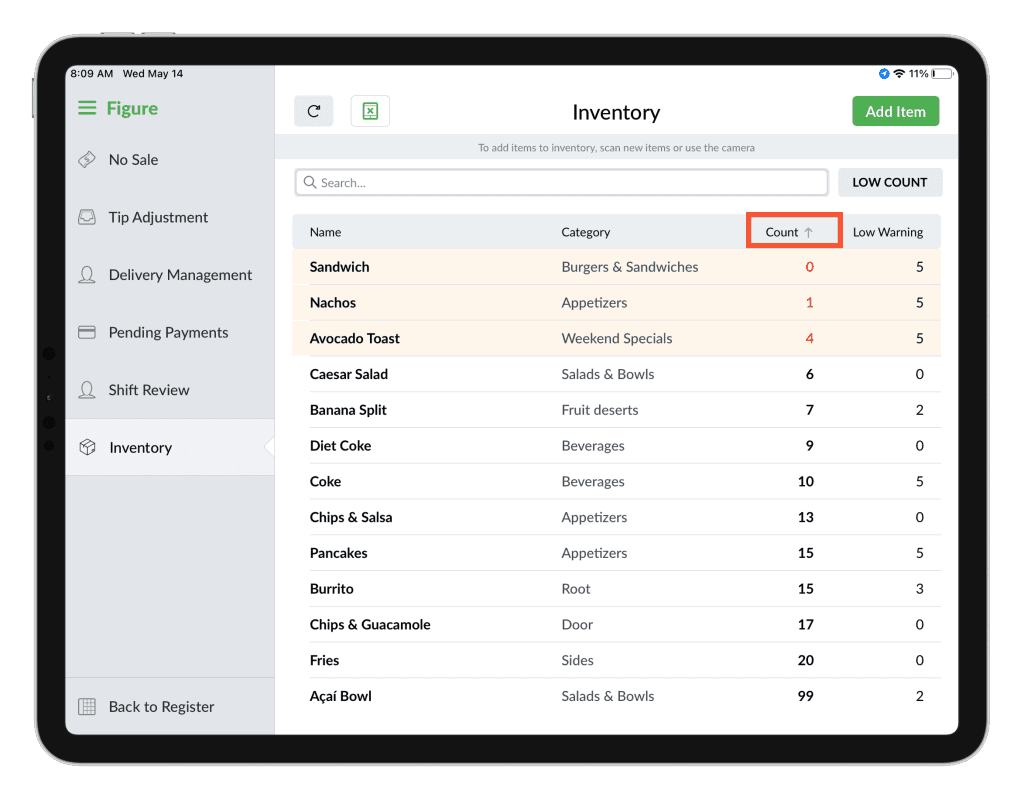
Sort: Click any column header to sort the list by that value. For example, click Count to sort by lowest quantity; click it again to sort by highest.
Low stock / sold out warning on POS
You’ll notice that an item begins displaying its inventory count once it reaches the set threshold (e.g., 5 units). When the stock falls below this threshold, the system will show a warning indicating that the item is out of stock.
However, on the POS system (unlike on Make It Butter or Kiosk), you still have the option to sell the item — in case you physically have it in stock at your store but the system hasn’t been updated yet.
Low stock / sold out warning on Make It Butter
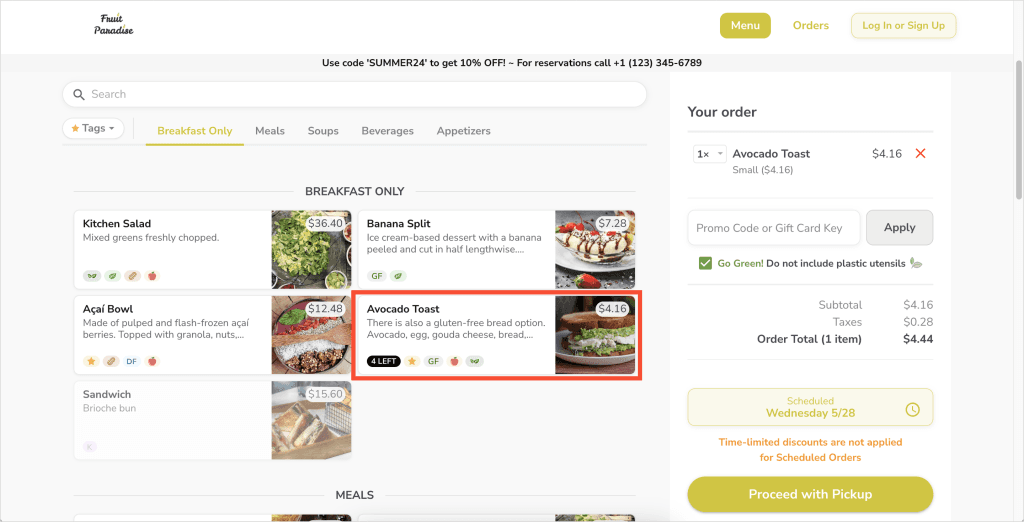
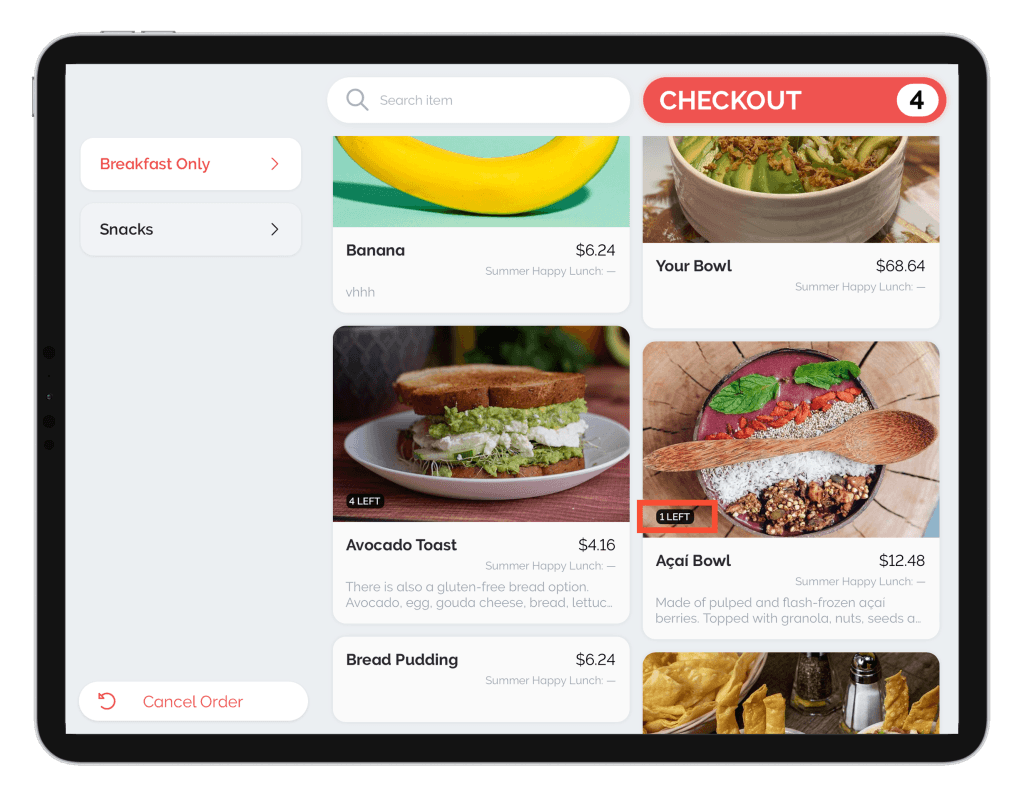
When the low stock threshold is reached, a label displaying the remaining quantity appears next to the item. At this point, customers can only order up to the exact number of units left in stock, preventing overselling.
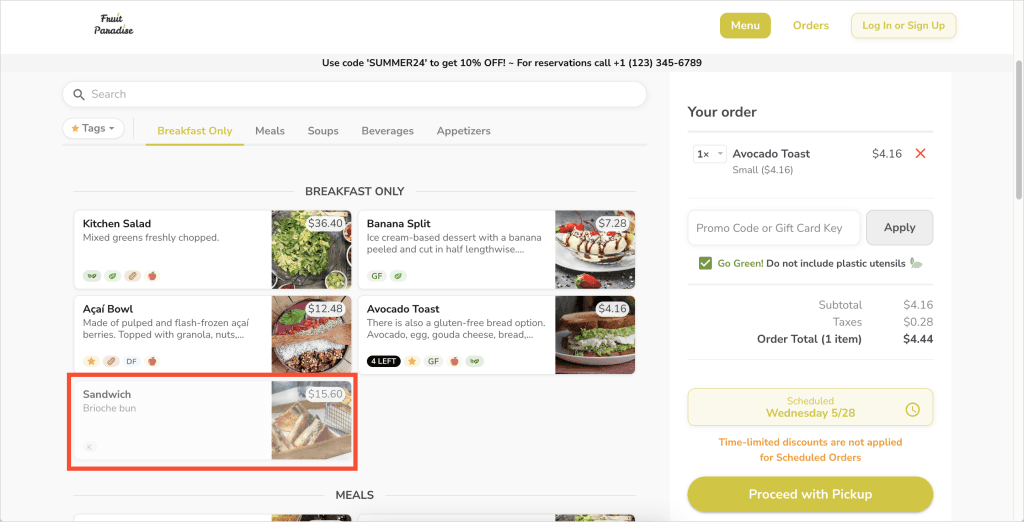
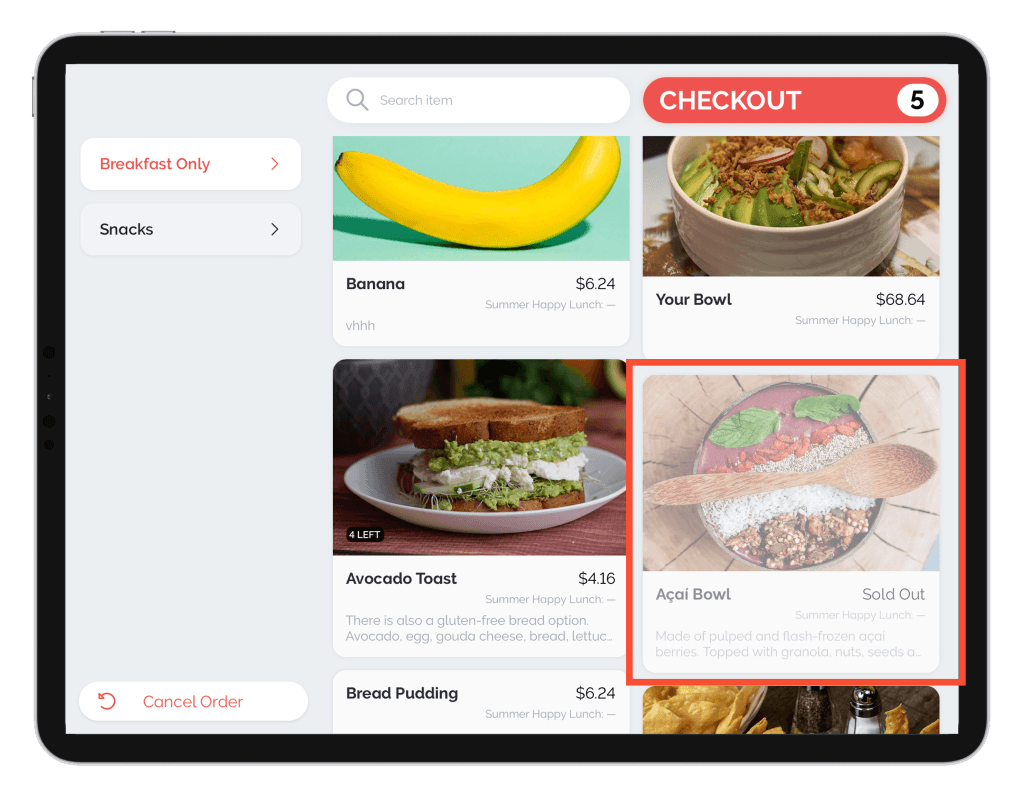
When an item’s stock reaches zero, it is automatically grayed out and becomes unavailable for ordering until it is restocked.
Low stock / sold out warning on Kiosk
When the low stock threshold is reached, a label displaying the remaining quantity appears next to the item. At this point, customers can only order up to the exact number of units left in stock, preventing overselling.
When an item’s stock reaches zero, it is automatically grayed out and becomes unavailable for ordering until it is restocked.
The amount left or the information about the item being out of stock is displayed also in the item detail.