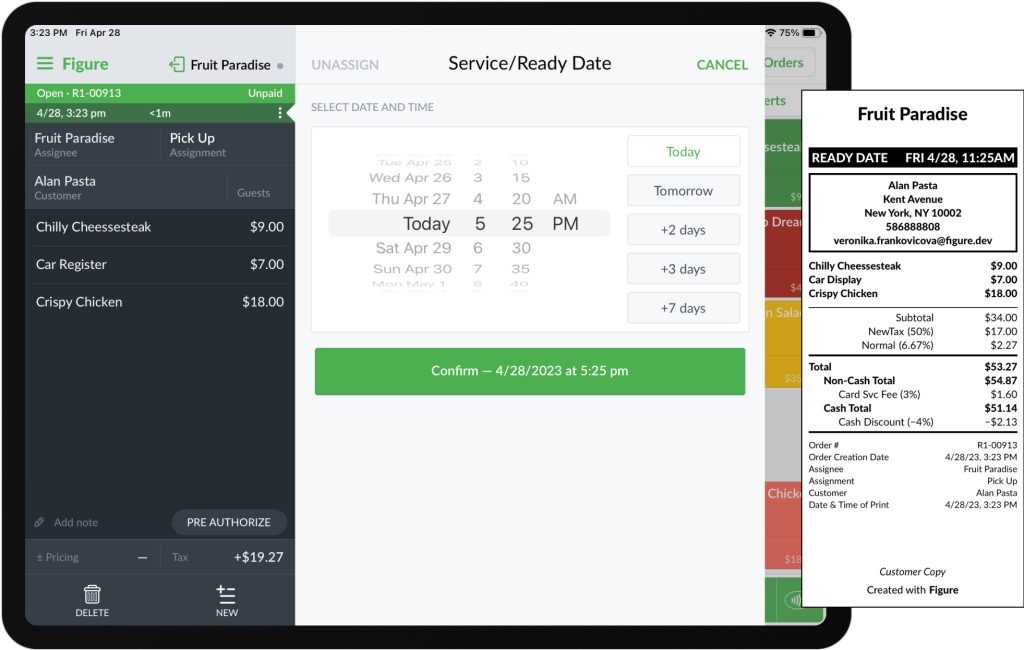
If an order should be scheduled for the future, you can assign a Ready Date to the order in POS.
If the ready date is set, it will be printed on the receipts and displayed in POS and Figure Manage.
Note: It will not be marked as 'Future' order in KDS.
How to enable Ready Date
In order to start using this feature, it is necessary to enable it first. There are two ways how to do so – either from the POS (iPad) or from Figure Manage.
How to enable Ready Date in POS
[1] Go to POS > Menu (top left corner) > General
[2] By the Enable Ready Date select the default time of the ready date

Same Day = the Ready Date will be by default always set to the current day + you'll also choose a Default Ready Time to a your preferred time
Next Day = the Ready Date will be by default always set to 'tomorrow' + you'll also choose a Default Ready Time to a your preferred time
2 Days and More = you will choose a number of days and time to which the Ready Date should default
Time Offset = set in how many hours and minutes from a current moment the Ready Date should default to
How to enable Ready Date in Figure Manage
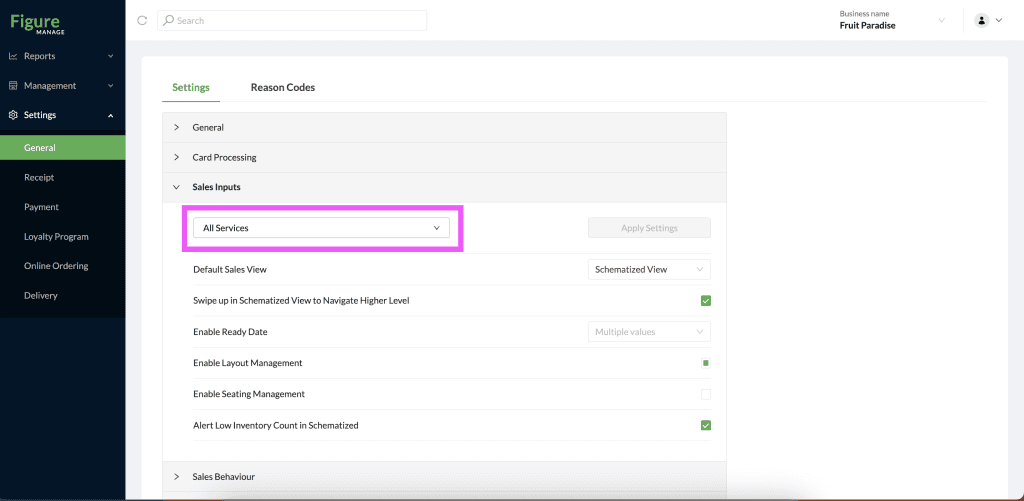
[1] Go to Figure Manage > Settings > General > Sales Inputs
[2] Select a terminal/service for which you want to enable the Ready Date for
[3] By the Enable Ready Date select the desired Ready Date default
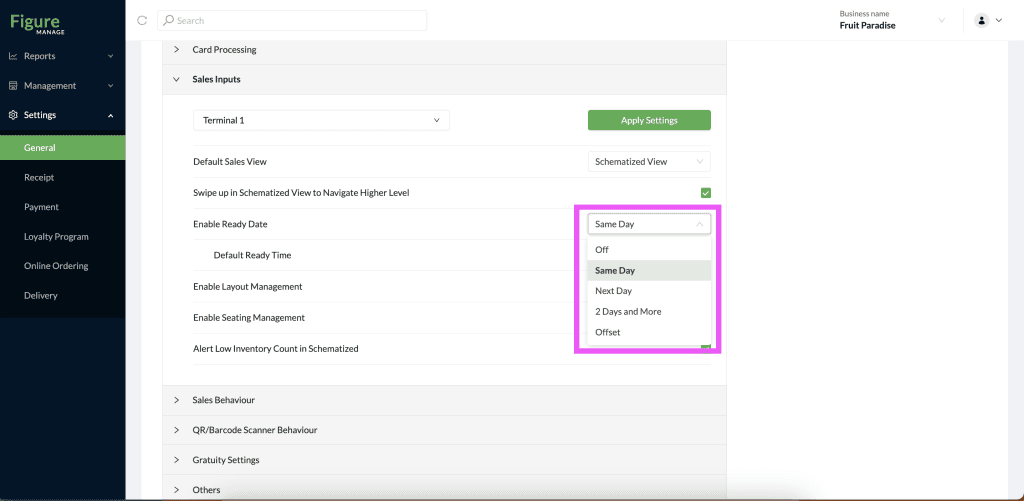
Same Day = the Ready Date will be by default always set to the current day + you'll also choose a Default Ready Time to a your preferred time
Next Day = the Ready Date will be by default always set to 'tomorrow' + you'll also choose a Default Ready Time to a your preferred time
2 Days and More = you will choose a number of days and time to which the Ready Date should default
Time Offset = set in how many hours and minutes from a current moment the Ready Date should default to
[4] Hit Apply Settings
How to assign a ready date to an order
[1] Go to POS and create an order
[2] Hit the three dots
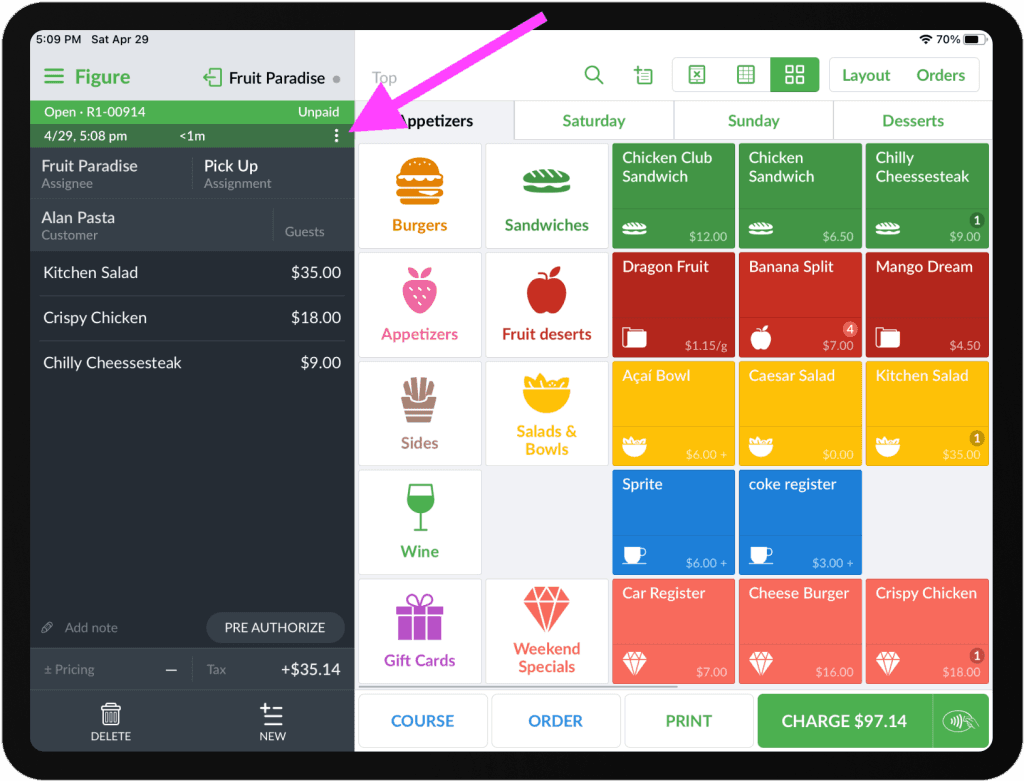
[3] Choose the Ready Date and hit Confirm
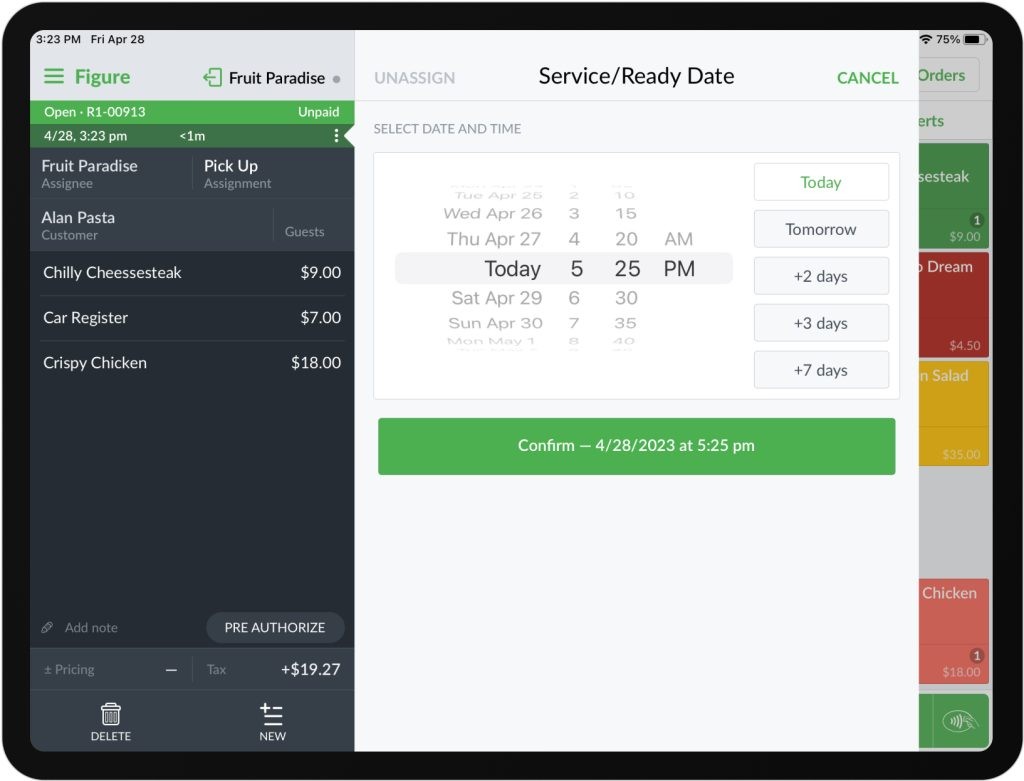
The Ready Date is now assigned to the order. You can see it in POS, on printed receipts and in Figure Manage:
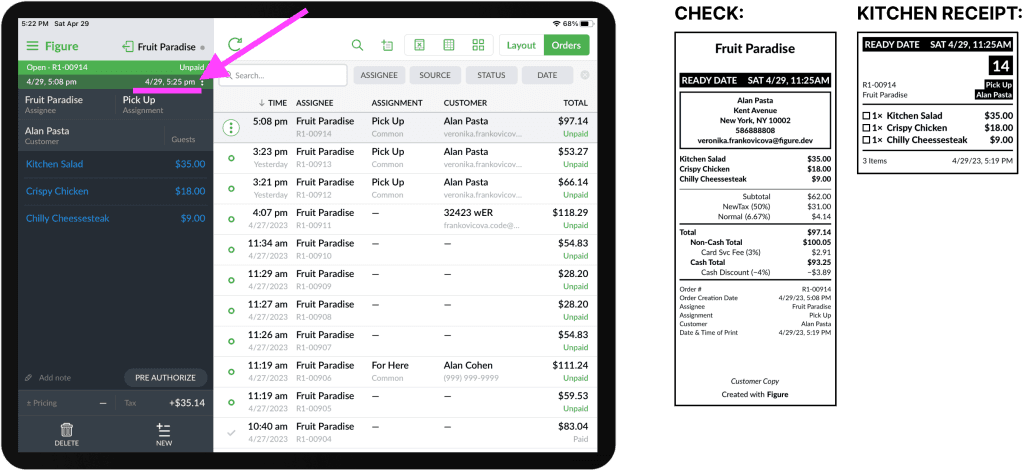
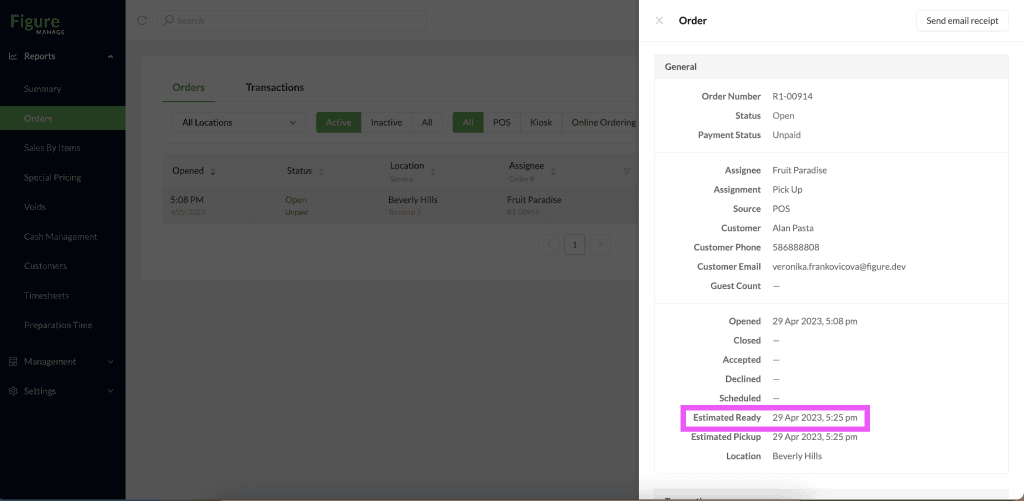
In Figure Manage, you can see the Ready Date in the order detail: