Enable the Layout Management
The Layout Management can be enabled from Figure Manage or POS.
If you choose to enable it in Figure Manage, follow the steps below:
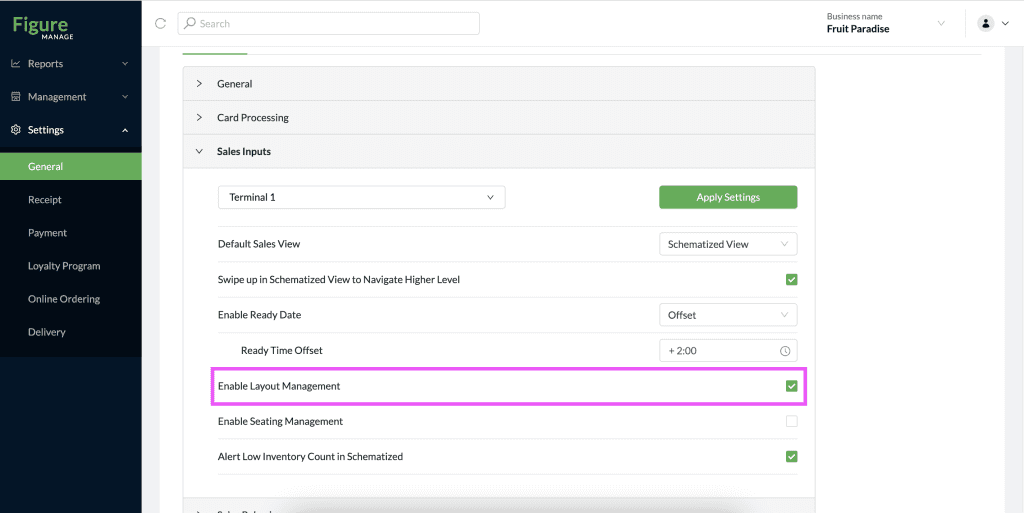
[1] Log into Figure Manage website with your credentials and go to Settings -> General -> Sales Inputs
[2] There, enable the Enable Layout Management and hit Apply Settings
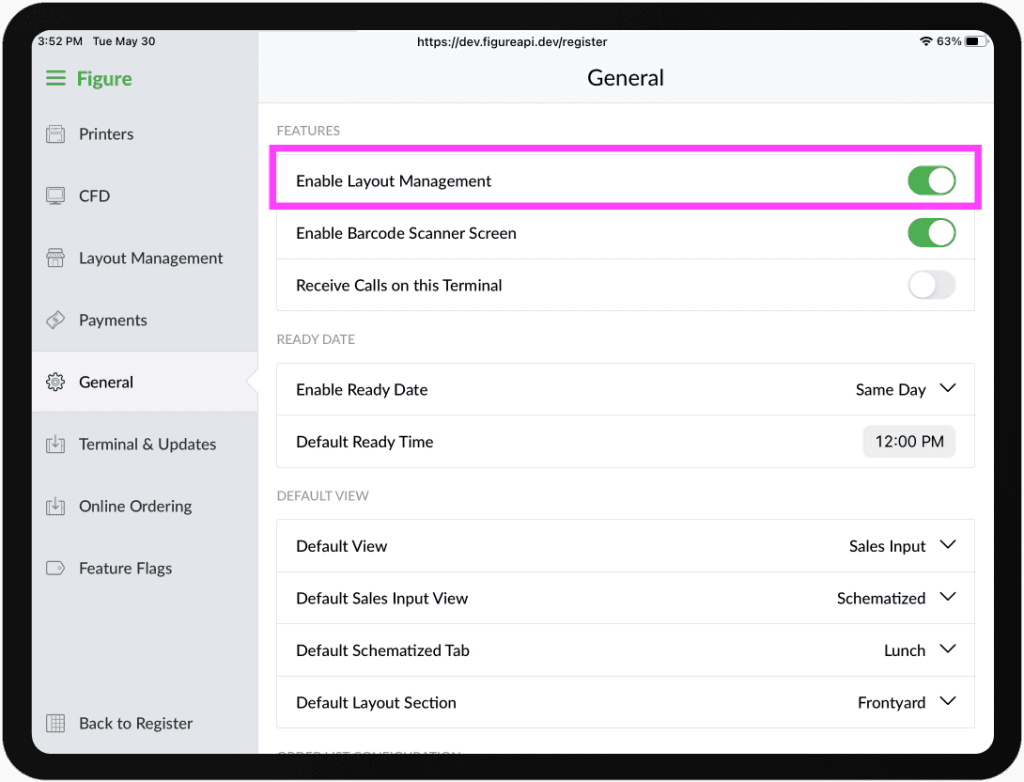
If you choose to enable it from POS, follow the steps below:
[1] Go to Figure POS
[2] Go to Menu -> Settings -> General
[2] There, enable the Enable Layout Management
The Layout Management section will appear in the left menu. There, you will configure the layout in upcoming steps.
Predefine your sections and tables
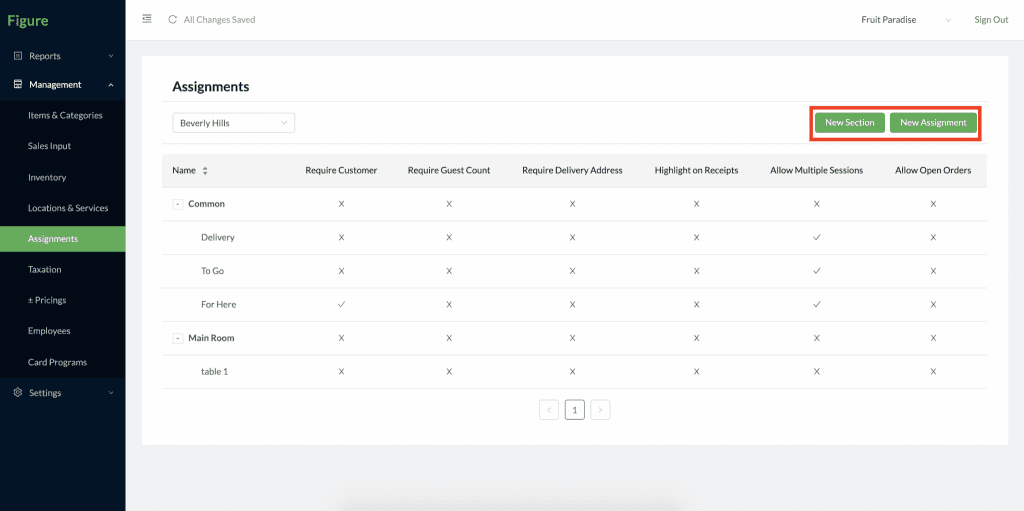
[1] Log into Figure Manage website with your credentials and go to Management –> Assignments.
[2] Create a list of your tables. Use the button ‘New Section’ to create a section (such as room) if needed and ‘New Assignment’ to create a table.
The 'Sections' is just to keep this list organized. It does not predefine how the sections will look like in your POS.
[3] Set a name or number for each table and add it to a required section.
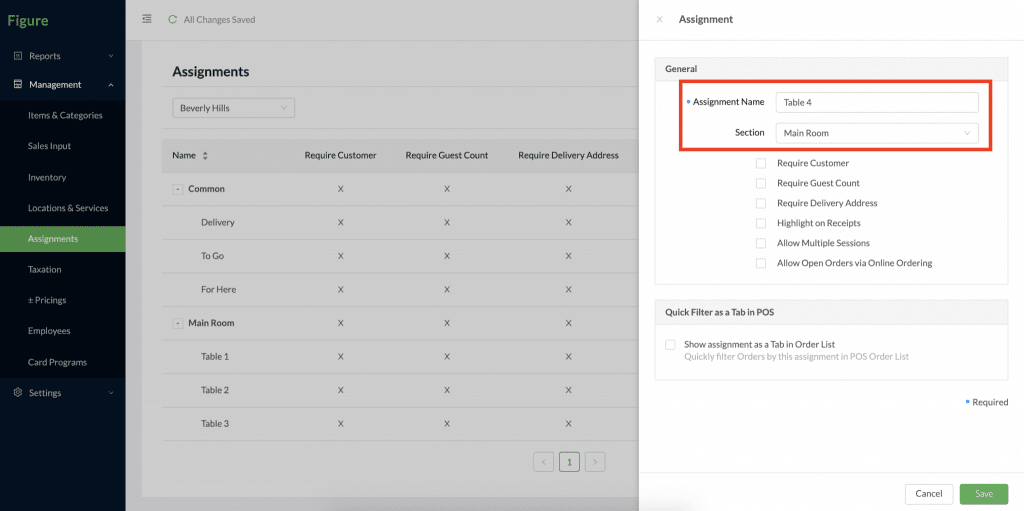
You can enable one of the offered options that will apply for this assignment:
✅ Require Guest Count = the order cannot proceed until the guest count is assigned.
✅ Require Delivery Addres = the order cannot proceed until a delivery address is assigned.
✅ Highlight on Receipt = this assignment will be highlighted on receipts for better visibility.
✅ Allow Multiple Session = this assignment allows multiple orders to be assigned to it.
✅ Allow Open Orders via Online Ordering = for table ordering, customers can keep their tab open — they won’t be forced to pay and close after each order.
[4] Hit Save
Create the layout in POS
Once you have all the assignments (sections and tables) created, you can create a visual table layout in your POS. That you can use as your default view for POS.
[1] Go to Figure POS
[2] Go to Menu -> Settings -> Layout Management
[3] To add a new table, choose one of the shapes:
+ CIR = to add a circle
+ SQU = to add a aquare
+ REC = to add a rectangle
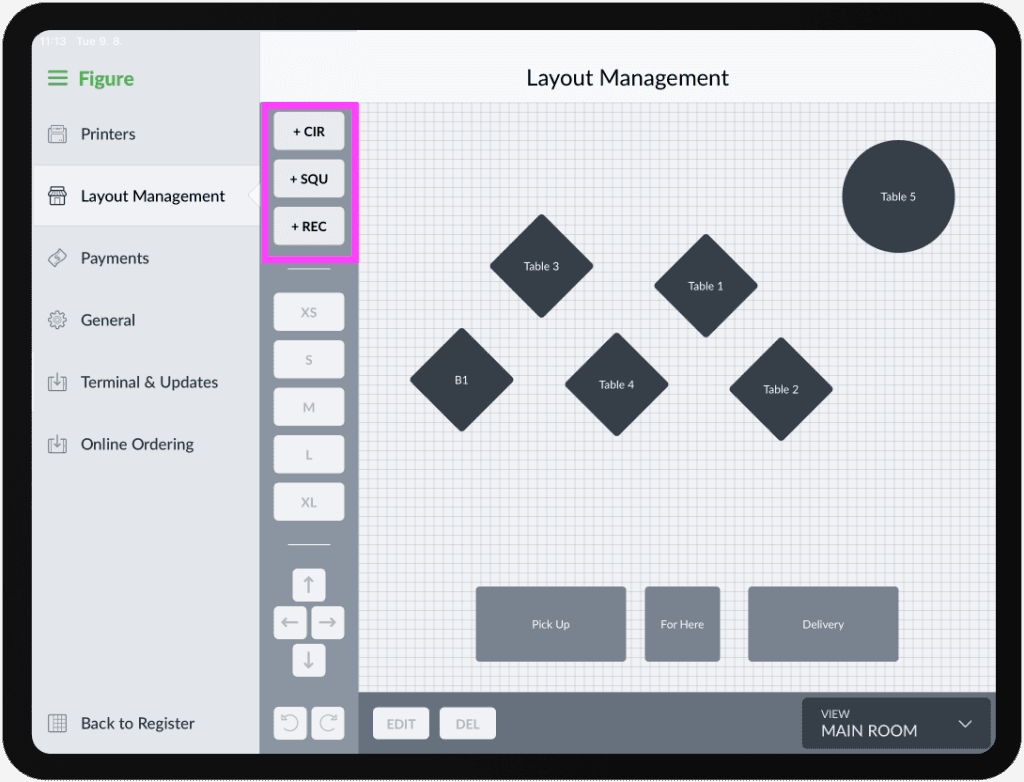
Then, you can use the 'drag and drop' to move the tables.
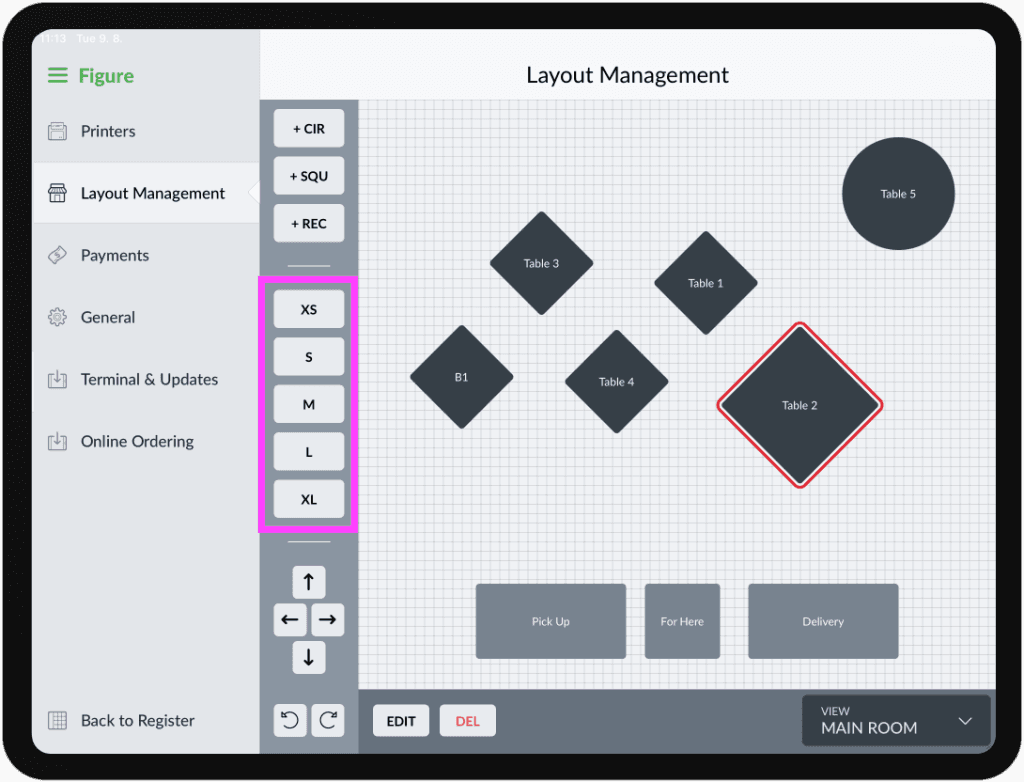
To change size, tap on a table and use those buttons (XS - XL):
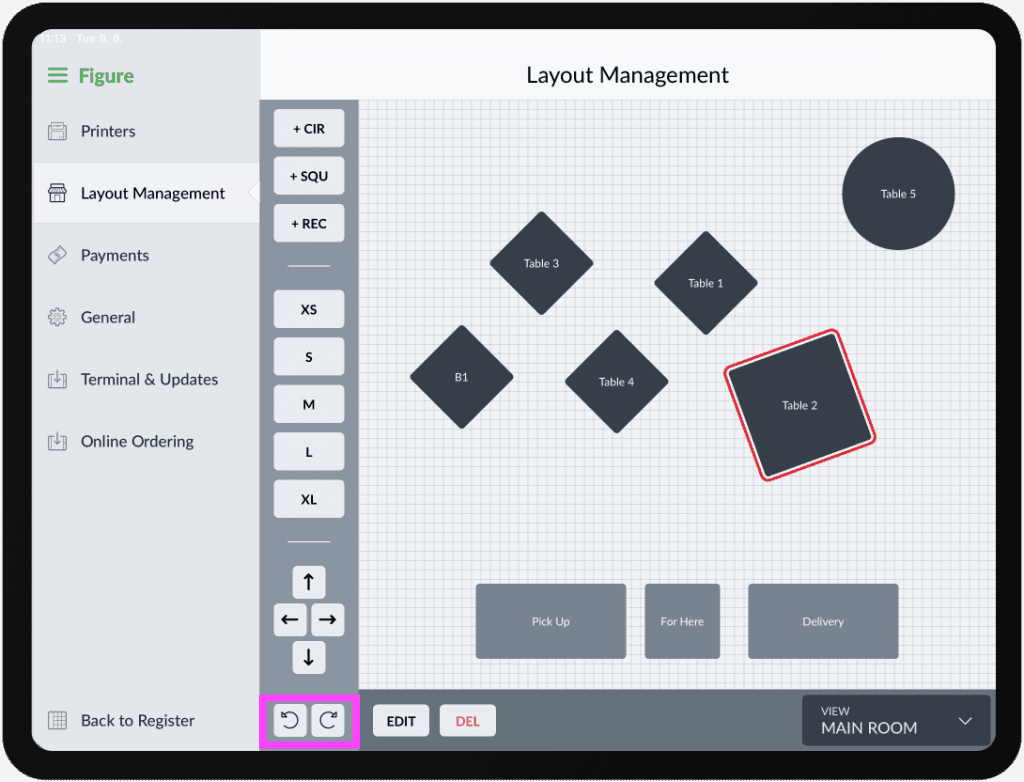
To turn tables, use the arrows at the bottom.
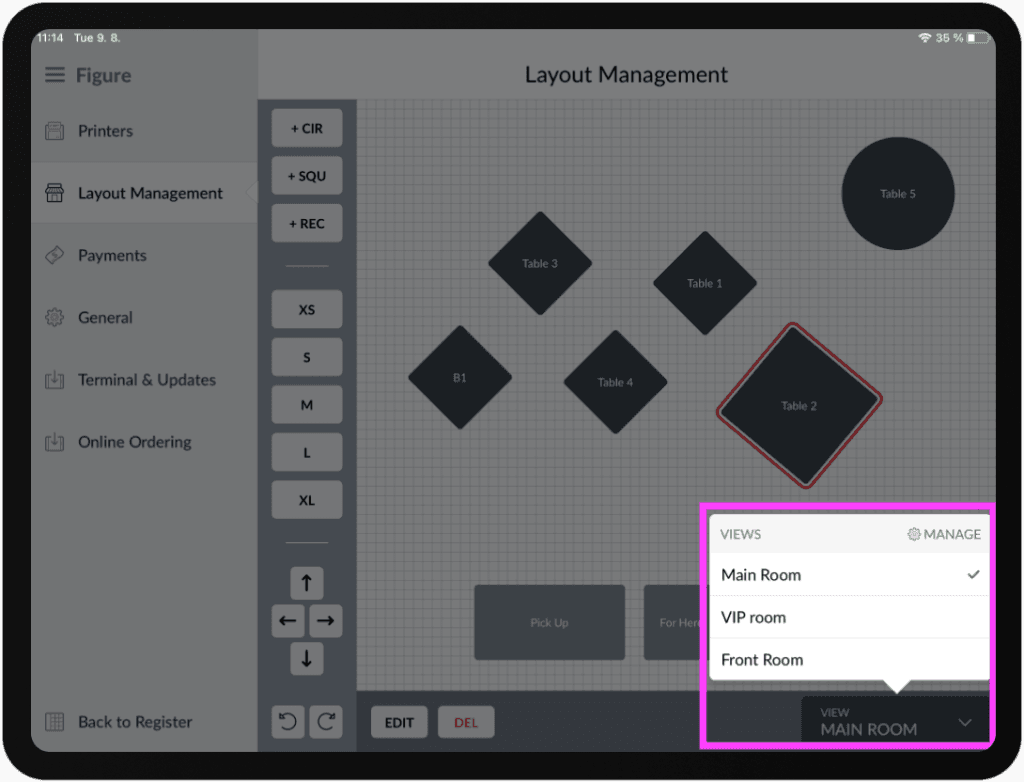
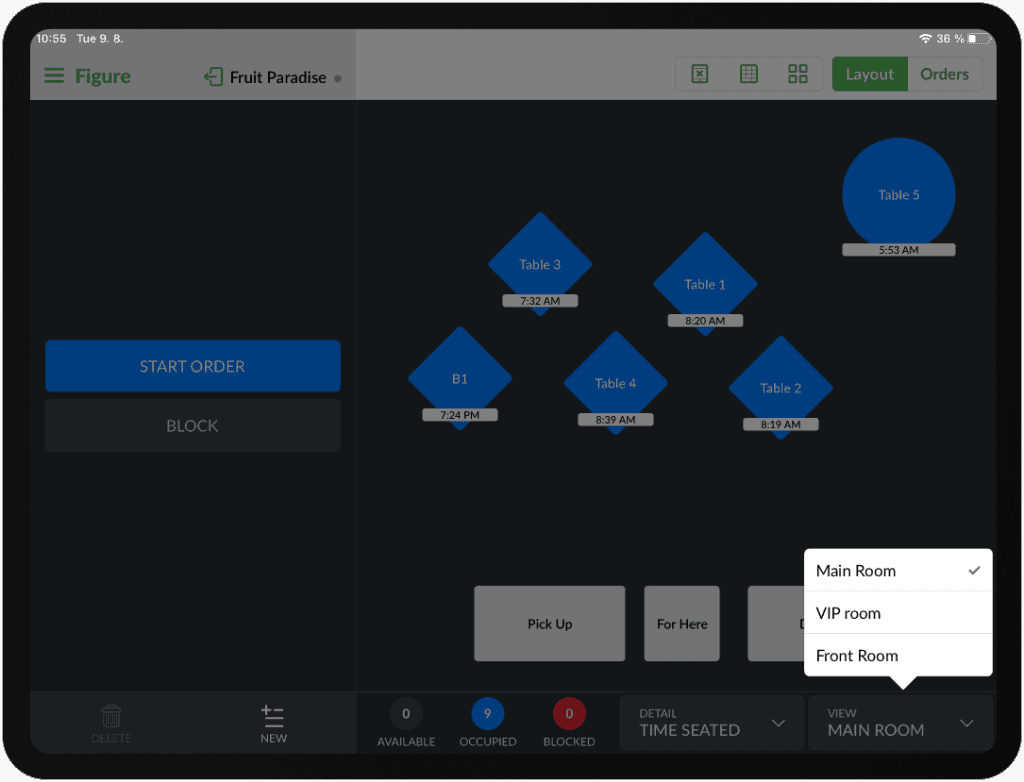
Edit Views: You can setup different Views (rooms,...). By hitting MANAGE, you can edit, add or remove views. You can use every assignment once in every view.
Every change will be immediately reflected in your POS:
Visual Cues
Default Visual Cues
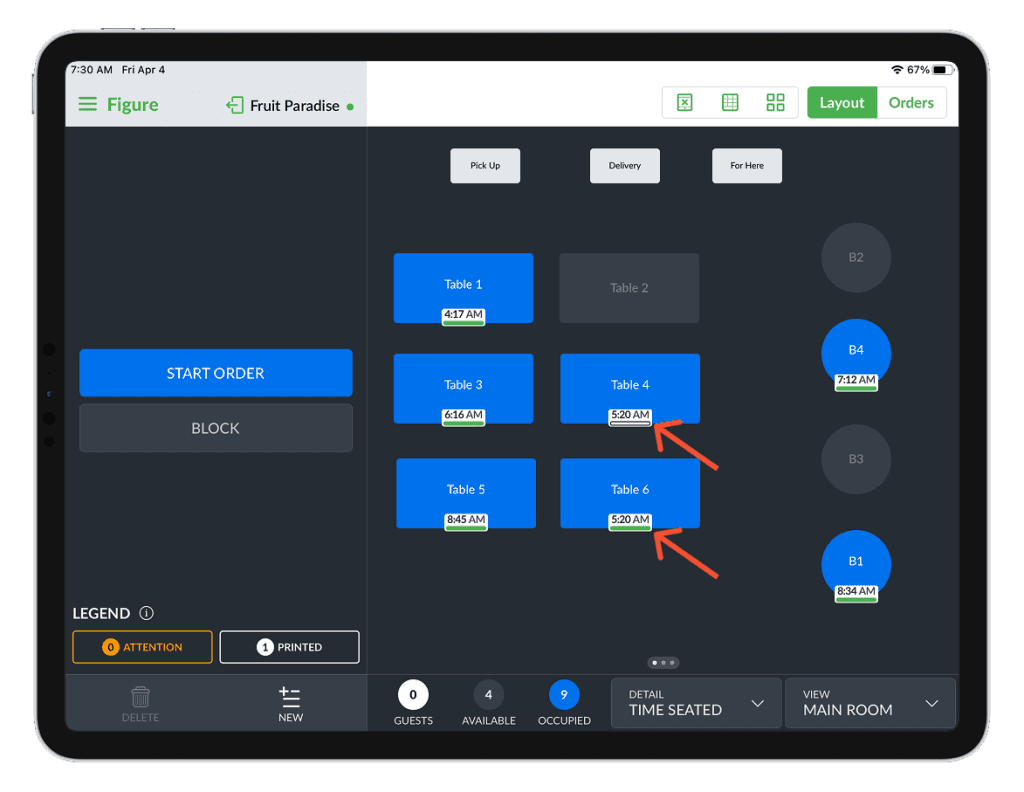
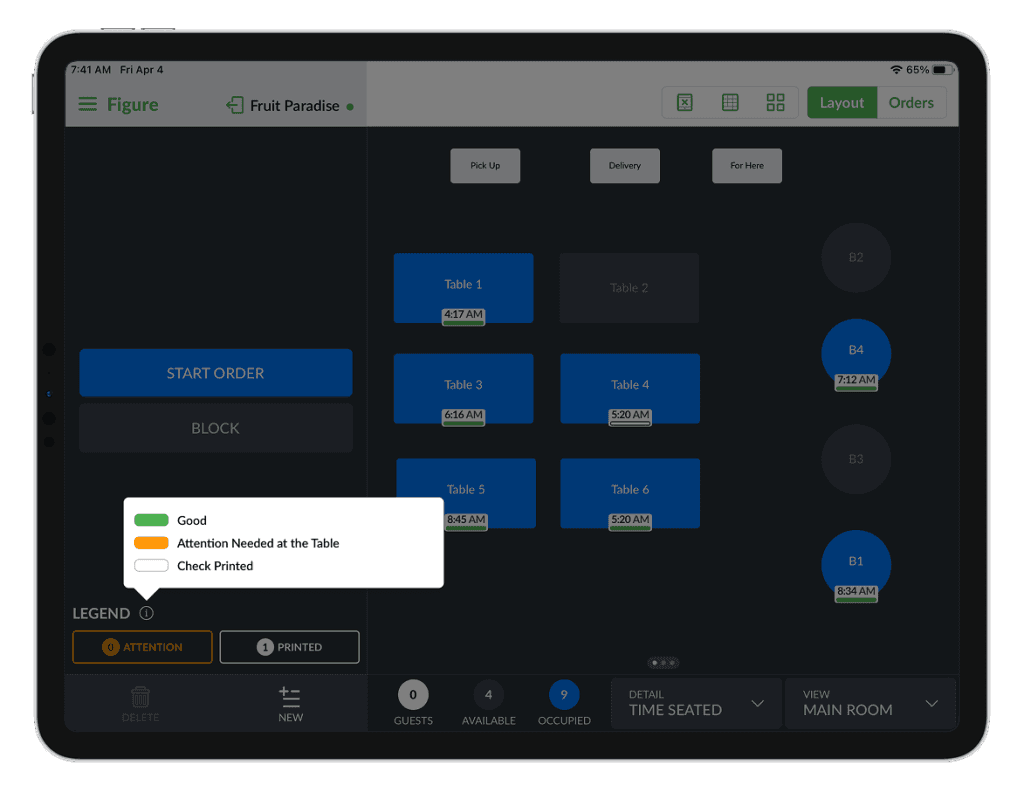
By default, the color indication uses these colors to label tables:
Green = the order is in good standing; no immediate action is required
Orange = attention is needed at the table. By default, this status appears only when a guest requests a check or assistance through QR code/table ordering.
White = a check has been printed for this order
In the table layout management system, a LEGEND is available to explain the meaning of each color indicator.
Configurable Visual Cues
Additionally, it is possible to configure additional visual cues, allowing for greater visibility and detailed insights into the order status.
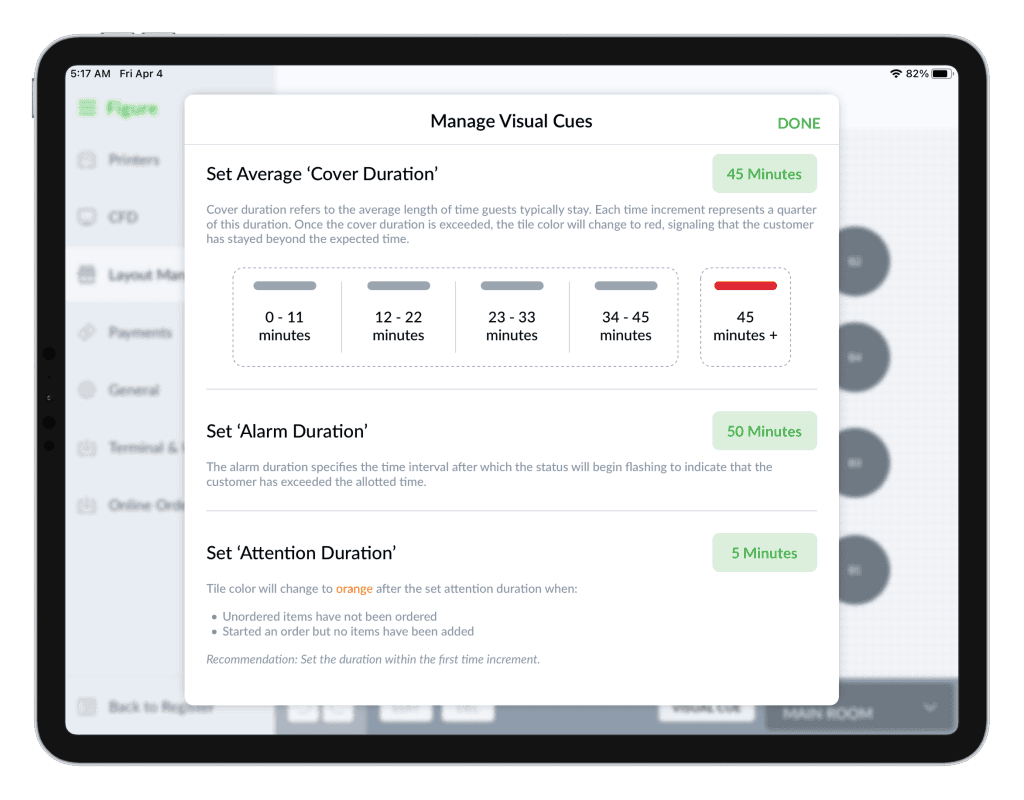
Average Cover Duration
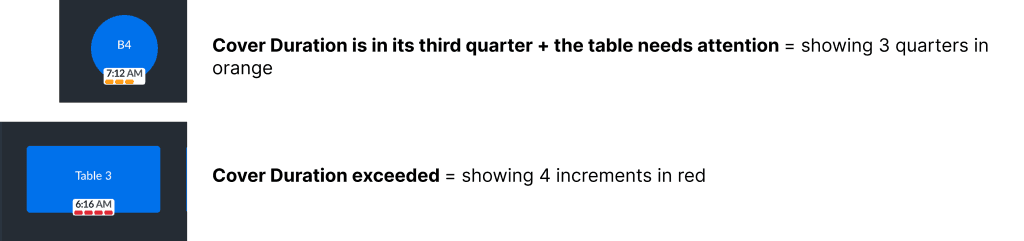
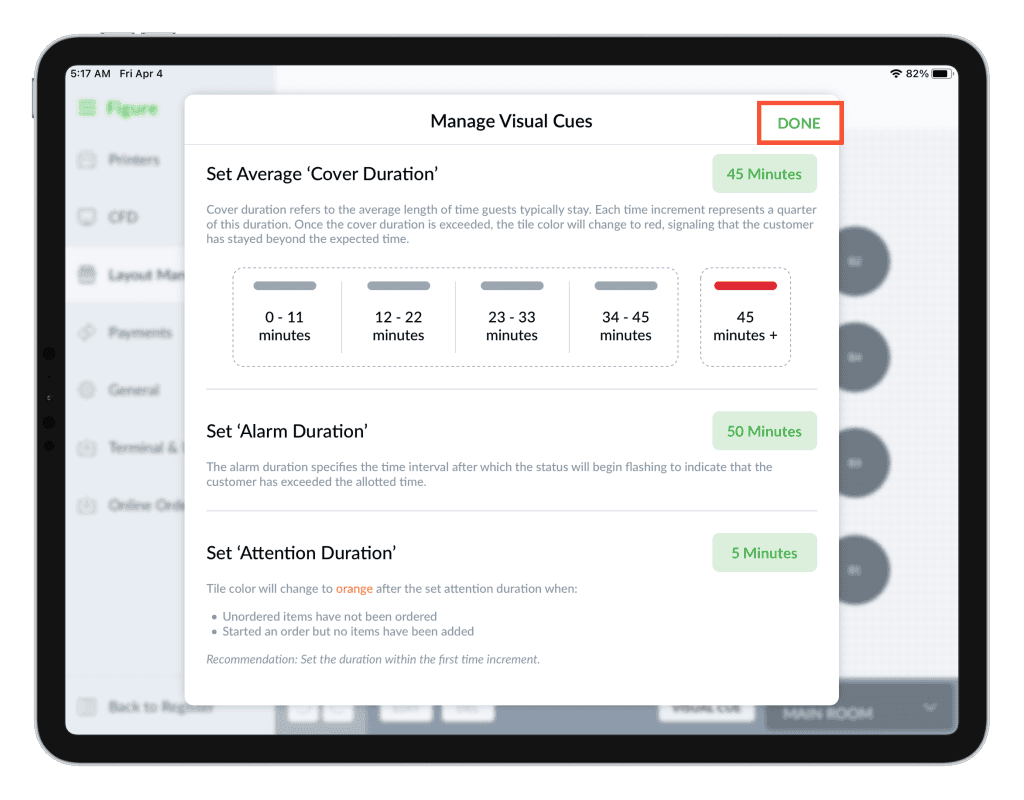
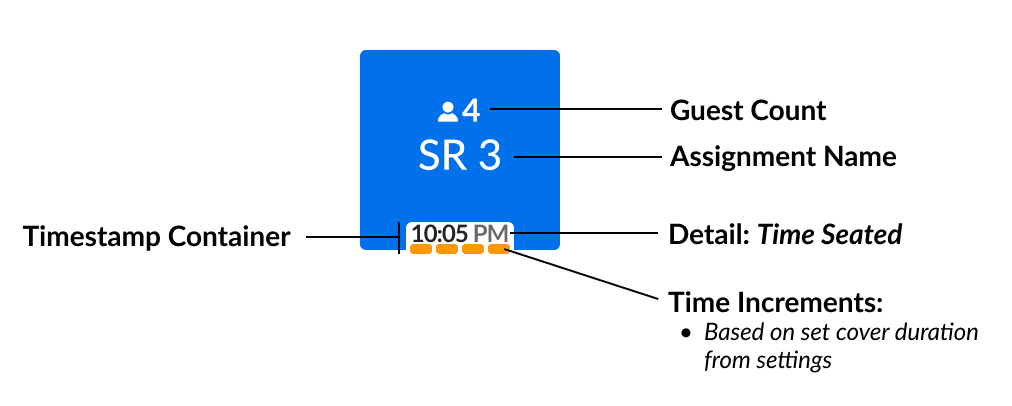
Cover duration refers to the average length of time guests typically stay. Each time increment represents one-quarter of this duration. Once the duration is exceeded, the tile color will change to red, indicating that the customer has stayed beyond the expected timeframe.
Note: If a cover duration is not set, time increments will not be displayed. Instead, the duration will appear as a single bar.
Alarm Duration:
The alarm duration specifies the time interval after which the status will begin flashing to indicate that the customer has exceeded the allotted time.
Example: If a table exceeds the allotted time and requires attention, the time increments will flash orange.
Attention Duration:
Tile color will change to orange after the set attention duration when:
Unordered items have not been ordered
Started an order but no items have been added
Note: If MIB table ordering is enabled, check requests and attention-required statuses will be highlighted with an orange indicator.
Recommendation: Set the duration within the first time increment set from cover duration.
Examples:
How to configure the Visual Cues
[1] Go to Figure POS
[2] Go to Menu -> Settings -> Layout Management
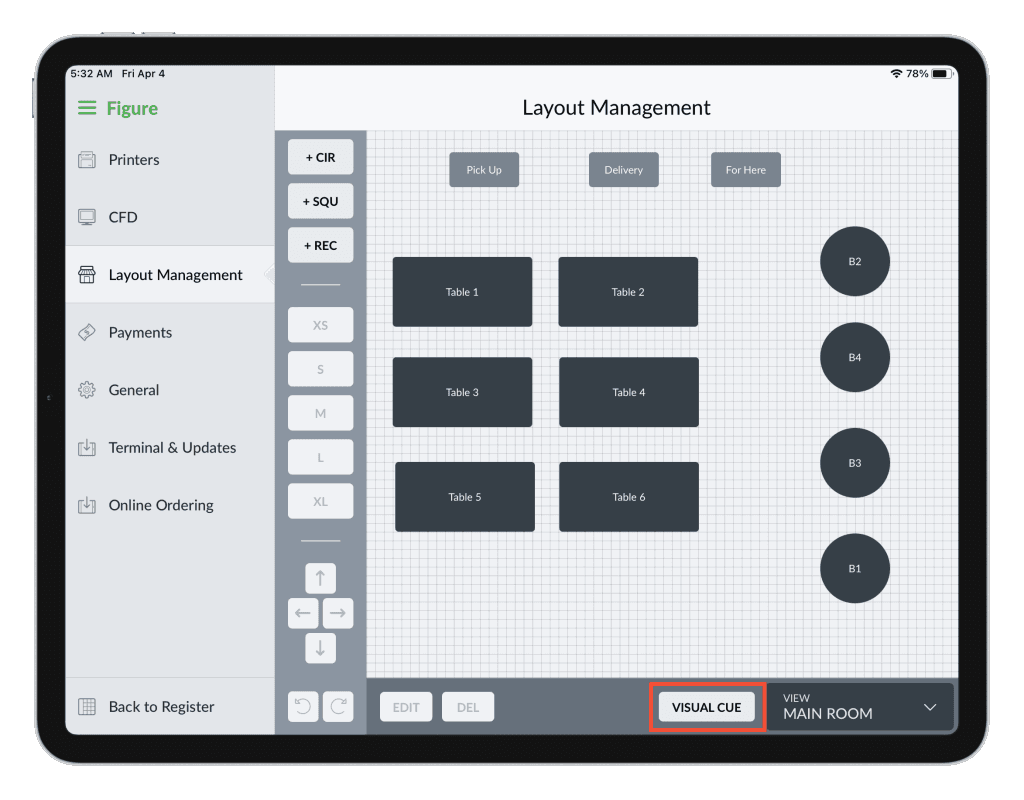
[3] Press VISUAL CUE button
[4] To set the duration for each type, tap the 'Set Duration' button and enter the desired time in minutes.

[5] Once all values are configured, press DONE
Once the duration is set, all tables will adhere to this configuration, changing color accordingly based on the defined settings.
Green = everything is in good standing; no action is required
Orange = attention needed at the table
White = a check has been printed for this order
Color flashing = Any of the above colors may flash to indicate that the guest has exceeded the expected Alarm Duration
In the table layout management system, a LEGEND is available to explain the meaning of each color indicator.
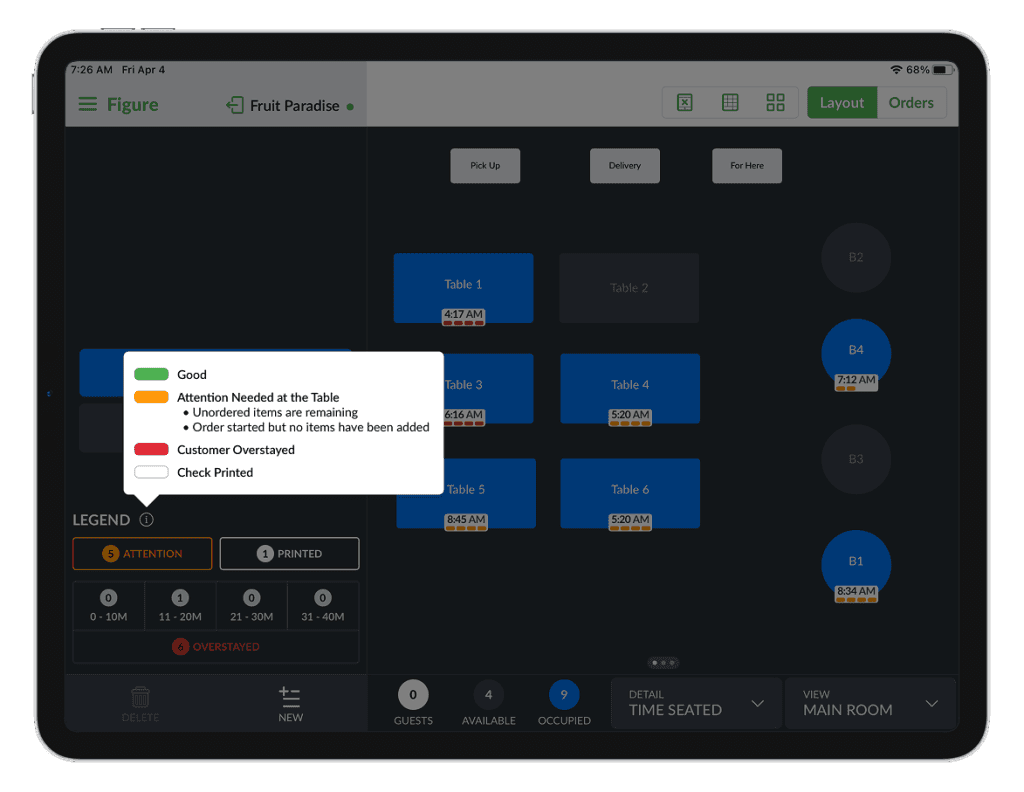
At the bottom left, a summary of table statuses is displayed, providing an overview of the current status of all tables.
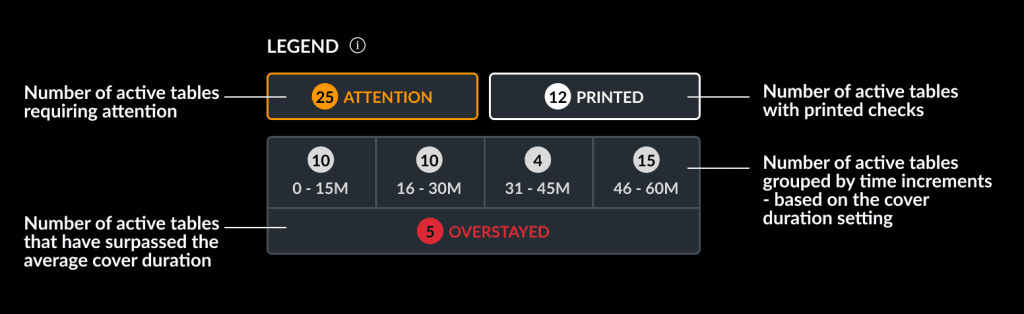
When a server taps on a table that requires attention, a popover will appear displaying the reason for the attention. This helps staff quickly understand what needs to be addressed without overwhelming the screen.
Behavior of the attention popover:
The attention popover appears automatically upon tapping a table that needs attention.
It will auto-dismiss after 4 seconds if no action is taken.
It can also be manually dismissed at any time by tapping on the popover.
💡 This behavior is default and not configurable via settings.
See examples of the Attention popovers:
Example 1: Attention is needed because the order has been opened but no items were added within the time 'Attention Duration':
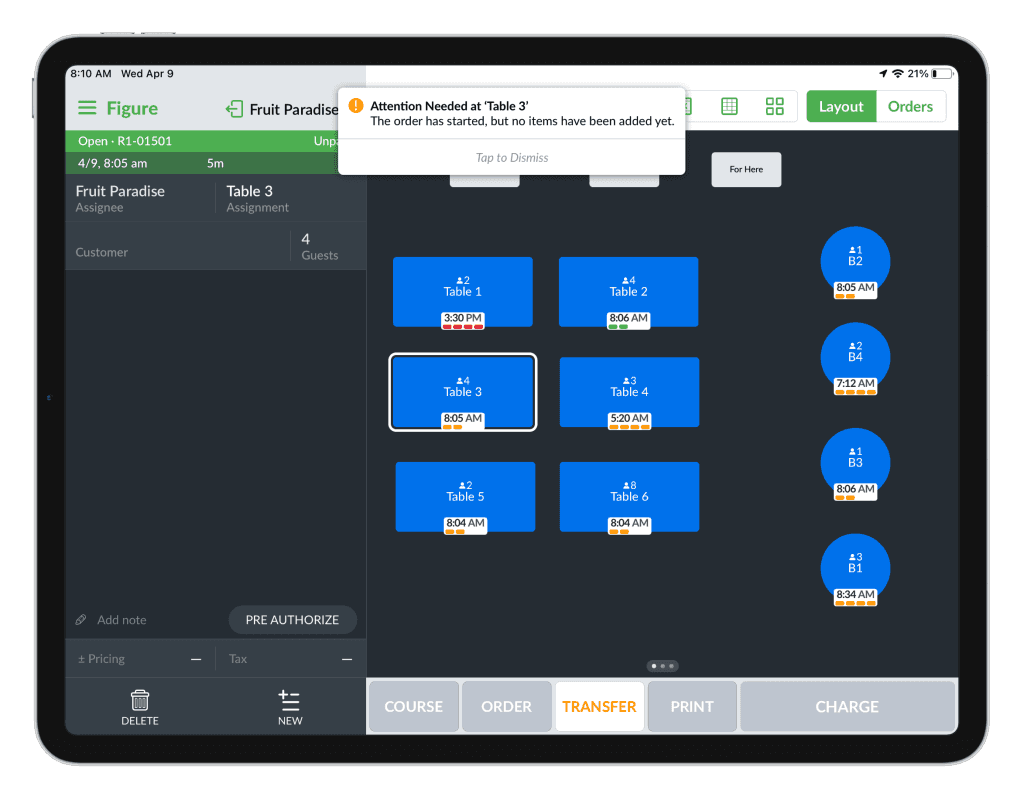
Example 2: Attention is needed because some items in the order have not yet been sent to the kitchen.

View the Table Layout
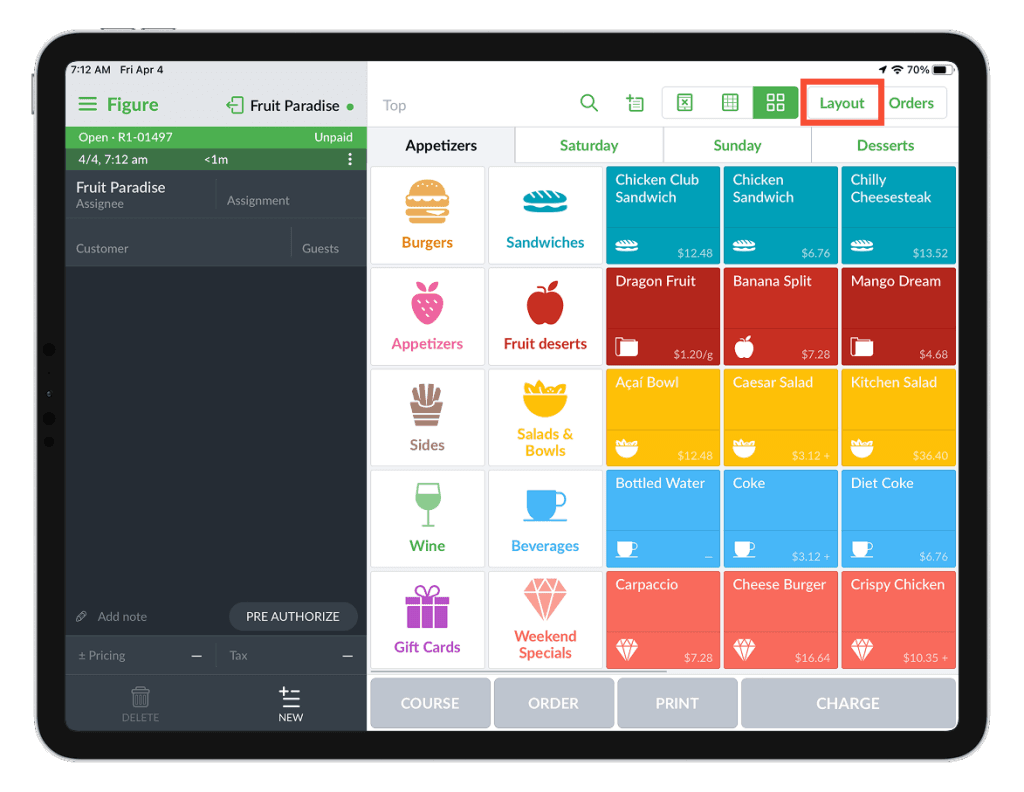
You can set the Table Layout as your default view or access it at any time by pressing the designated 'Layout' button.

Below, see the description of a table and its elements:
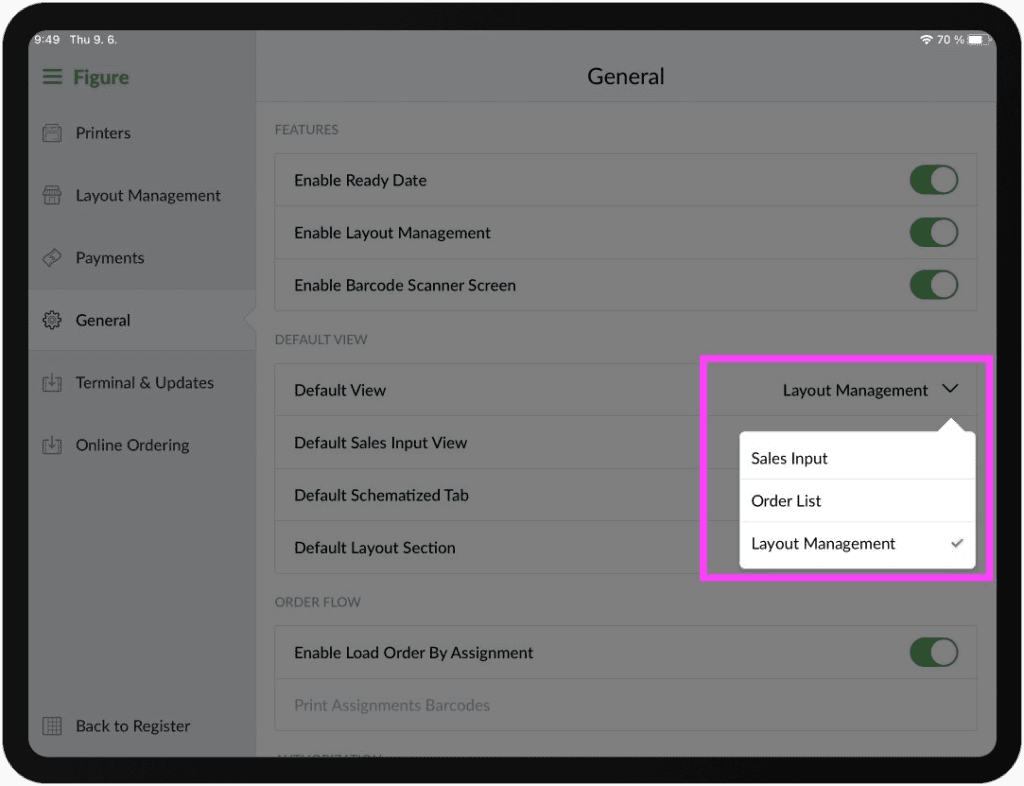
Set the Table Layout as a default view
[1] Go to POS -> Menu -> Settings -> General
[2] Set the Layout Management as the Default View
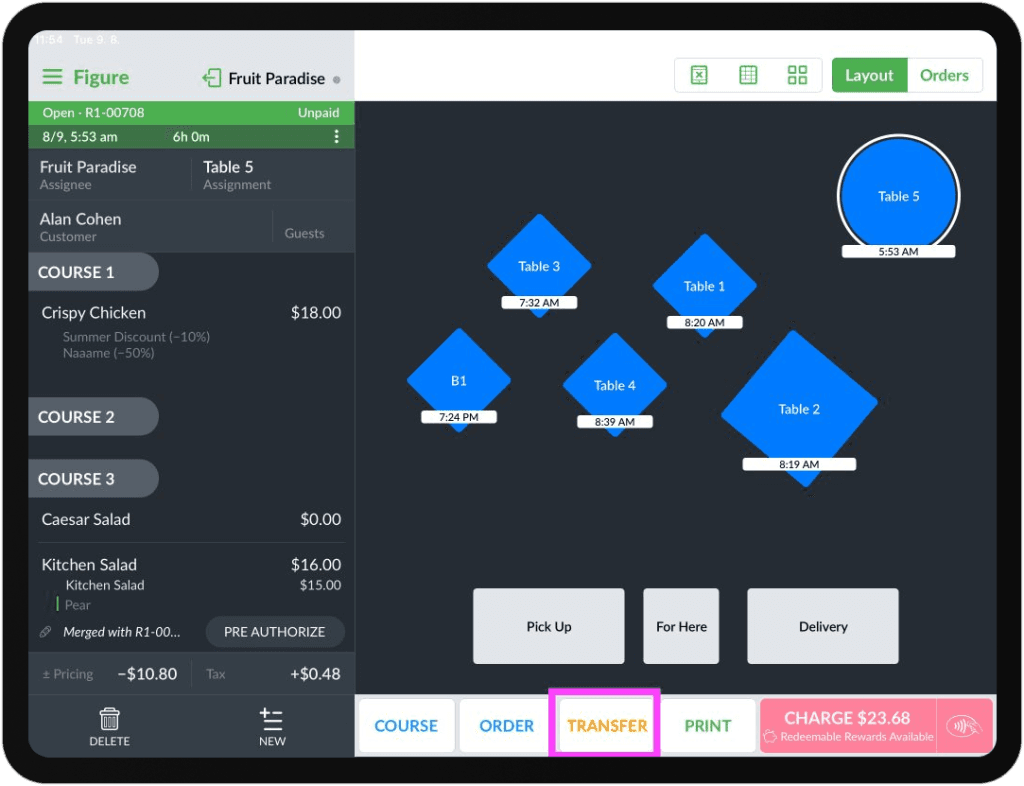
How to transfer / merge tables
When being in the Layout View, you can transfer everything assigned to one table to a different table. You can transfer it to empty table or to already occupied and merge those two table into one.
Learn how to transfer / merge tables in this article.
See a recording of creating a new view and adding tables to the view: