To make your Make It Butter (online ordering) or Kiosk look more appealing and appetizing, it’s recommended to upload images for your items.
Follow the guide below.
Prepare the image
Take a picture of your meal. We recommend uploading professionally taken photos for the best results.
Requirements for the image:
size: up to 3 MB, ideally smaller than 1 MB to make sure the image will successfully
format: JPG, JPEG or PNG
Upload the image
[1] Go to Figure Manage -> Management -> Items & Categories
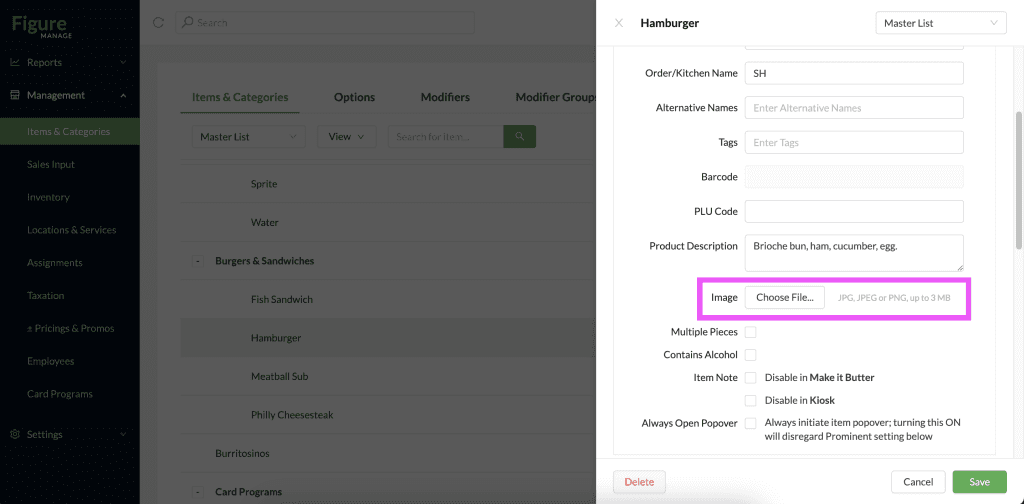
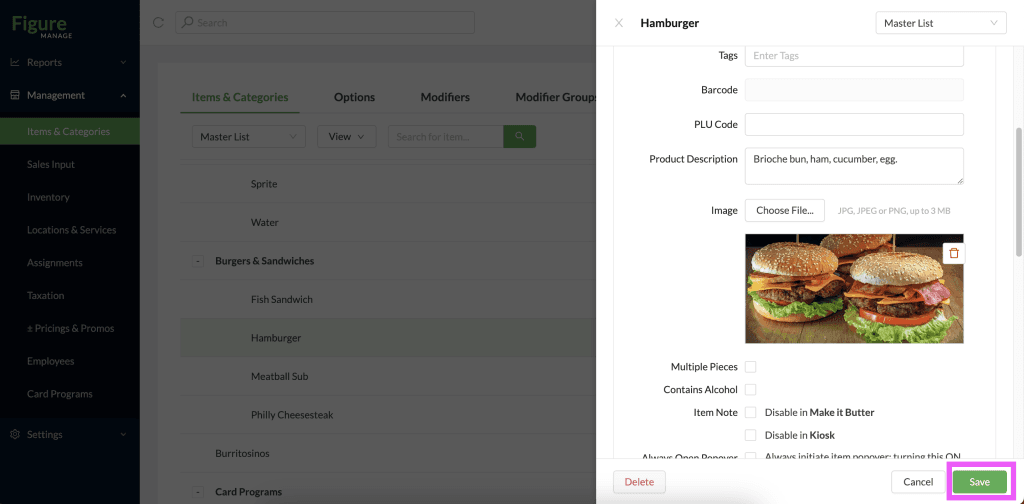
[2] Click on the item to open its details and upload an image.
[3] Scroll down a bit and click 'Choose File...'
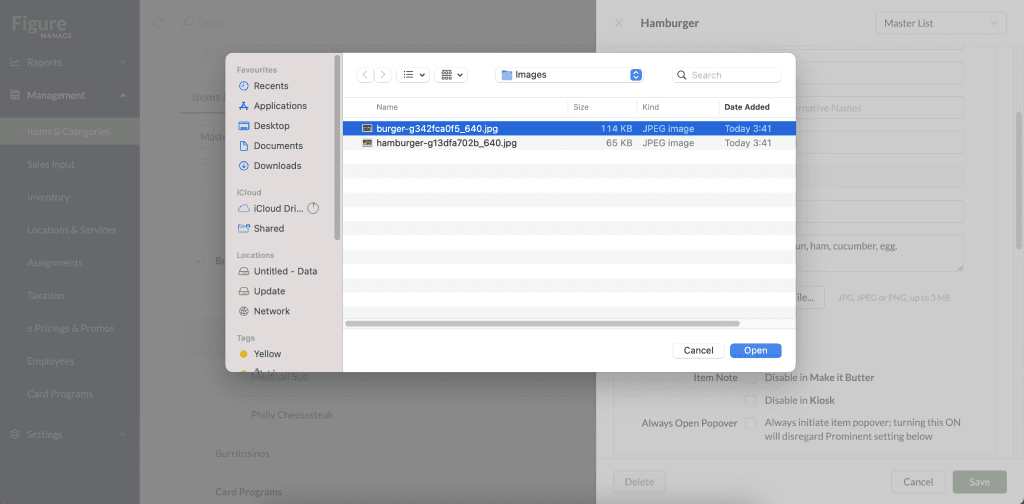
[5] Choose the image
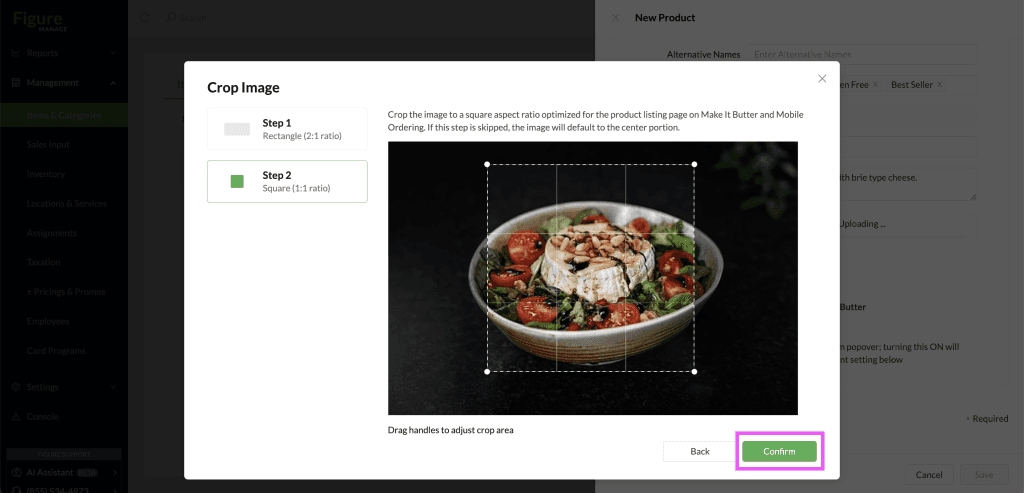
[6] Crop the image.
NEW: You can now crop images for both rectangular and square displays.
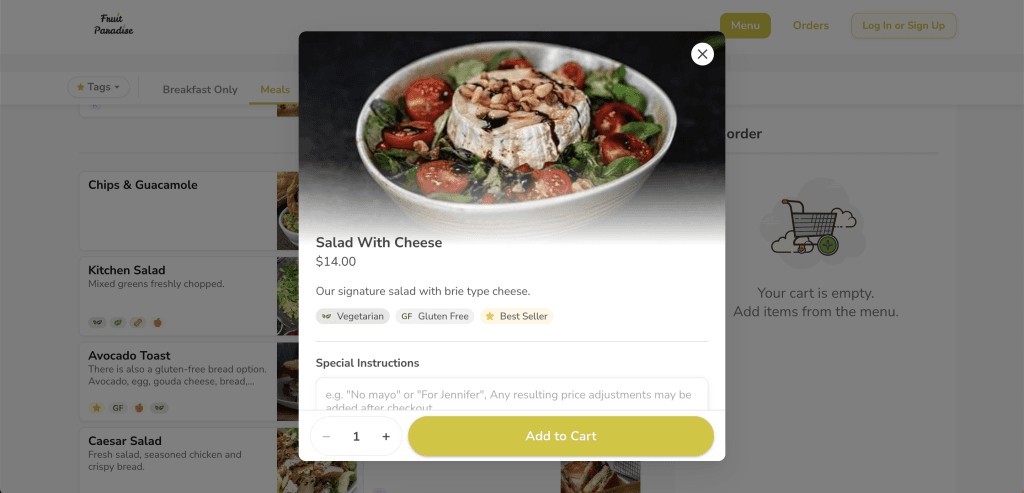
The rectangular display is used in the item detail view on Make It Butter.
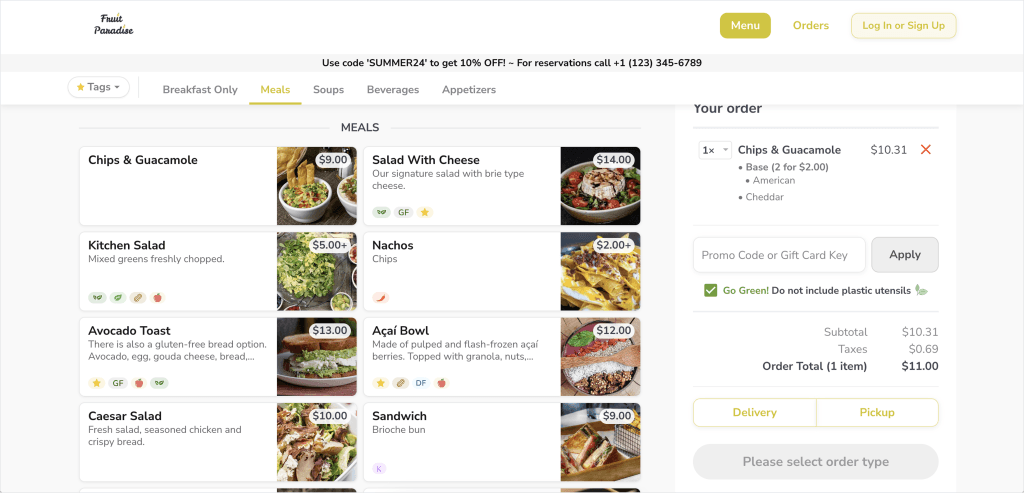
The square display is used for the product listing page on Make It Butter and Mobile Ordering.
Go through the Step 1 and Step 2 to adjust the image for each display type (rectangular and square).
If you skip one or both steps, the image will automatically default to the center portion.
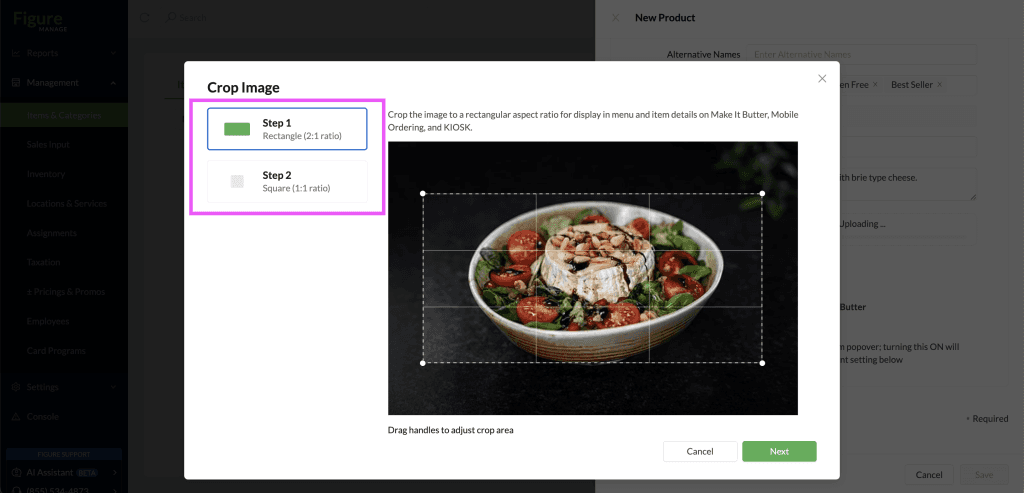
To crop the image, drag the corners of the highlighted rectangle or square.
The aspect ratio is preset, but you can freely resize the cropping area—make it larger or smaller as needed.
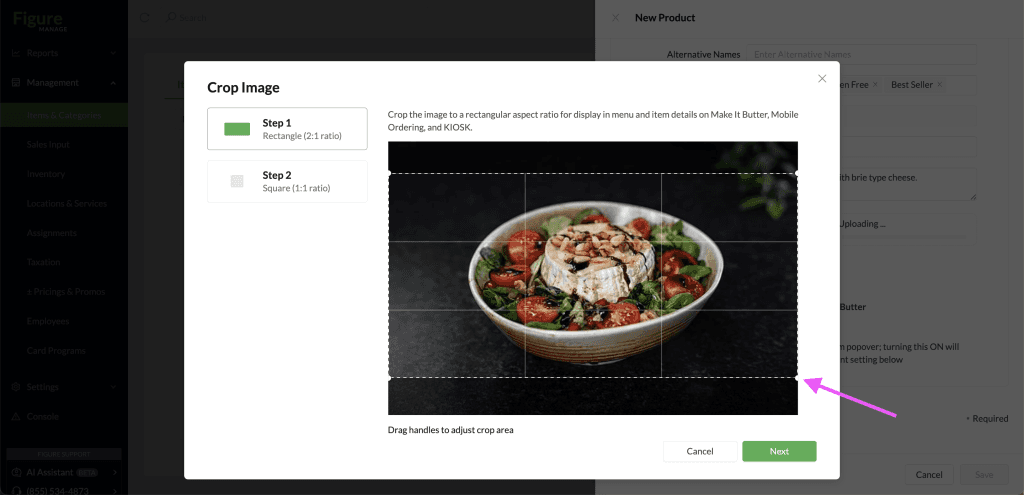
[7] Once you are done cropping both rectangle and square, click Confirm
[8] Hit Save to save the whole item configuration.
Now, when the item is added to your Kiosk or Make It Butter, its image will be displayed alongside the item.
This is how the images are displayed on Make It Butter in the product listing:
This is how the images are displayed on Make It Butter in the item detail:
Video tutorial: