Figure POS Overview — From Ordering to Kitchen and Payment

Deborah Lee
Product Manager
This guide walks through POS login, menu setup, item modifiers, sending orders to the kitchen, payments and splits, online ordering, and the self‑service kiosk.
Related Figure products

Overview
This guide walks through POS login, menu setup, item modifiers, sending orders to the kitchen, payments and splits, online ordering, and the self‑service kiosk.
Step 1: Sign In and Timekeeping
On the POS login screen, each employee signs in using a 4–6 digit PIN with role‑based permissions.
Optional: clock in/out directly from the login screen.
Step 2: Navigate and Customize the Menu
Access a customizable menu divided into up to five tabs.
Organize items into color‑coded categories; placement, colors, and icons are fully configurable.
Step 3: Build Orders with Modifiers
Ring items and apply modifiers:
Always‑show modifiers for choices (sizes, options).
Hidden background modifiers for items not yet sent.
Required modifiers that must be selected before proceeding.
Support nested modifiers (e.g., wings: size prompts sauce count).
Use gestures: swipe L→R to increase quantity, R→L to decrease/delete; tap‑and‑hold to duplicate an item with its modifiers, then edit as needed.
Add custom modifiers for special requests and price them accordingly.
Step 4: Send to Kitchen (KDS) and Printing
Tap the blue Order button to send items; sent items turn blue.
On the Kitchen Display Screen (KDS), new tickets show a green banner; aging status shifts to orange → red → blinking red.
Adjust KDS timing and color thresholds directly in KDS settings.
Figure supports thermal and impact printers alongside KDS.
Step 5: Present Check and Take Payment
Print the check when the guest is ready.
Hit Charge to open payment options:
Initialize for card (chip, tap card, tap phone).
Quick cash denominations calculate change automatically.
Tap Finish to finalize the order.
Step 6: Split Payments
Use Split Pay for complex check handling:
Custom: assign uneven amounts (e.g., $40 cash + rest on card).
Split Evenly: distribute total across multiple cards.
Split by Items: assign individual items to guests.
The UI shows which splits are paid and which still require payment.
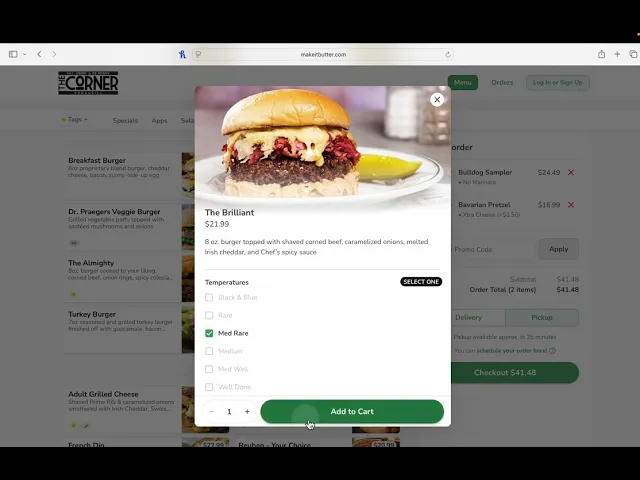
Step 7: Online Ordering (Make It Butter)
Branded storefront: client logo appears top‑left; chosen color scheme applies throughout.
Use high‑resolution images for banners and items; add item descriptions and images in the back office at figurpos.com.
Create the order, choose delivery or pickup, and complete checkout:
Phone number collected.
First‑time customers receive SMS verification.
Optional password to create an account.
Recommended: collect payment before preparation; alternative: pay upon pickup.
Staff receive a yellow badge and chime on the POS; accept/decline the order and add extra prep time if needed.
Orders flow straight to KDS with customer name.
Step 8: Self‑Service Kiosk
Customers start their own order; the kiosk shares the same pictures/descriptions as the website.
Back‑office changes (modifiers, prices, content) apply system‑wide across POS, website, and kiosk.
Checkout typically collects card payment to complete the flow without staff intervention.
Required fields include name; configure phone and email collection as needed.
Customer info entered on kiosk/website is added to your customer database for viewing and export.
Step 9: Customer‑Facing Display (CFD)
A front‑facing iPad display shows the live check, totals, signature, and tip entry to the guest.