Add items to Figure manually or import them using a CSV file. You can set prices, add modifiers or options, and then use these items to build menus for services like POS, Kiosk, or Online Ordering. It’s entirely up to you which items you choose to sell online or through your POS system.
You can add items right away or organize them into categories for easier management.
Add Items – Manually
[1] Go to Figure Manage
[2] Go to Management -> Items & Categories
[3] Hit New Item
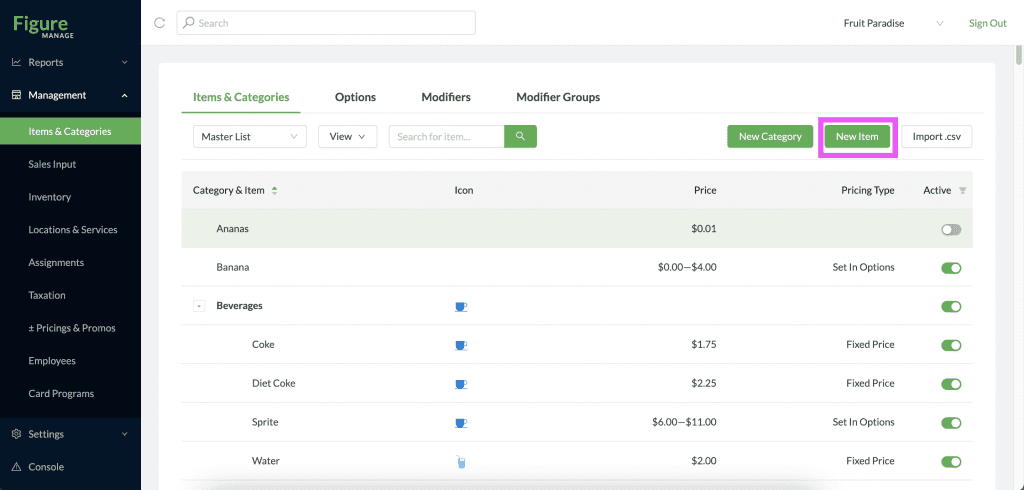
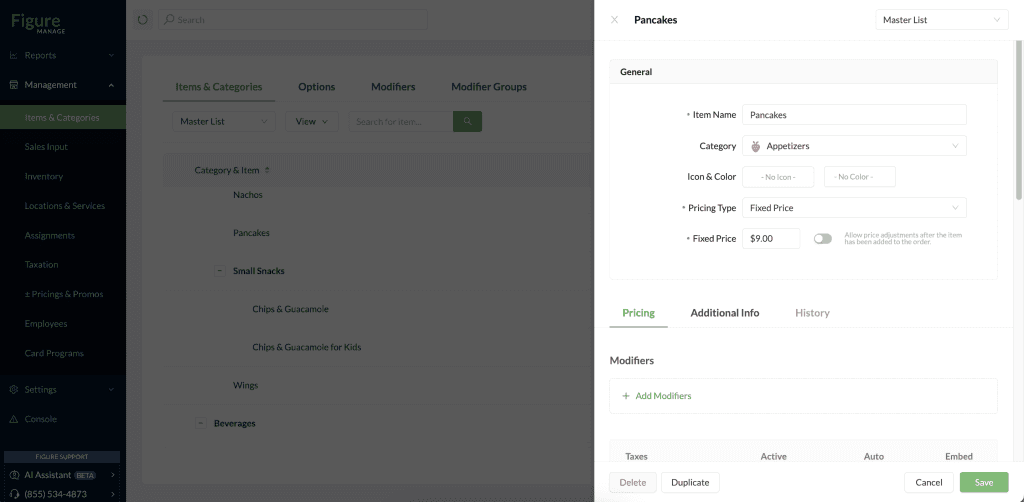
[4] Fill the item information:
Item Name*: this will be displayed at every service and receipt if not set differently in ‘Additional Info’ for each part of the system
Category: You can create categories—such as beverages, lunch, and more—to help organize your items and menus effectively. Before you can add an item to a category, the category must first be created. Alternatively, you can assign the item to any existing category later.
Icon & Color: these will be displayed in your POS
Pricing Type*: choose a pricing type
*required
[5] Add Options if needed (for ‘Set In Options’ pricing type)
Learn more about Options & Modifiers
[6] Add Modifiers if needed
Modifiers = additions, modifications or exclusions that you can add to any item.
Learn more about Options & Modifiers
[7] Set Aditional info
Display name: this name will be displayed to your customers
Register Name: this name will be displayed on your POS
Order/Kitchen Name: this name will be printed on your kitchen receipts and displayed on your Kitchen Display
Alternative Names: this helps to identify your items which might be coming from 3rd parties’ websites such as Grubhub, Doordash. In case you are selling a Banana, which is named ‘Banana’ in the Figure system, but in Grubhub system it is named ‘The Yellow Thing’, add ‘The Yellow Thing’ as an alternative name for Banana item. This way, the system will recognize it is the same item. See this article on Alternative Names.
Tags
Product Description: Add a description which will be displayed on your Online Ordering website or Kiosk. Describe ingredients, etc.
Image: Upload an image of the meal
Multiple Pieces: Use this when an item consists of several parts. This is used mostly by drycleaning services.
Contain Alcohol: When this is marked, the online ordering will always notify customers that an item they are about to order, contains alcohol.
Item Note: Item notes are allowed by default for all items. By using this setting, you can disallow adding items notes on Online Ordering (Make It Butter) or Kiosk.
Always Open Popover: When an item will be tapped on POS, the item detail will always open.
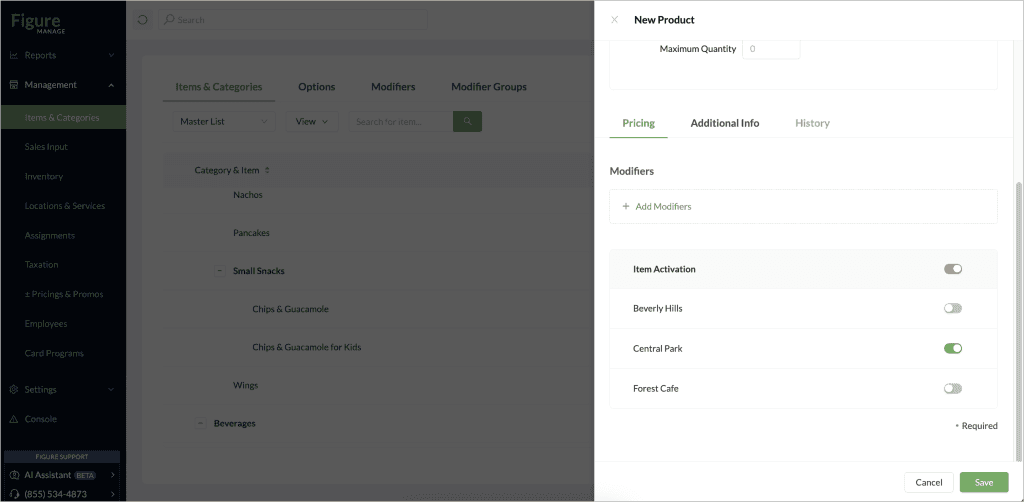
[8] Item Activation: This section is designed for businesses with multiple locations. Here, you can activate or deactivate an item for each individual location, allowing you to tailor your offerings to each store’s needs.
Add Items – CSV Import
[1] Go to Figure Manage
[2] Go to Management -> Items & Categories
[3] Hit Import.csv button
[4] Hit Download .csv to download a CSV template
[5] Open the downloaded file and fill the columns as needed
[6] When the file is completed, save it and go back to Figure Manage -> Items & Categories
[7] Hit Import .csv
[8] Choose Import .csv
[9] Choose the saved CSV filed you’ve just created
Your menu is created. You can adjust the items manually.
Note: Currently, it is not possible to download already existing menus from Figure Manage in a CSV form.