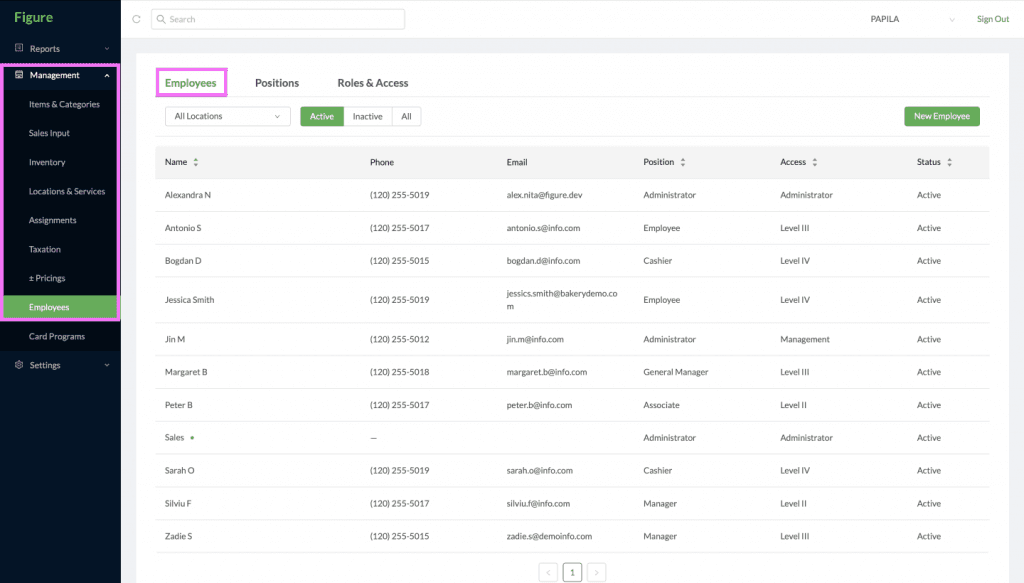
To manage your employees, you need to learn how to navigate the Employee Agenda. This agenda has three tabs:
1. Employees: where you can add, delete, edit employees and set up their details
2. Positions: where you can add, delete, edit departments and roles so that you can better organize
3. Roles & Access: where you can add, delete, edit roles and set up their permissionsEmployees tab
[1] Log into Figure Manage with your credentials
[2] Go to Management -> Employees Agenda
[3] Select Employees Tab
How to Create New Employee
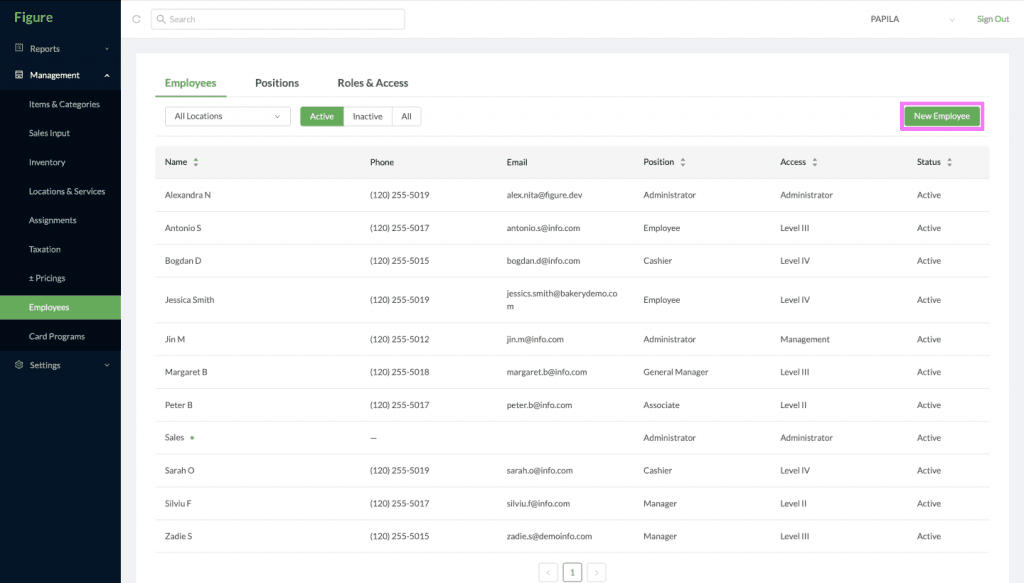
[1] Click on New Employee button
[2] Complete Employee Details as it follows:
[3] Complete Personal Info:
Name is required
Address, phone number, email, if desired

[4] Complete Credentials
Access level is required: based on this level, this employee will have certain permissions.
Info about access level and how you can customize them herePIN is required: this PIN is used by the employee to Log In into Figure POS
Employee Access Key is optional: the key is the card number that the employee is using to swipe up on the pin screen
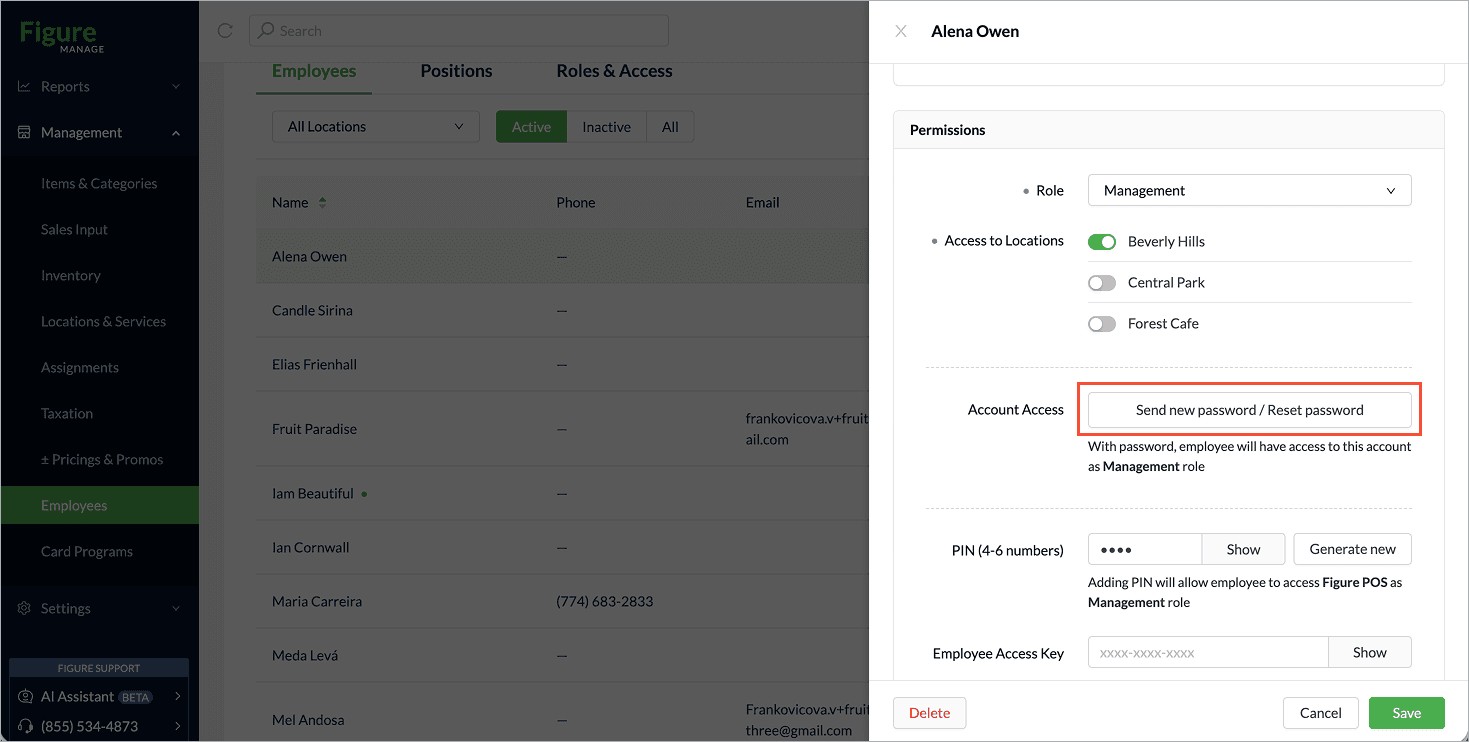
Password: in case your employee forgets the password to their Figure Manage account, you can reset it from here

[5] Complete Locations
Choose where your employee will work. You can select all locations or just one.
Based on this, the employee can or cannot log in to certain locations and if they have an access to Figure Manage, they will always have access to settings and reports of only those assigned locations.
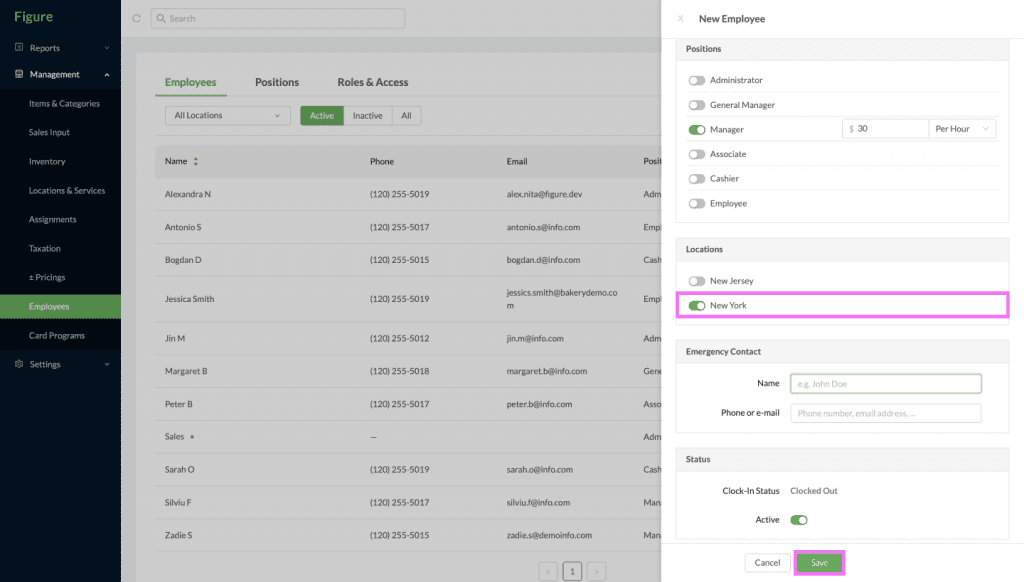
This is all the required info in order to create a new employee. You can click Save now, or continue with:
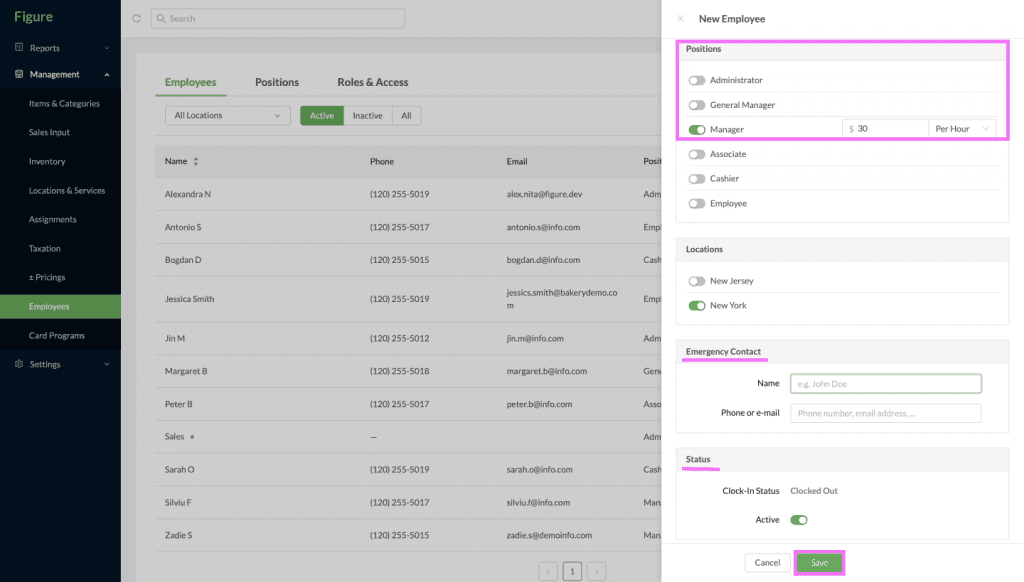
[6] Complete Positions
Position selection is optional
Default positions: Administrator, General Administrator, Manager…If you want to track your Employee Time Sheet, then you have to select one of the positions and insert the hourly pay
[7] Complete Emergency info
If desired
[8] Active or Inactive status
Choose if your employee is active or inactive. The active state allows the employee to log into POS with their PIN, as well as clock in/clock out, while the inactive status will disallow it
[9] Click Save
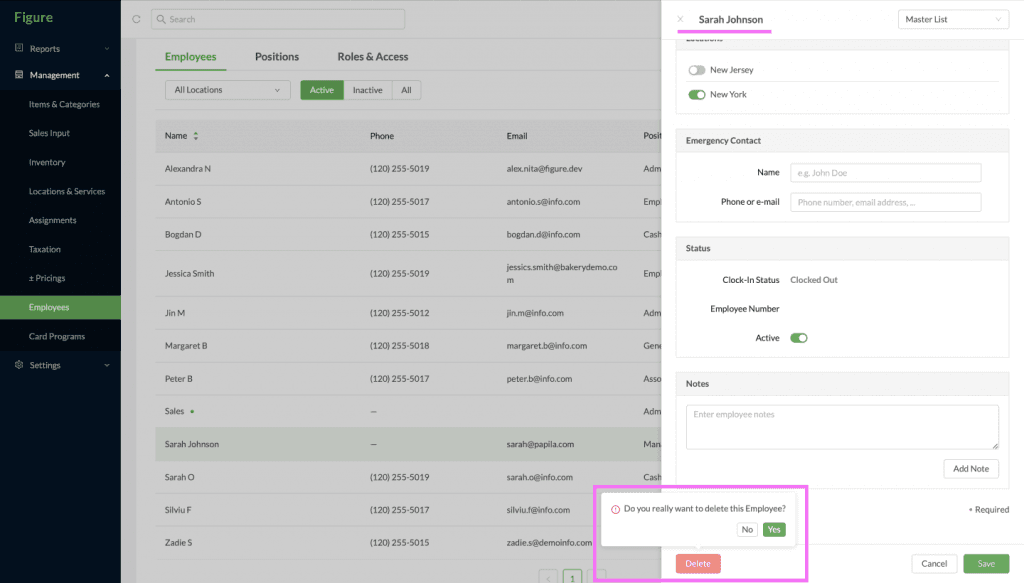
How to Delete Employee
[1] Click on an existing Employee Name
[2] Click on Delete button
[3] Confirm that you want to delete the employee
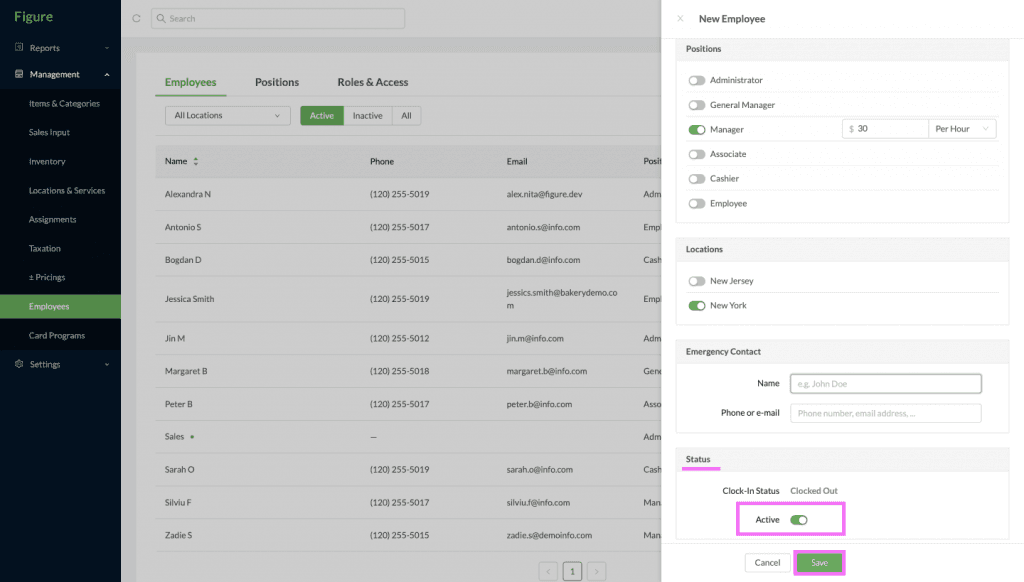
Make Employee Active/Inactive
[1] Click on and existing Employee name
[2] Scroll down to Status section
[3] Switch the Active toggle as needed
Green means active
Grey means inactive
How to edit Employe Details
[1] Click on Employee Name
[2] Edit any field with the new details you want
[3] Click on Save
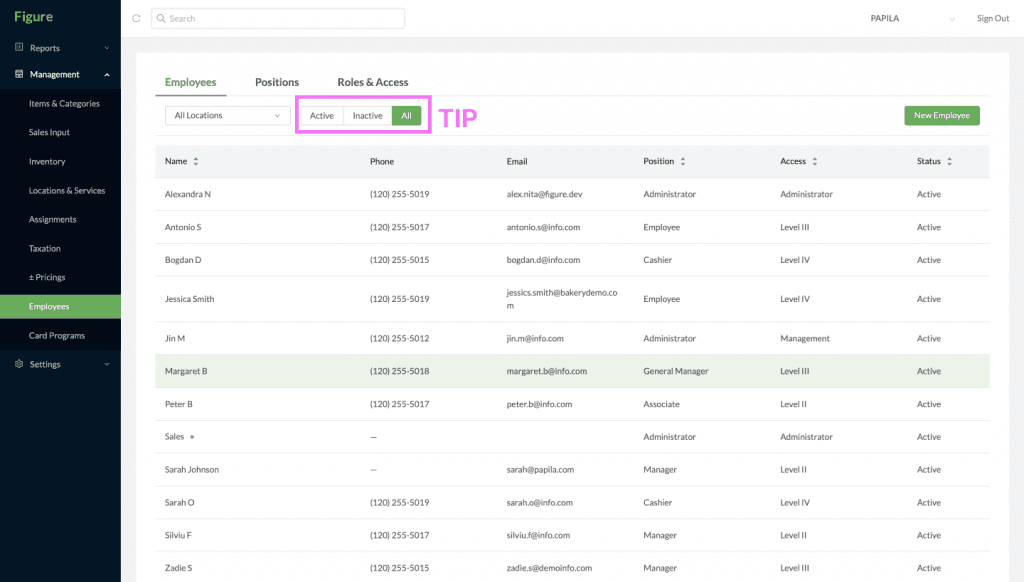
Tip: Filter between active and inactive employees using the Active/Inactive/All buttons
Positions
Positions, once created, can be selected in Employee details.
After you create a new Position or Department, you can go to Employee Details and update it.
After you select a specific position for an employee and enter the hourly pay, you can track the payroll and monthly timesheet in timesheet agenda.
[1] Log into Figure Manage with your credentials
[2] Go to Management -> Employees Agenda
[3] Select Positions tab
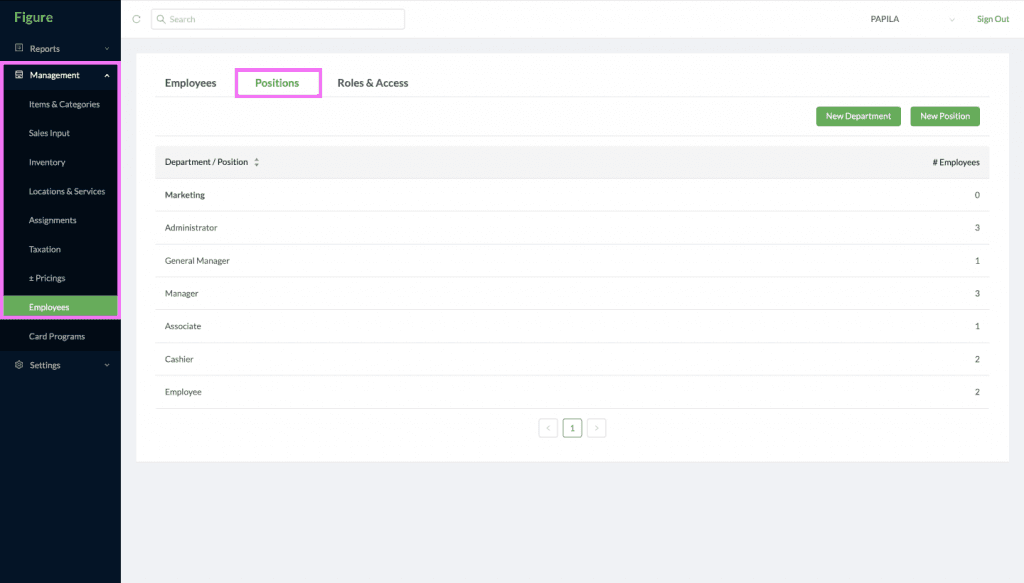
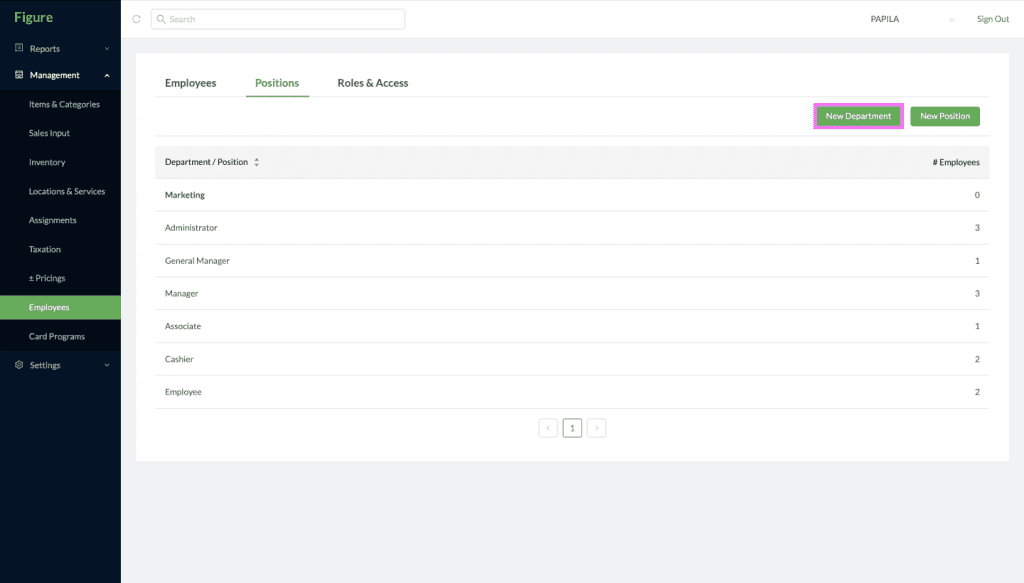
Create New Department
[1] Click on New Department button
[2] Insert Department Name and click on Save
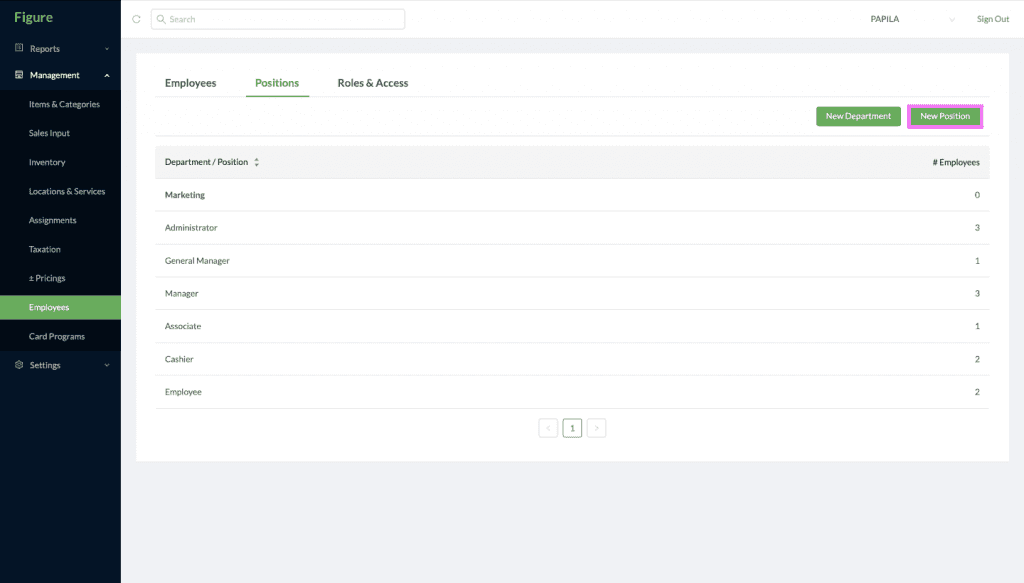
Create New Position
[1] Insert Position Name
[2] Choose a specific Department or leave it as “no department”
[3] Click on Save
Edit Existing Department/Position
[1] Click on the Department/Position name
[2] If desired, rename it
[3] If desired, delete it
Roles & Accesses
Based on their role, every employee has access to certain agendas and actions.
You can manage exactly what kind of access every role/employee has from this agenda. Some permissions restrict the action completely and some actions can still be executed by swiping an employee card or inputting a PIN of an employee that has the permission to execute the action.
After you set the roles, you can go back to the Employee tab and assign definite roles to employees.
[1] Log into Figure Manage with your credentials
[2] Go to Management -> Employees Agenda
[3] Select Roles & Accesses tab
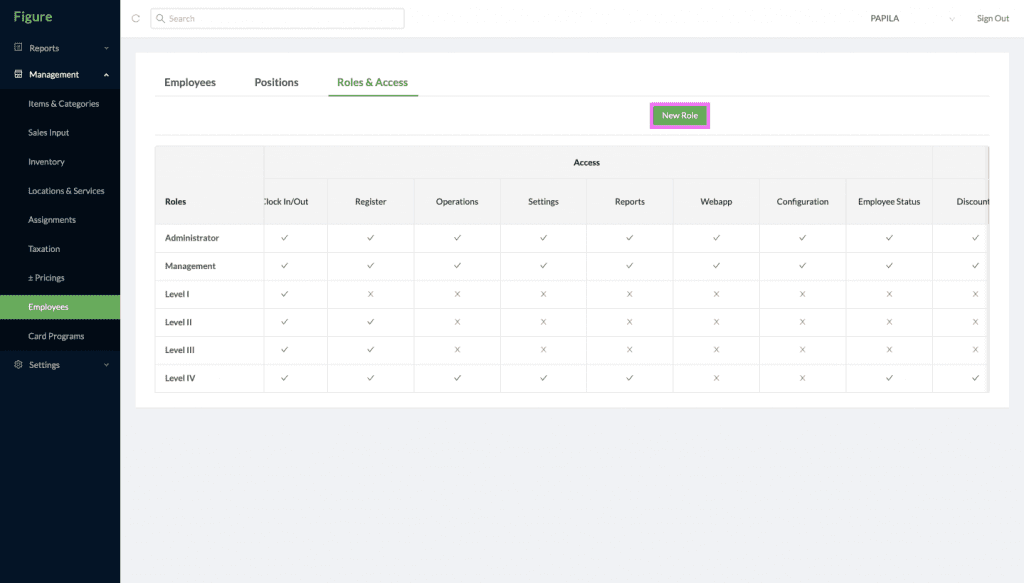
You can see a table with all the roles and their access permissions.
Learn more about the individual permissions here.
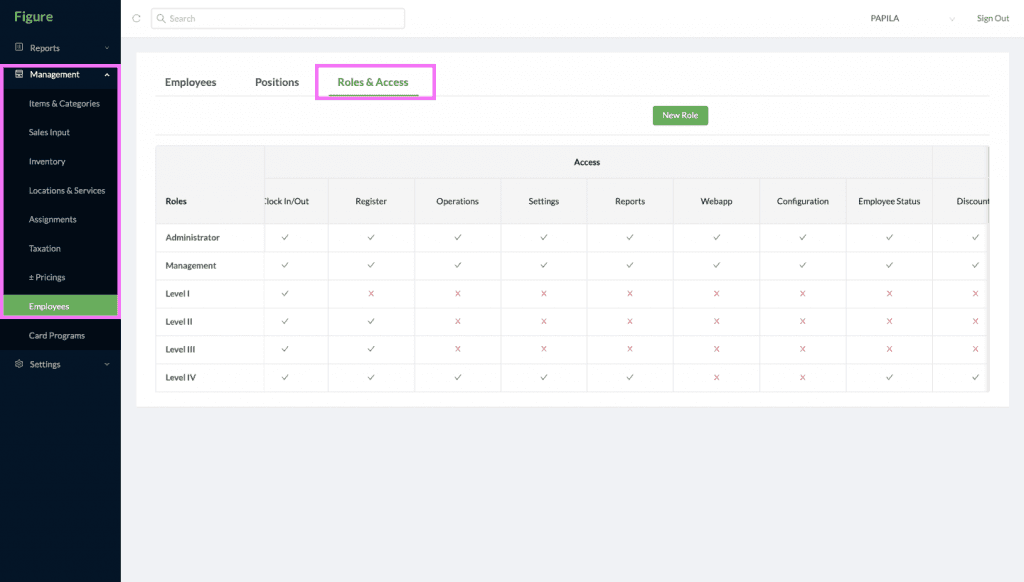
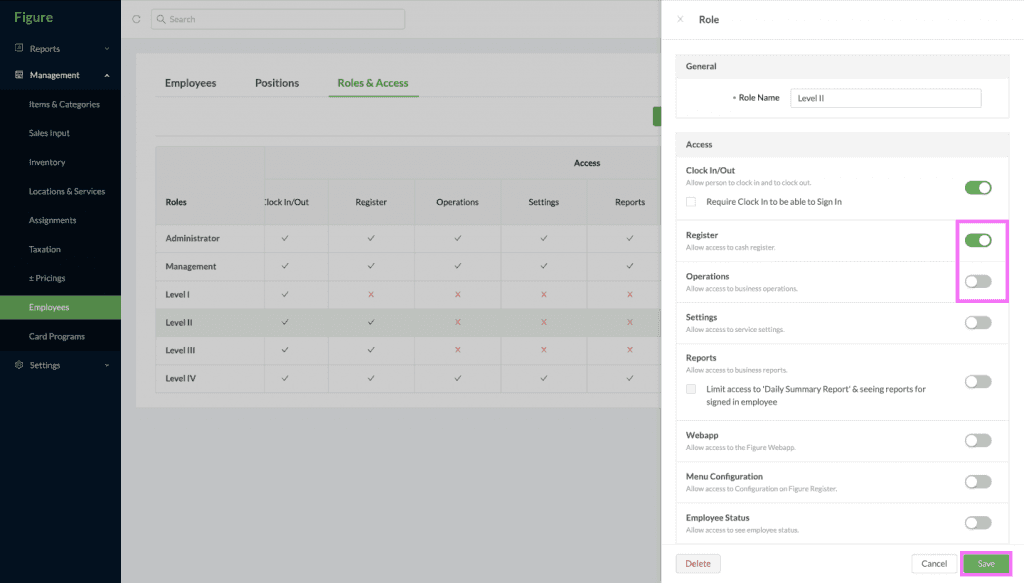
Edit Roles
[1] Click on a Role name
[2] Rename the Role Name, if desired
[3] Toggle with the switches on/off depending on what access you want to enable/disable for that Role
[4] Click on Save
If you want to delete this role, click on Delete button
Create New Role
[1] Click on New Role button
[2] Insert Role name is required
[3] Toggle with the switches on/off depending on what access you want to enable/disable for that Role
[4] Click on Save
List of permissions:
Permission | Description | Applies To | Always actionable with mng’s PIN |
|---|---|---|---|
Clock In/Out | Allows to clock in / out | POS | ✖ |
Register | Allows access to Register (iPad) | POS | ✔ |
Operations | Allows access to Operations agenda | POS | ✖ |
Settings | Allows access to Settings agenda | POS | ✖ |
Reports | Allows access to Reports agenda | POS | ✖ |
Limit access to Daily ‘Summary Report’ & seeing reports for signed in employee | The employee can see only Daily Summary report, not other reports. In the Summary, the role cannot see records for other employees. | POS | ✖ |
Figure Manage | Allows access to Figure Manage | Figure Manage | ✖ |
Menu Configuration | Allows access to Configuration agenda | POS | ✖ |
Employee Status | Allows access to see employee status in POS > Menu > Status > Employee | POS | ✖ |
Employees | Allows access to see Employees agenda | Figure Manage | ✖ |
Numerical Input | Allow access to the Numerical Sales in Figure Register | POS | ✔ |
Discounts | Allows role to apply or to approve price modifications by adding or removing a Special Pricing | POS | ✔ |
Taxes | Allows role to change tax rate | POS | ✔ |
Refunds | Allow role to refund orders or to approve refund requests. | POS | ✔ |
Voids | Allow role to void orders or to approve void requests | POS | ✔ |
Cash Payment | Allow role to perform Cash Payments | POS | ✔ |
No Sales | Allow role to perform ‘No Sale’ transactions | POS | ✔ |
Disable employee from seeing a cash balance | Disallow role to see the cash balance in No Sale agenda. | POS | ✖ |
Change Assignee | Allow role to change assignee in an order. | POS | ✔ |
Change Assignment | Allow role to change assignment in an order. | POS | ✔ |
Change Customer | Allow role to change customer in an order. | POS | ✔ |
Skip Signature | Allow role to skip signature screen. | POS | ✔ |
Service | Allows role to activate a new location on POS | POS | |
Close Account | coming soon | coming soon | coming soon |
Re-Open Closed Order | Allow role to re-open closed orders | POS | ✔ |
Merge Orders | Allow role to merge orders/tables. | POS | ✔ |
Transfer Items | Allow role to transfer items between orders/tables. | POS | ✔ |
To Be Assigned as a Driver | Allow role to be assigned as a driver | POS | ✖ |
Create Custom Item | Allow role to add Custom Items to order | POS | ✔ |
Adjust Fixed Price | Allow role to adjust price of fixed priced items in POS. (Also, that particlar item has to have this enabled in the item detail in Items & Categories) | POS | ✔ |
Delete Items from Printed Checks | Allow role to delete items from printed checks in POS | POS | ✔ |
FAQ
How to add a new Manager and grant access to Figure Manage
In short:
Create or edit the employee.
Assign the appropriate Role and Position. The Role must have permission to access Figure Manage.
Send the employee a link to create their password for Figure Manage.
If you need to give a new manager access to Figure Manage, first make sure they have been added as an employee. If they haven't been added yet, follow the How to create a new employee section above.
Once the employee has been created, assign the appropriate Role and Position. The Role determines which permissions the employee has. To give them access to Figure Manage, make sure the relevant permission is enabled for their Role. See How to edit Permissions.
Finally, the employee needs to set up a password to log in to Figure Manage. In the employee details, click Send new password / Reset password. The employee will receive a link that they can use to create or reset their password.