The steps for closing out the day differ depending on whether you’re using the Virtual Till or not. Follow the instructions below based on your setup. Each step is described in detail below.
When utilizing Virtual Till
Step 1: Close Checks
Step 2: Declare Cash Tips
Step 3: Adjust Card Tips
Step 4: Reconcile Cash and Tips
Step 5: Close Till & Clock Out
When not utilizing Virtual Till
Step 1: Close / Finalize Orders
Step 2: Adjust Tips
Step 3: Pay Out Cash
Step 4: Print Out the Daily Summary Report
When utilizing the Virtual Till
See this article to learn more about Virtual Till and Shift Review, including how to set it up.
When utilizing the Virtual Till, you perform a Shift Review for each employee to close out the day. See the steps described in detail below:
To perform the Shift Review, go to POS > Menu > Operations > Shift Review
There, you’ll find the steps you need to take to close the shift.
The receipt on the left side updates dynamically based on the values you enter during each step.

Step 1: Close Checks
You can see how many Open / Closed checks there are created during that shift. By clicking the VIEW OPEN CHECKS button, you will be redirected to the order list with the open orders in order to finalize them.
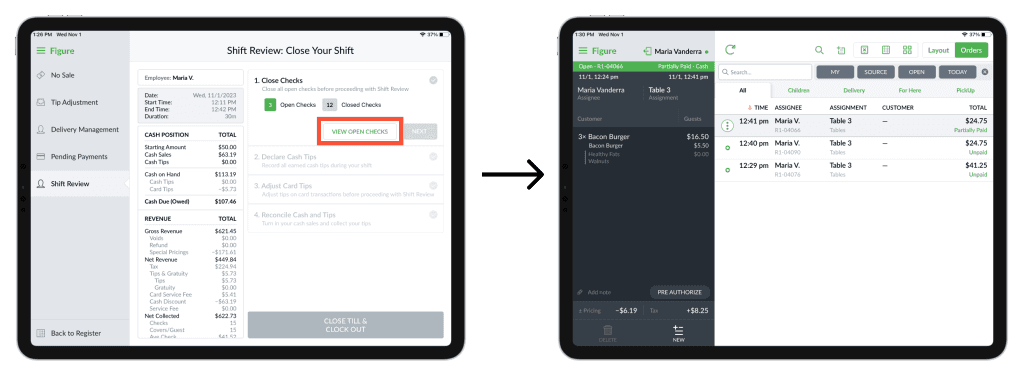
It is possible to proceed to the next step after this one is completed = all checks are closed.
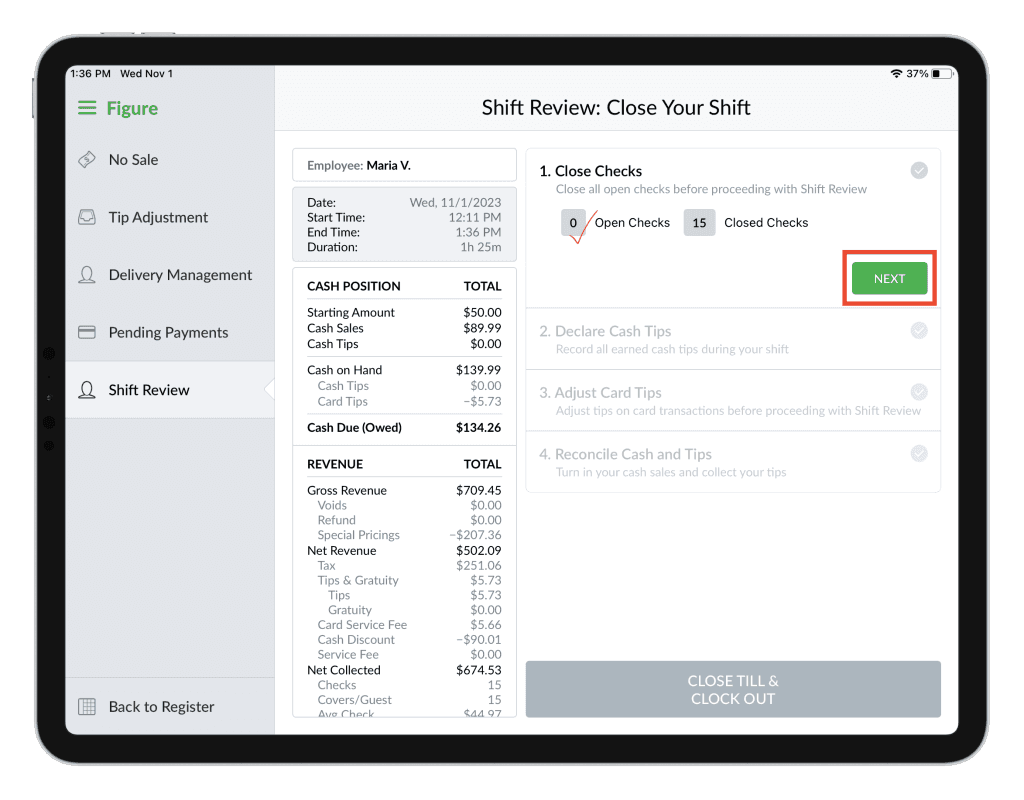
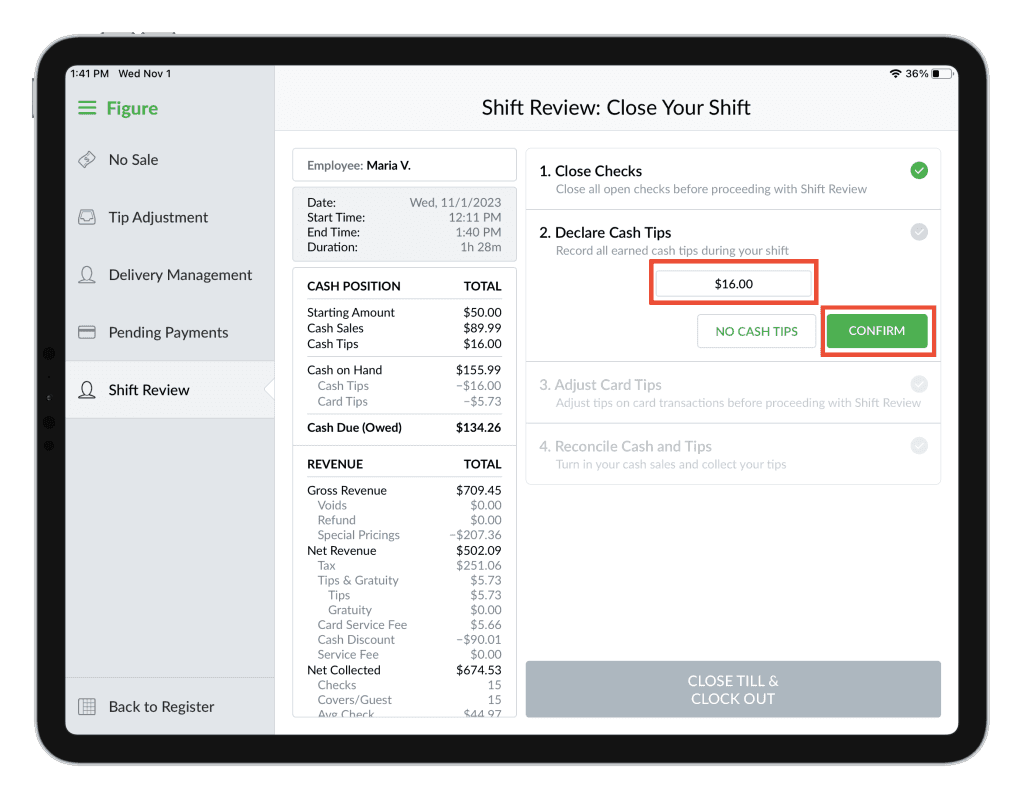
Step 2: Declare Cash Tips
To record all earned cash tips during the shift. Press NO CASH TIPS if there were none received or add the cash tips and press CONFIRM.
Step 3: Adjust Card Tips
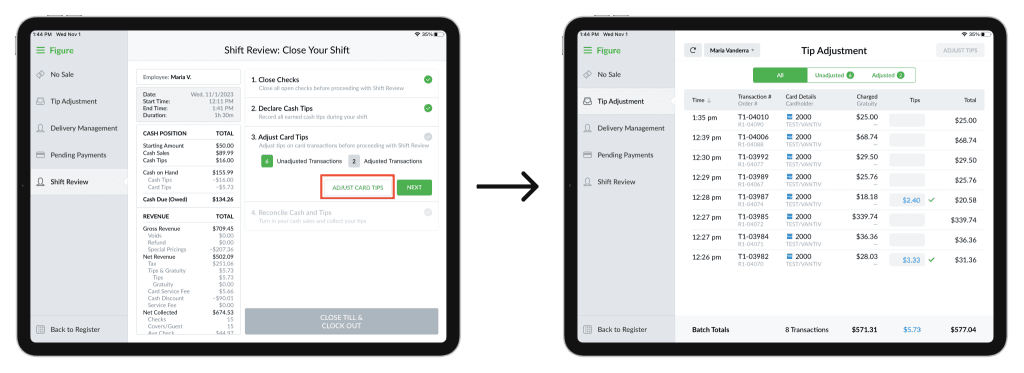
If there are any card transactions without a tip, you can use the button ADJUST CARD TIPS which will redirect you to the Tip Adjustment screen. Learn more about tip adjustment in this article.
Adjust the tips or confirm that all orders have the tips already adjusted by pressing NEXT.
Step 4: Reconcile Cash and Tips
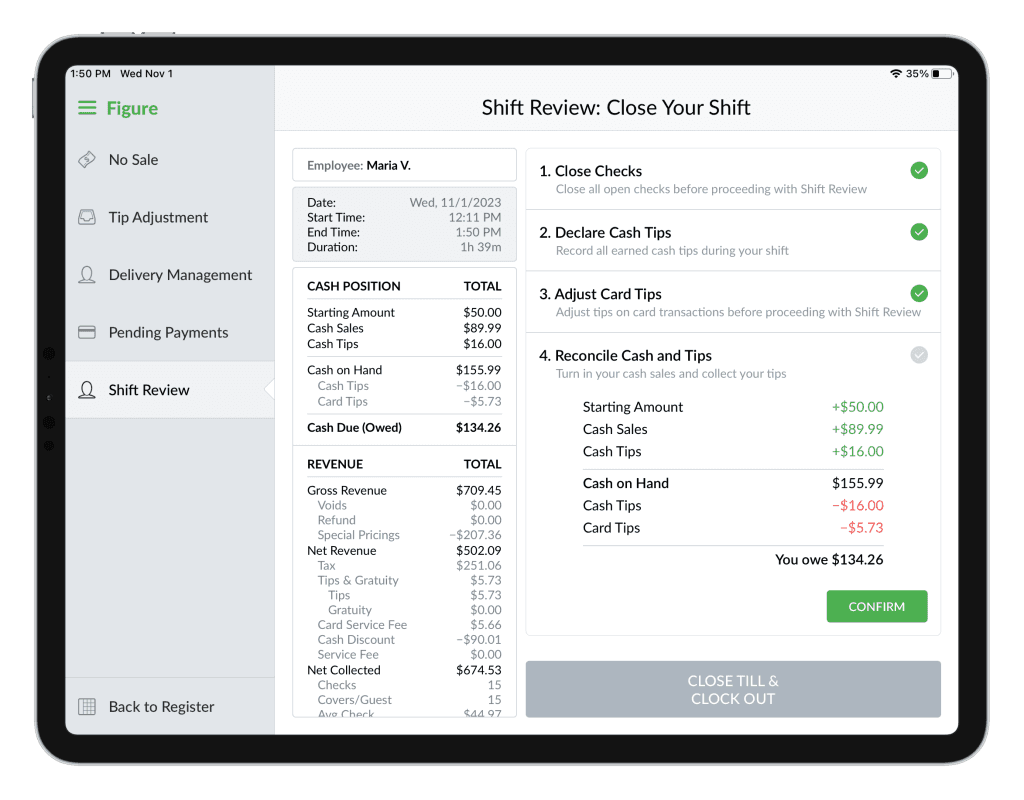
Step 5: Close Till & Clock Out
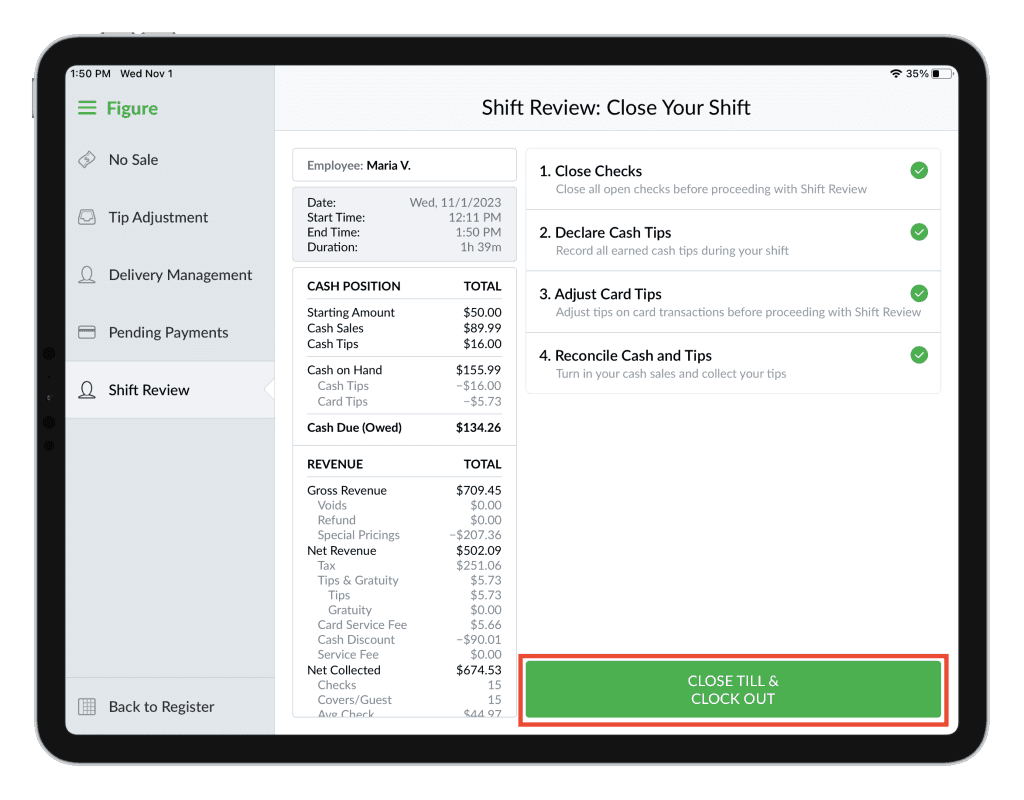
After all the previous steps are completed, press the CLOSE TILL & CLOCK OUT button.
The till will be closed, employee will be clocked out and the receipt with the shift review will be printed, along with the clock-out receipt.
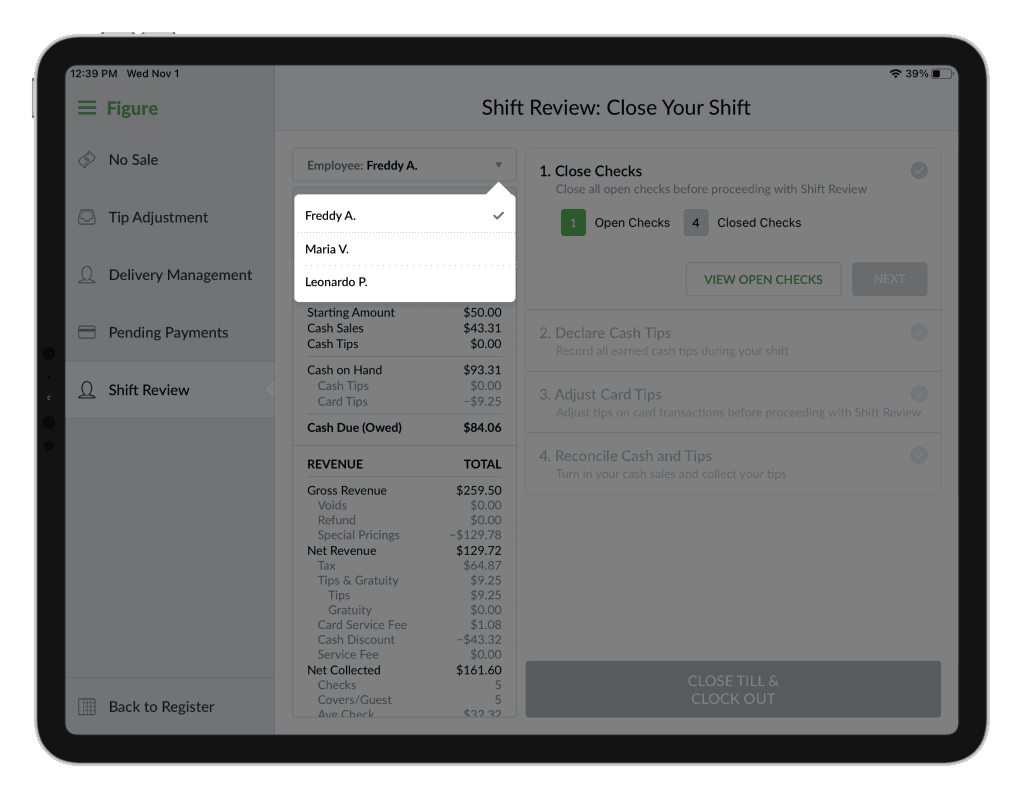
Manager’s view of the Shift Review
Managers or employees who have the Manage Shift Reviews permission enabled, can see and perform shift reviews for other employees. The manager can select an employee they want to view the shift review for.
See this article to learn more about Virtual Till and Shift Review, including how to set it up.
When not utilizing the Virtual Till
These are recommended steps to take to close out the day:
Step 1: Close / Finalize Orders
[1] Go to the POS > Orders list, and look for open orders. You can either filter out all open orders by tapping on STATUS at the top and choosing OPEN, or scroll through orders and look for the open ones (green circle = open, grey checkmark = closed / finalized)
[2] Double tap on the open order and hit FINALIZE
Step 2: Adjust Tips
There are two ways how to adjust tips:
1️⃣ Adjusting tips in the order detail:
Open the paid order by double-tapping it.
Tap the ADJUST TIP button at the bottom.
Enter the tip amount in the TIPS + GRAT field.
Tap the ADJUST BY [amount] button to confirm.
2️⃣ Adjusting tips in batch:
Navigate to POS > Menu > Operations > Tip Adjustment.
Enter the tip amounts in the Tips column.
When finished, tap ADJUST TIPS to apply the changes.
See this article about tip adjustment.
Step 3: Pay Out Cash
For each terminal with a cash register assigned, perform a cash Pay Out by navigating to: POS > Menu > Operations > No Sale > Pay Out.
See this article about Cash Pay Out / Cashdrop
Step 4: Print Out the Daily Summary Report
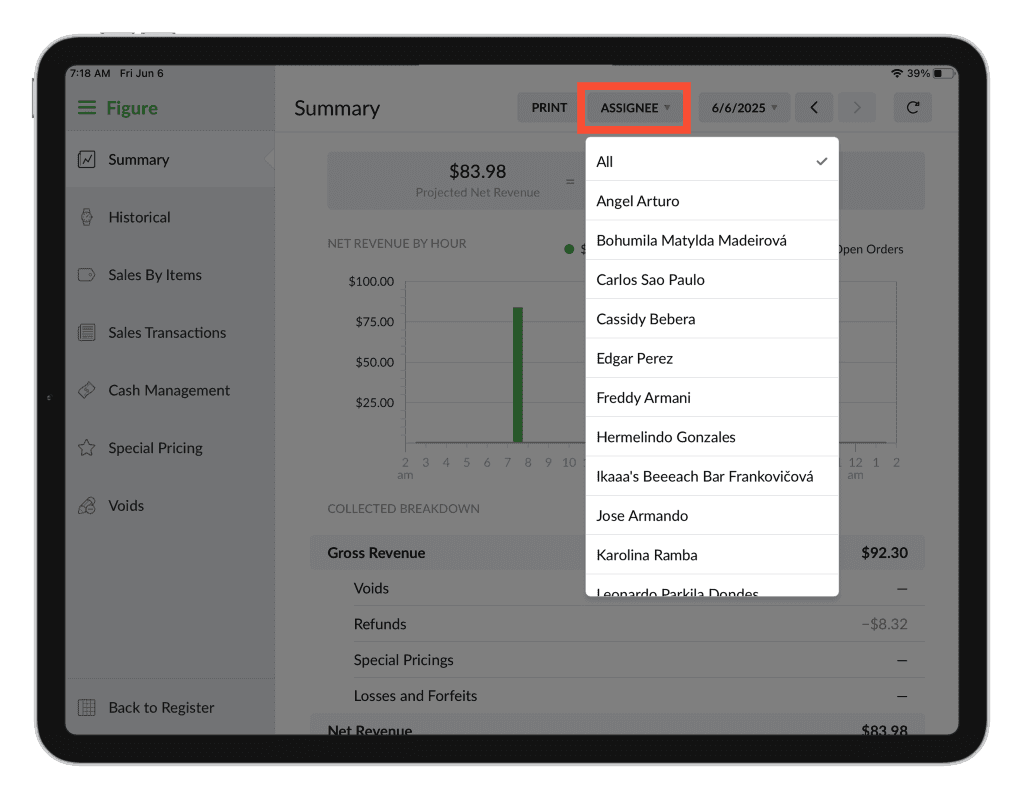
Navigate to POS > Menu > Reports > Summary and tap PRINT at the top.
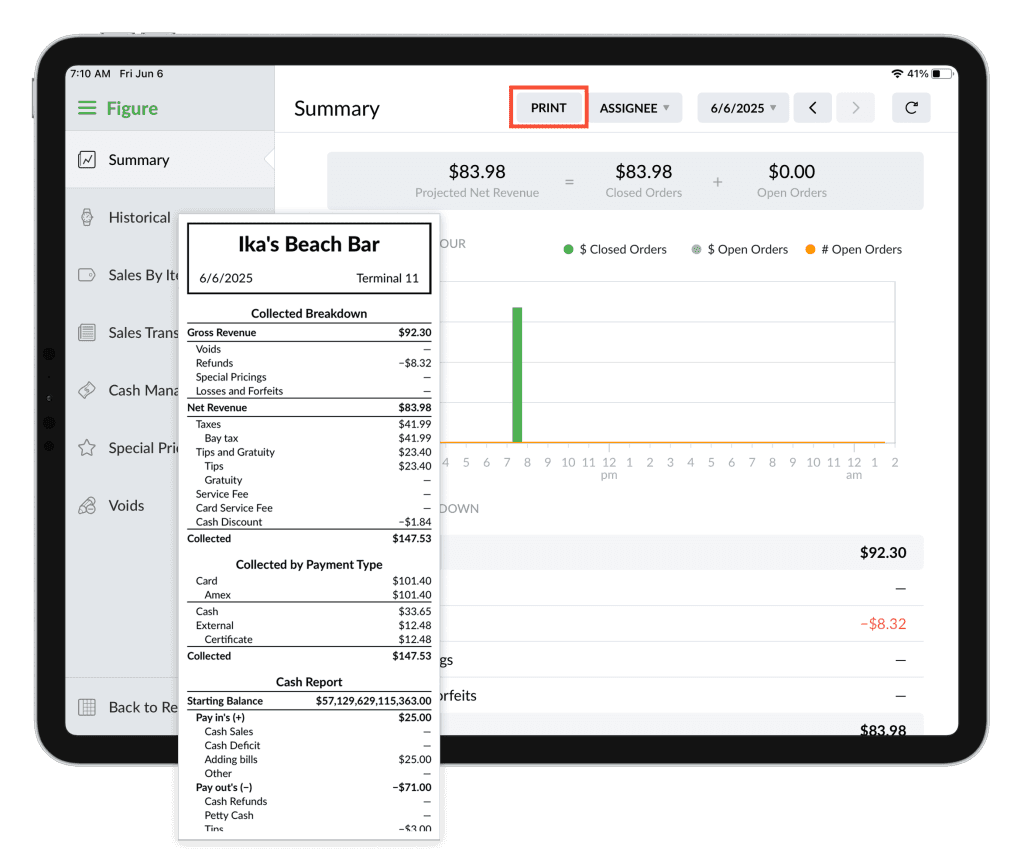
From there, select the type of reports you’d like to print.
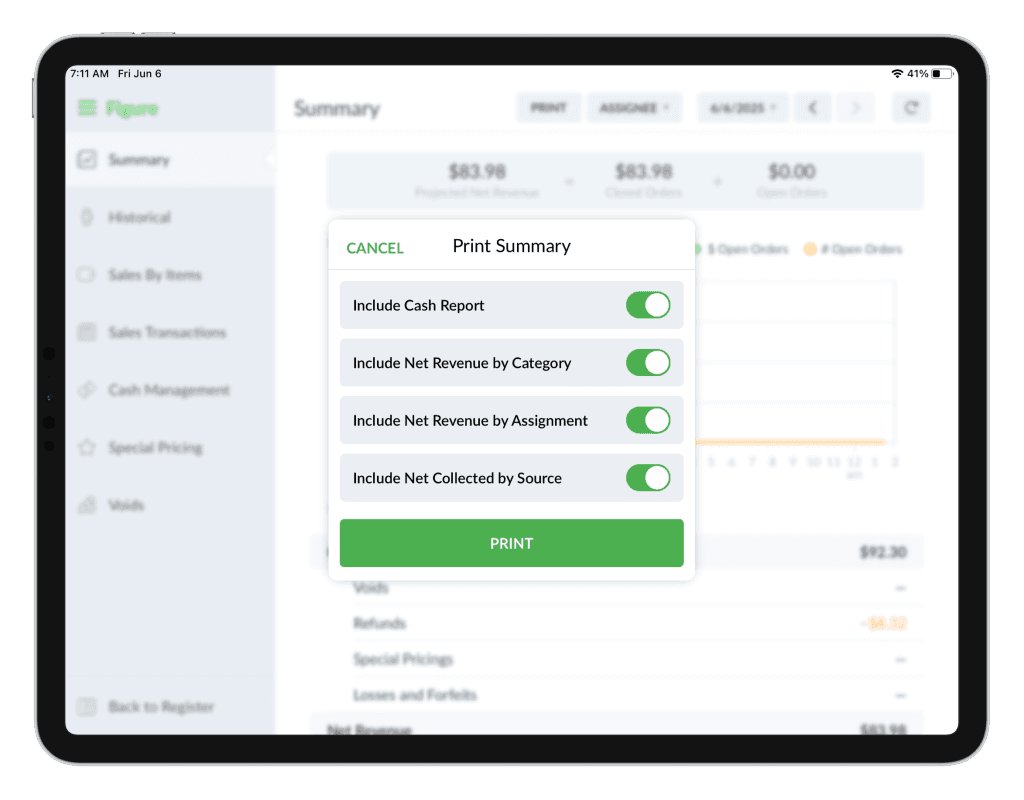
You can also select for which assignees you want to print the report for – to easily see their sales and earned tips.
This report can be printed from any terminal — it summarizes data from all terminals into a single printout.