If your business is growing, then you probably need to expand to new locations. That is great!
Below is a step by step guide showing how to create new locations and services in Figure.
Introduction to Locations and Services
Basically, if you are expanding to a new city or to a new location, or if you just started your account with Figure, then you need to:
[1] Create and manage new Locations
[2] Create and manage new Services (see how)
Service = POS, Kitchen Display, Kiosk, Make It Butter, etc
Services are always created within a location
How to create a New Location
[1] Log into Figure Manage website with your credentials and go to Management -> Locations & Services
[2] Click on New Location
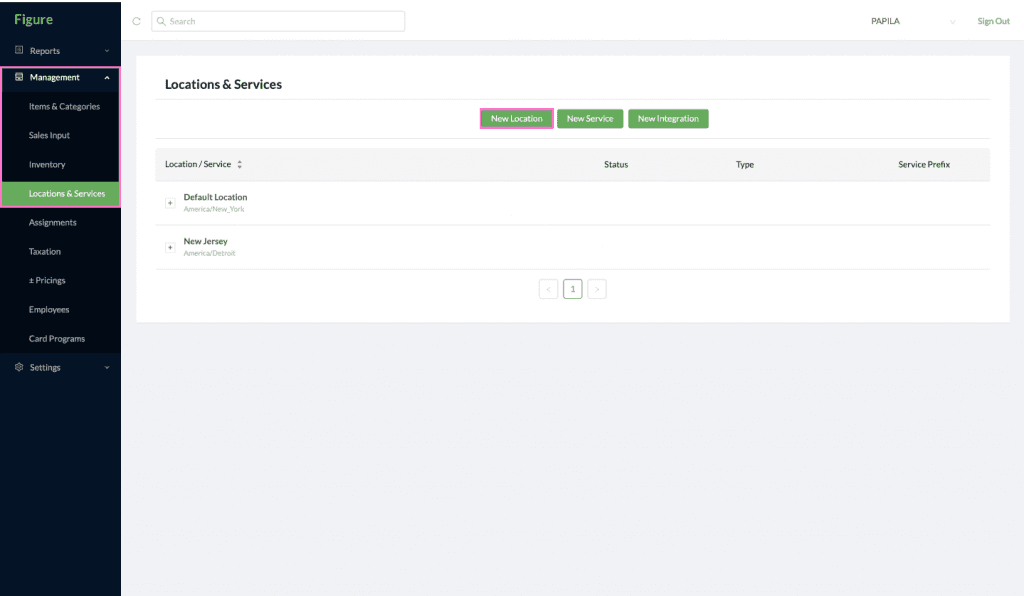
[3] Write Location Name
[4] Choose Location Time Zone. (If the location is outside of New York)
[5] Click On Save
You just created a new location. Right now you can use this location in order to:
Manage your Address for Delivery settings
Manage your Phone and Email to receive notification about incoming Online Orders
Manage your Hour of Operations for the Online Ordering
Manage your Custom Temporary Hour of Operation for the Online Ordering
Set up new services (POS, KIOSK, Online Ordering, KDS ). Learn here how to create New Services
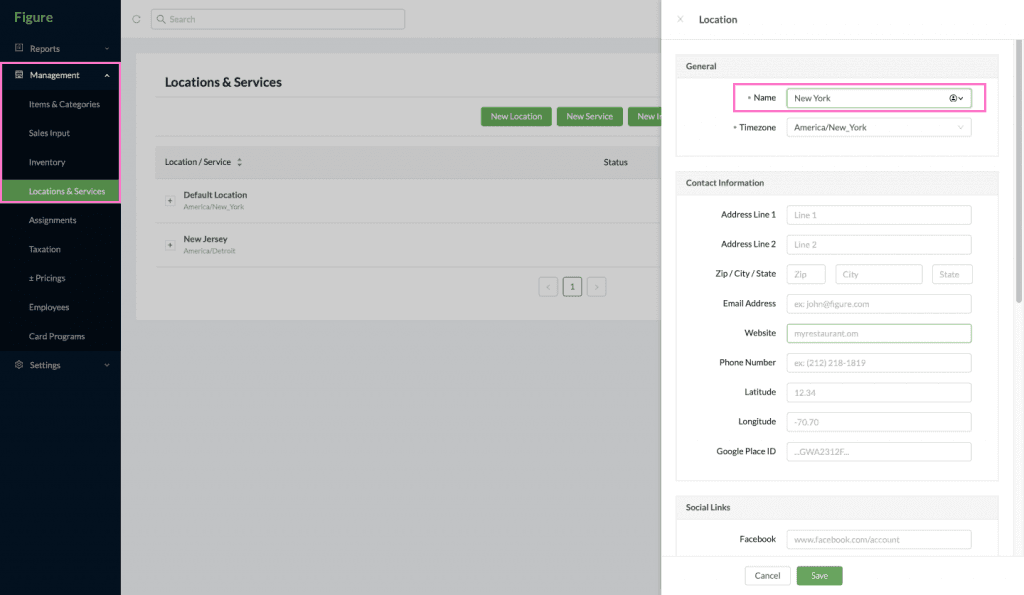
How to fill Location data
[1] Log into Figure Manage website with your credentials and go to Management -> Locations & Services
[2] Click on a Location Name
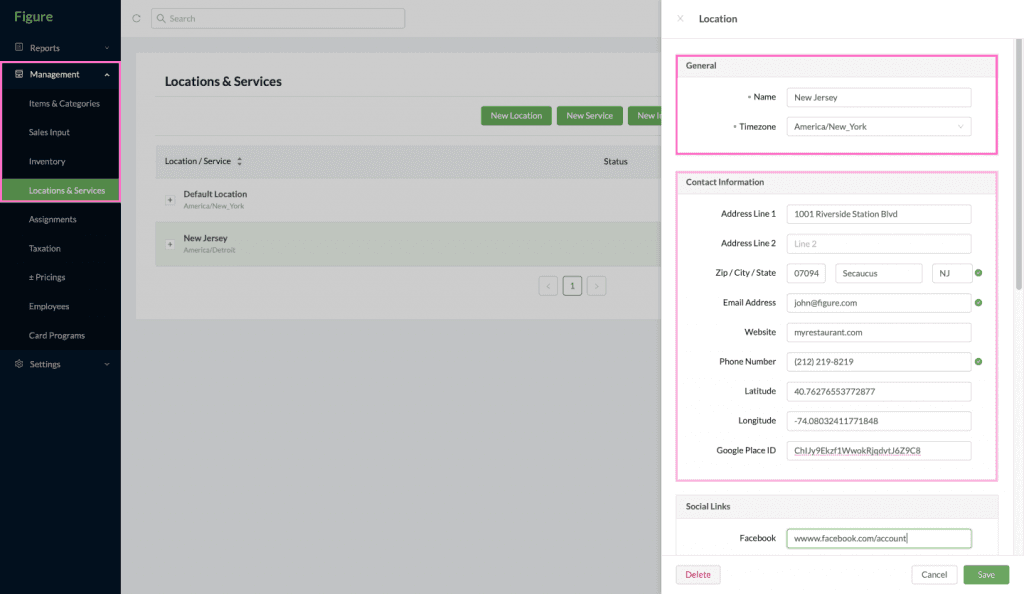
[3] Write down your Address (this address will be used for Delivery and it will be displayed on your online ordering)
[4]Write down your Email address (this address will be used so that you can get e-mail receipts and notifications about incoming orders)
[5]Write down your Website (this will be displayed on your online ordering for incoming orders)
[6] Write down your Phone Number (this will be used for SMS notifications for incoming orders)
[7] Insert Latitue & Longitude (this info will be used for delivery purposes)
[8] Insert Google Place ID (this info will be used for delivery purposes, so that drivers can find your restaurant)
[9] Insert your Social links (this will be displayed on the Online Ordering)
[10] Set Hours of Operations (this will be used for the online ordering hours of operation)
[11] Set Temporary Custom Hours of Operation, if needed
How to fill Latitude & Longitude
[1] Go to Google Maps
[2] Log into Figure Manage website with your credentials and go to Management -> Locations & Services
[3] Insert your Address in Google Maps
[4] Right Click on the red pin on the map (see image below)
[5] Copy the numbers that show in the first row

[6] Paste these numbers into your Figure Location
You will notice that one number is negative (-) and one number is positive
[7] Paste the positive number in Latitude field
[8] Paste the negative number in Longitude field
[9] Click on Save
How to fill Google Place ID
[1] Go to Google Place ID finder:
[2] Write down your address
[3] Go to Management -> Locations & Services
[4] Click on a Location Name
[5] Select the pre filled address that appears
[6] Copy the Google Place ID that will show (image below)
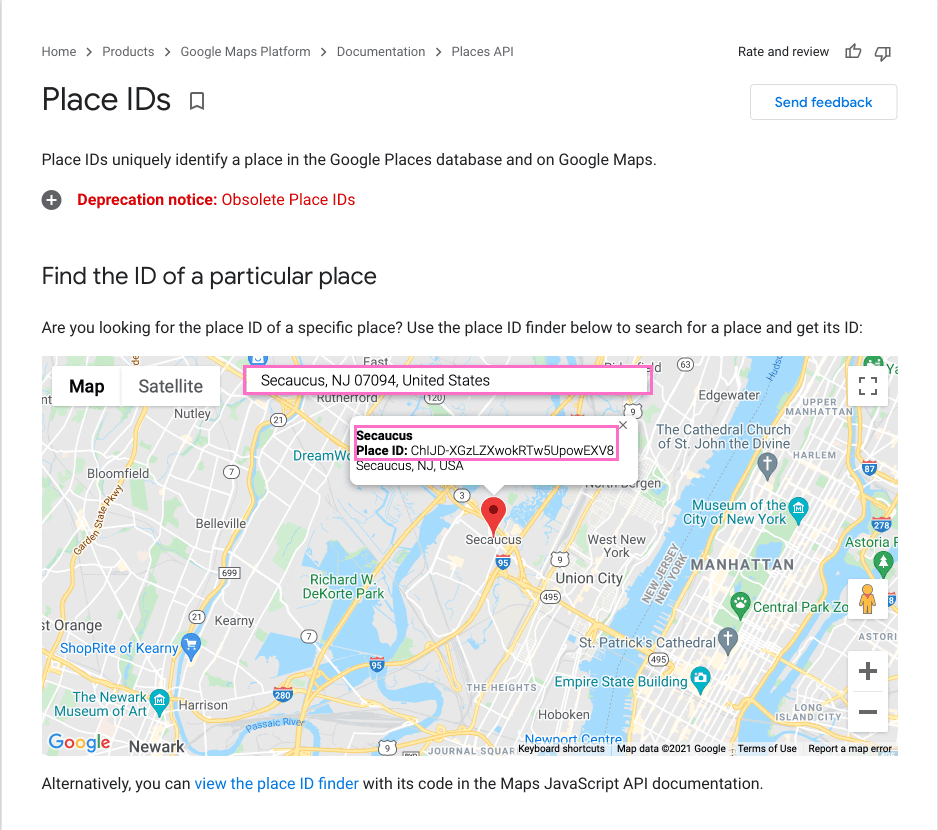
[7] Paste your Google Place ID into your Figure Location
[8] Click on Save
How to fill Social Links
[1] Go to your Facebook page
[2] Click on your profile picture
[3] Copy the webpage link from the search bar

[4] Paste the link into your Figure Location
repeat the steps for above for Instagram and Twitter account
Hours of Operation
[1] Log into Figure Manage website with your credentials. Go to Management -> Locations & Services
[2] Click on a Location Name
[3] Scroll down to Hours of Operations
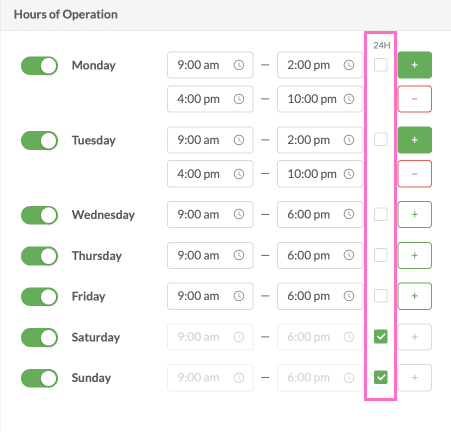
[4] Based on your hours of operations, set the hours in this section (photo below)

[5] You can make your business open all-day by checking the 24hour checkmark
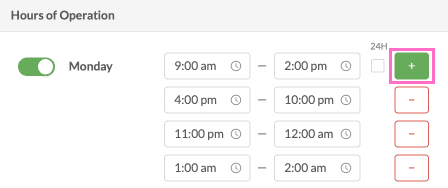
[6] You can add multiple hours of operations for the same day
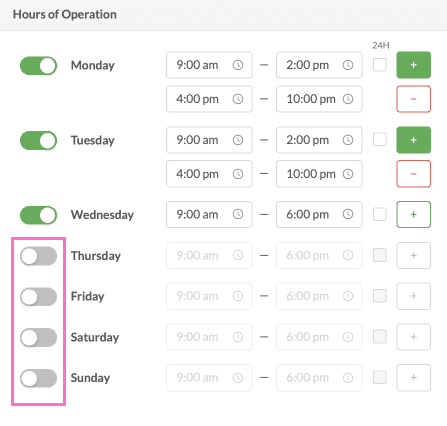
[7] If you have days when your business is closed all day, you can disable the day by switching off the toggle button
Custom Temporary Hours of Operation
Learn how to set Custom Temporary Hours of Operation + other Hours of Operations
How to make the New Location Active
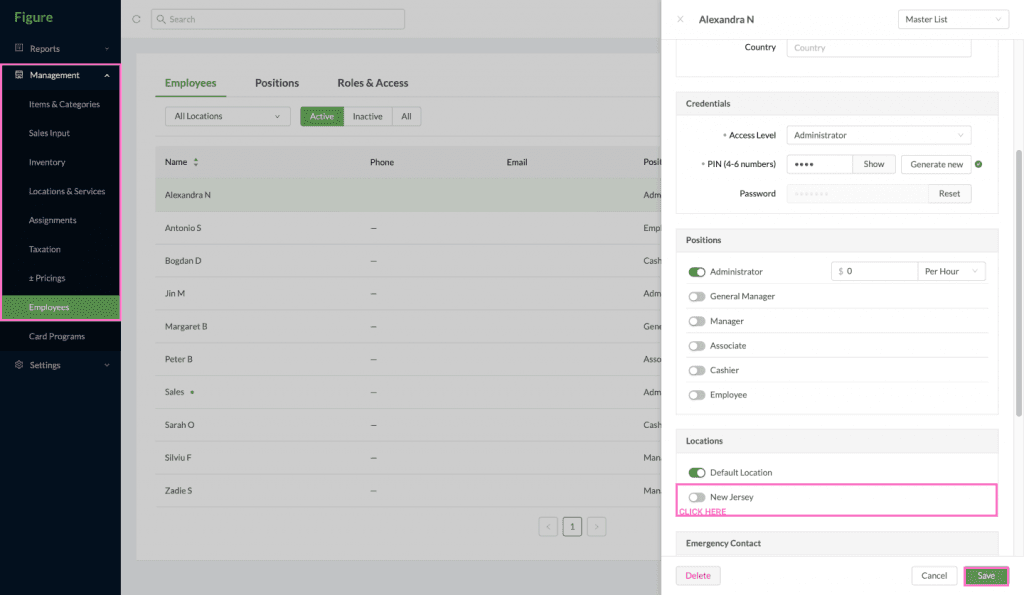
[1] In order to make the Location Active, you need to assign an employee to that Location
[2] Log into Figure Manage website with your credentials. Go to Management -> Employees
[3] Click on an Employee. For starters, choose your name = Administrator
[4] In Employee Details, go to Locations part
[5] Enable the switch next to the new Location Name
How to create a new Service
POS terminal, KDS, KIOSK, Online Ordering = these are all services.
You need to create a new service in your Figure Manage account, in order to accommodate any new POS Terminal, KDS, KIOSK or Online Ordering that you plan.
Maybe you want to add new services to your existing business, so that your kitchen can run smoother (KDS), while providing a quick & professional service to your guests (KIOSK service). Or maybe you just opened up a New Location and you want to add new services under it. Either way, this article will let you know how to add and manage your services in easy steps.
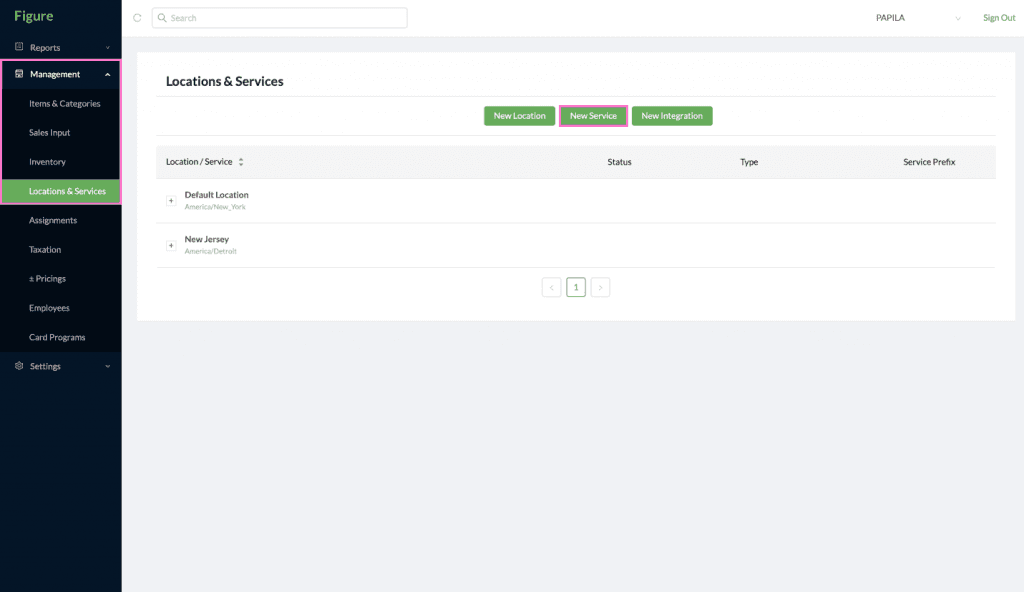
[1] Log into Figure Manage website with your credentials and go to Management -> Locations & Services
[2] Click on New Service
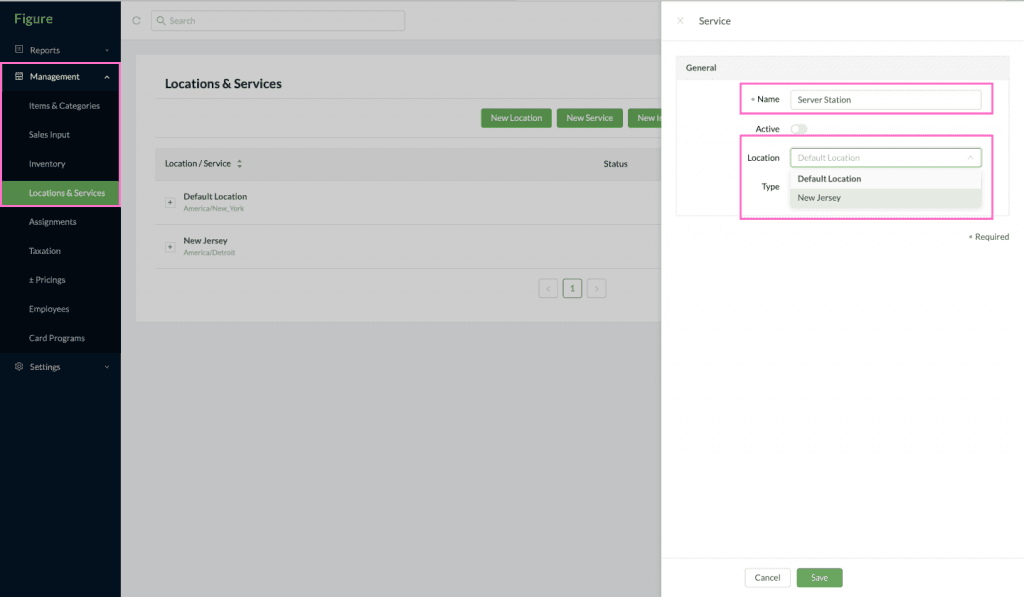
[3] Write down the Name of the Service
[4] If you have more Locations, choose one Location from the list (the new service will be under that location)
[5] Select the Service Type
Register (POS)
Kiosk
Online Ordering
Kitchen Display
Aggregator – see a separate article here
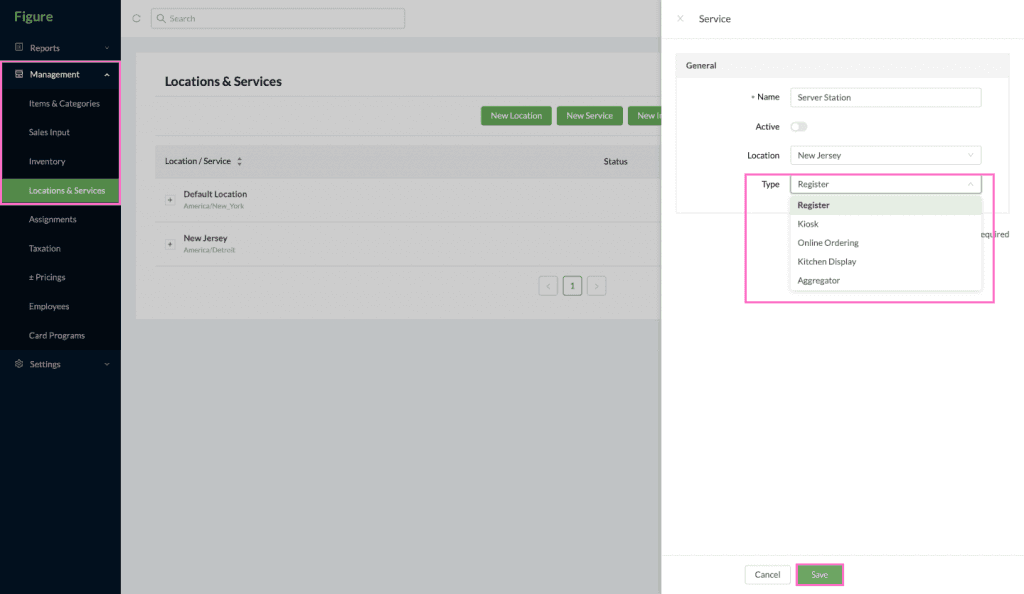
[6] Click on Save
How to manage Register/POS Service
[1] Create a New POS Service based on the steps above
[2] Go to your Figure POS app
if you do not have Figure POS app, this is how to download it
[3] Log into your account with your Figure credentials
[4] Choose the Location under which you created the service (if you have more than one)
[5] On the Select Register screen, choose the Service you just created
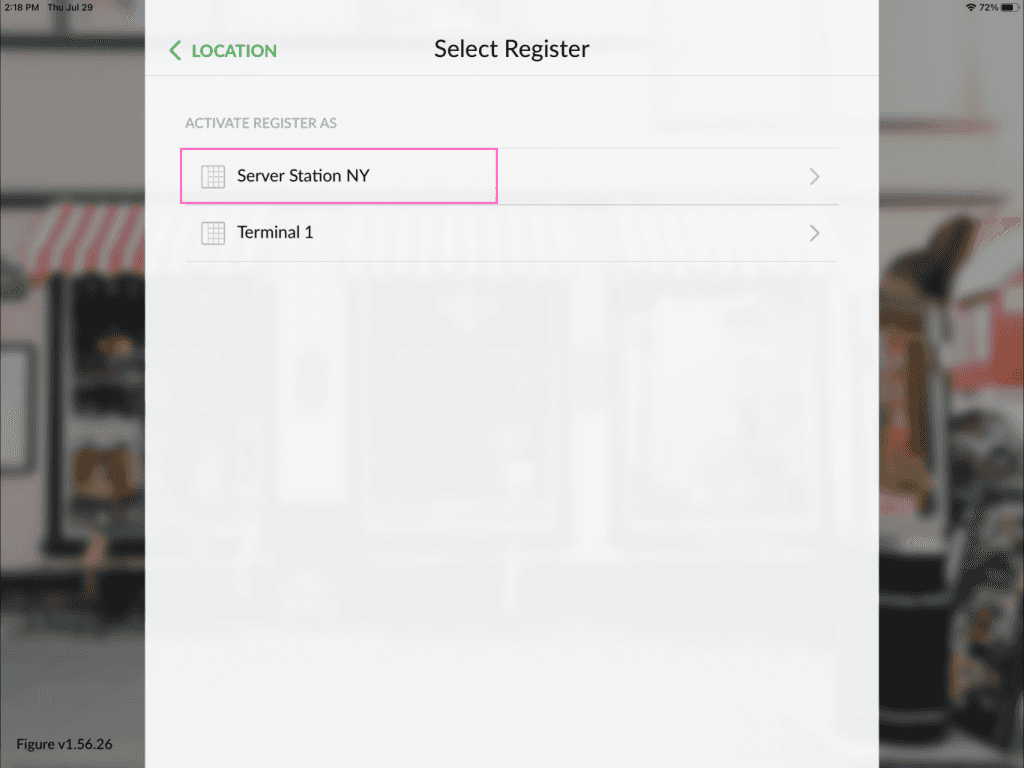
[6] Make sure that you, as an Administrator, are assigned to that Location
[7] Enter your Administrator PIN
[8] That's it! You are now using the new POS service you just created
How to manage Kiosk Service
[1] Create a New Kiosk Service based on the steps above
[2] Click on the Kiosk Service Name
You will see this:
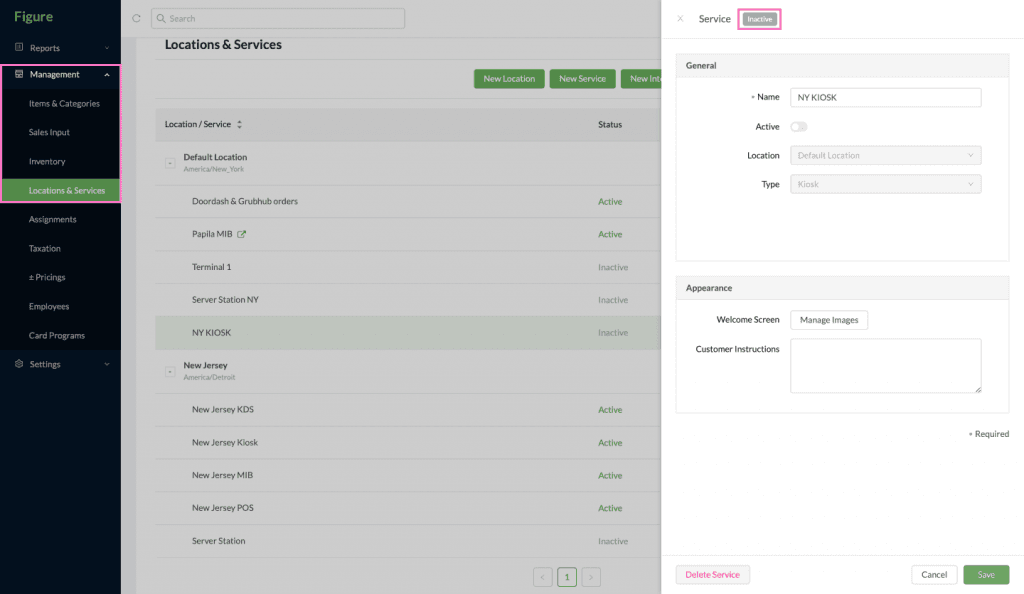
[3] You need to make the Kiosk active. This how to make the new KIOSK Service active:
Open your Savor Kiosk app
if you do not have Savor KIOSK appapp, this is how to download it
Enter your Figure Credentials in the Sign In screen on Kiosk
Choose the Location under which you created the new service
Choose the New Kiosk Service
[4] That's it! Your new Kiosk is now Active
How to manage KDS Service
[1] Create a New KDS Service based on the steps above
[2] Click on the KDS service name
[3] You will see this:
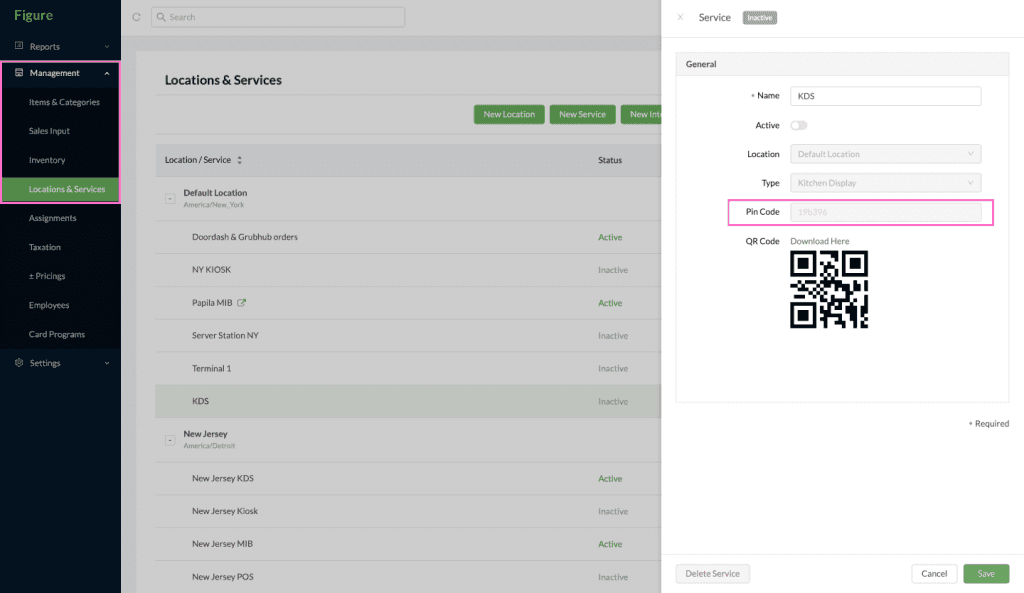
[4] Check your access PIN code which is written there
[5] Open your KDS app
if you do not have the app, this is how to download it
[6] Enter your Access PIN on the Login screen in KDS
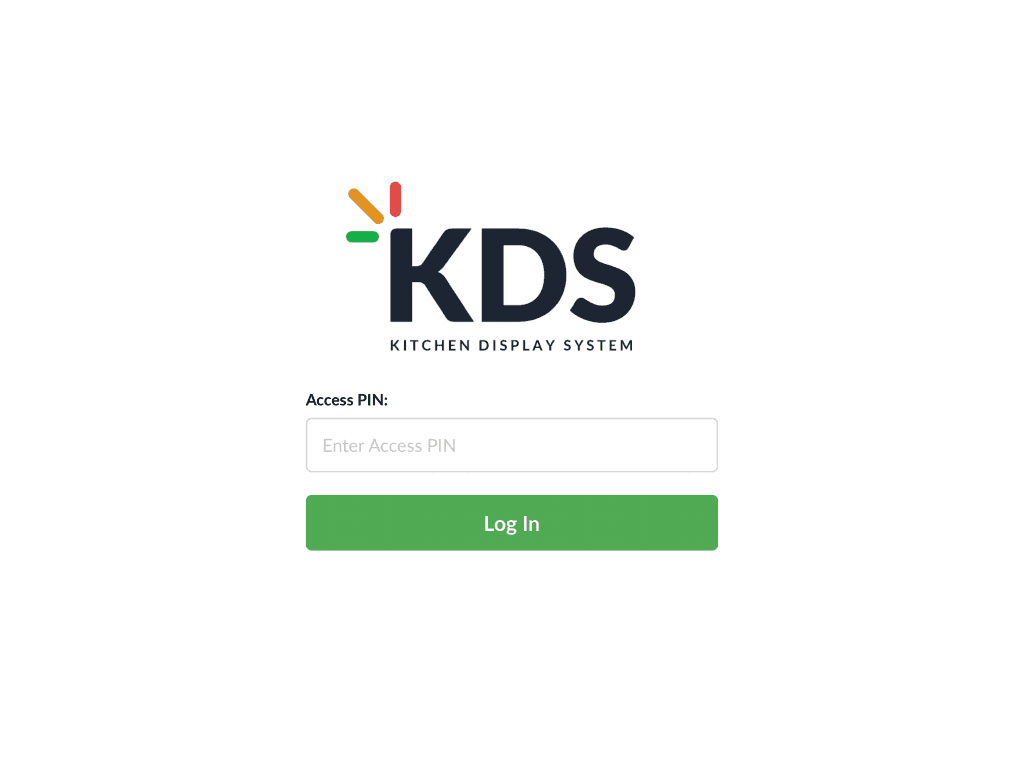
[7] That's it! Your new KDS is now Active
How to manage Online Ordering Service
[1] Create a New Online Ordering service based on the steps above
[2] Click on the Online Ordering service name
[3] You will see this:
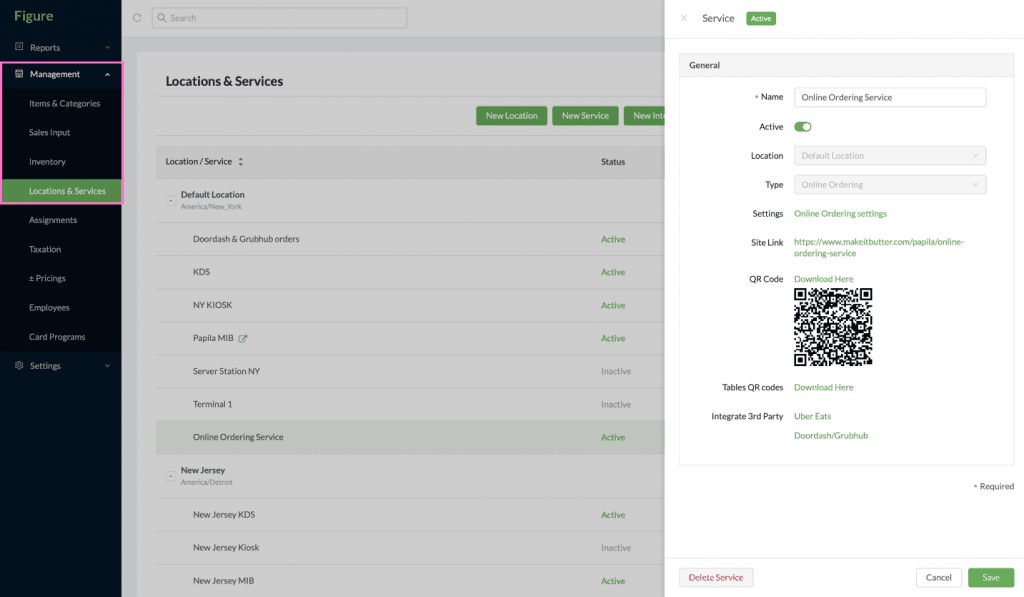
[4] Now you can customise your Online Ordering Settings