Figure Kitchen Display System (KDS) brings your kitchen together into one smooth operation. Use Figure’s Kitchen Display System in your restaurant to keep your team on the same page.
Once you have your KDS set up (how to set up your KDS), you can start sending orders to the kitchen. Check some simple features and settings below.
Navigation
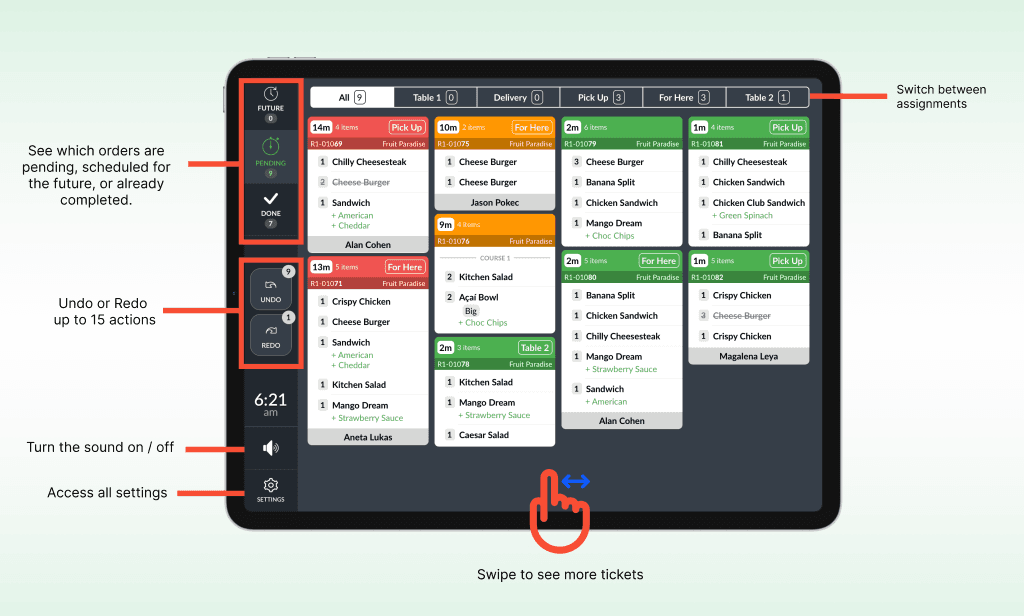
Mark Tickets as Done
You can customize how a ticket is handled when it is completed. Depending on your workflow, you can choose to simply move the ticket to 'Done' or trigger a kitchen receipt printout simultaneously.
Configure your workflow
To set your preference, navigate to KDS > Settings > Printing. Next to your printer, you can select one of the following behaviors:
Print on PENDING = the receipt prints as soon as the ticket arrives in the Pending section
Print on DONE = the receipt prints automatically the moment you tap the DONE button.
Optional Print on DONE = two buttons will appear: DONE (completes without printing) and PRINT AND DONE (completes and prints).
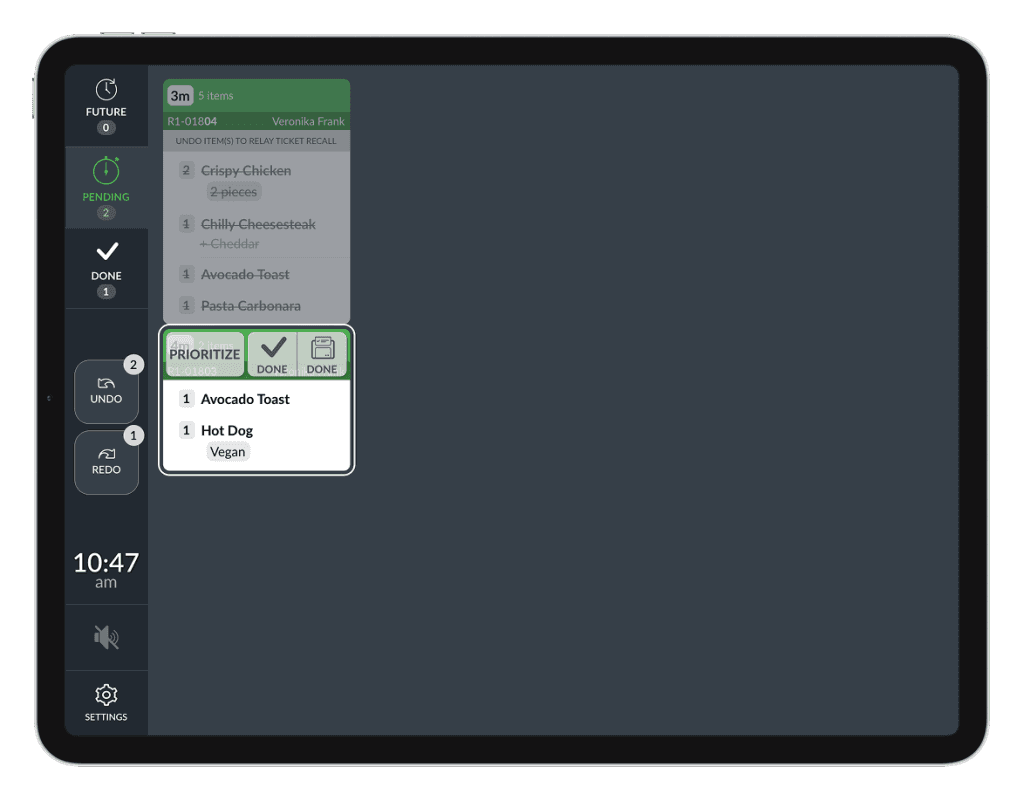
Recall Done tickets
If a ticket is marked as done and appears in the DONE tab, it can always be recalled and moved back to PENDING tab by tapping the ticket and then pressing the RECALL button.
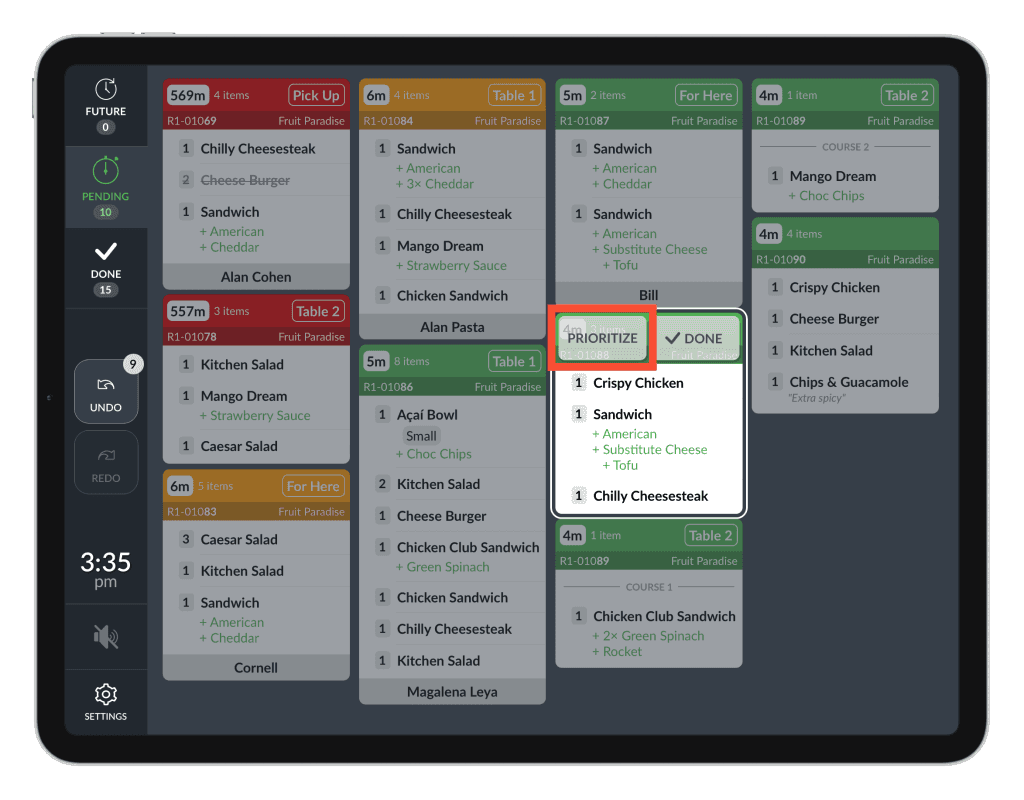
Prioritize tickets
Bump orders to be prioritized in extenuating curcumstances. By hitting the PRIORITIZE button, the ticket will move to the first place along with a sound notification.
Mark individual items as done
Tap an item to mark it as 'done'.
You can also set if you want to have the 'done' items in the ticket as striked-through or if you want to hide them completely. In KDS > Settings > Hide Done Items In Pending Section. When this setting is enabled, the tapped items will automatically disappear. They can be displayed again by tapping 'Display All' and hid again by tapping 'Hide Done'.
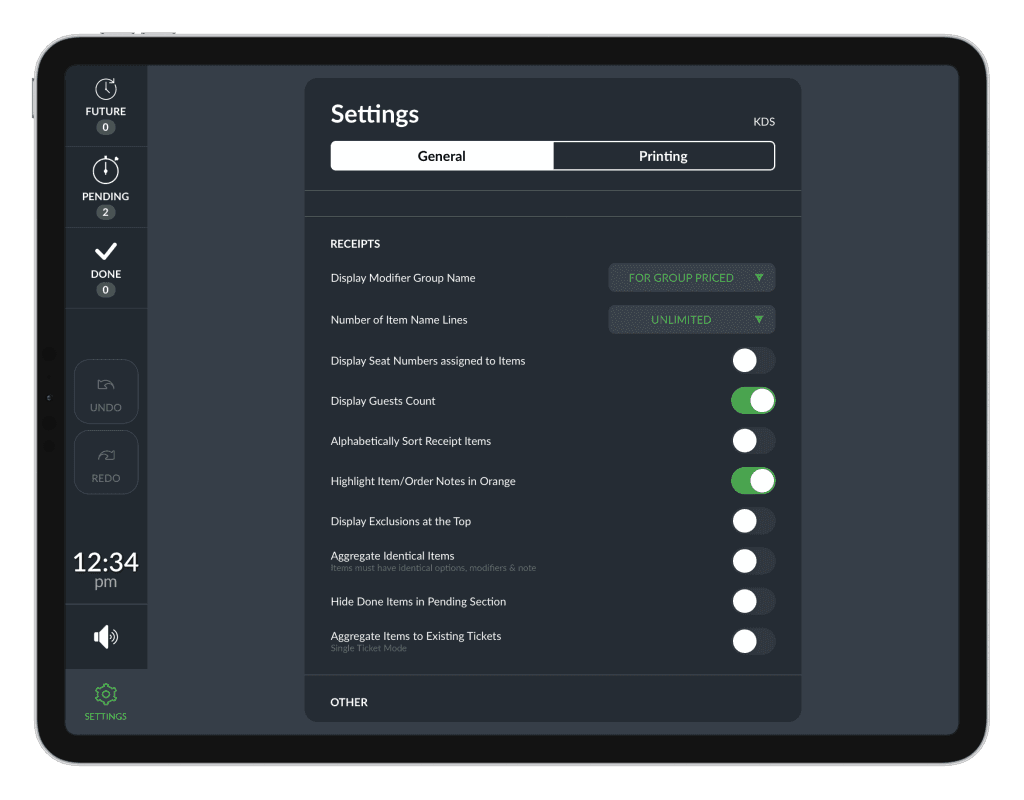
All Settings
See all the settings described below.
GENERAL SETTINGS
1 - Filter by Assignments: Choose which assignments (Delivery / To Go / Table 1,…) you want to see in your filter.
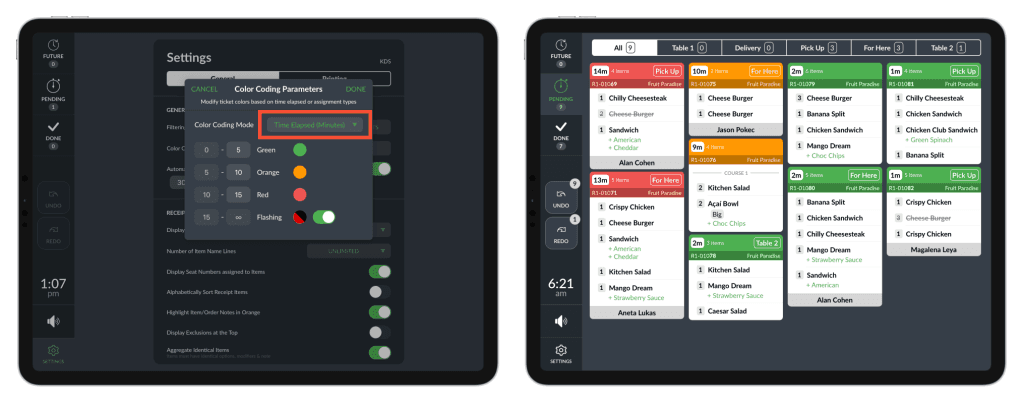
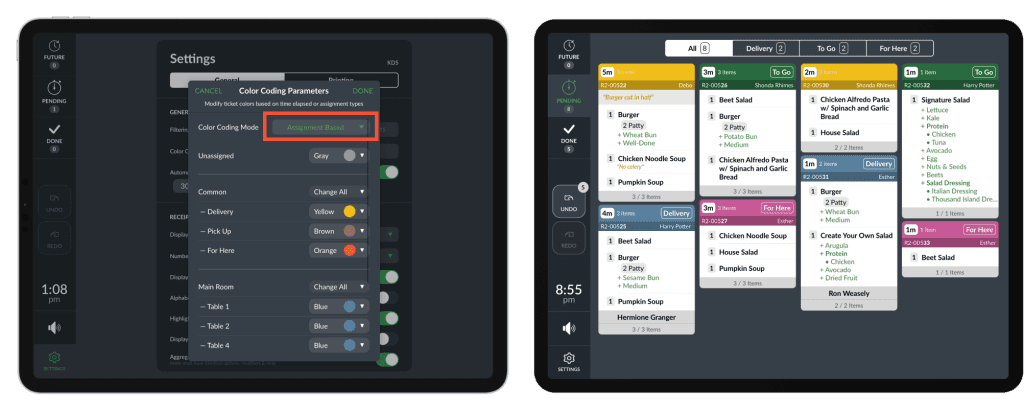
2 - Color Coding Parameters: There are two options of the color coding to choose from – Time Elapsed (Minutes) or Assignment Based.
Time Elapsed (Minutes): Choose the intervals for the tickets to turn orange, green, red or to a flashing mode.
Assignment Based: To visually differentiate between different assignment types. Assign a specific color to Delivery orders, Pickup orders, For Here, etc.
3 - Automatically move FUTURE tickets to PENDING: Choose if you want the tickets for scheduled (future) orders to be automatically moved to the PENDING tab. If you do, choose how much time before the ticket is due it will be transfered.
RECEIPT SETTINGS
4 - Display Modifier Group Name: Choose if you want to display the modifier group name Always, Never or only for Group Priced modifier groups (learn more about modifiers)
5 - Number of Item Name Lines: Choose how many lines you want to display for your item. Save space of the ticket by diplaying only One, or choose Two, Three or Unlimited number of lines.
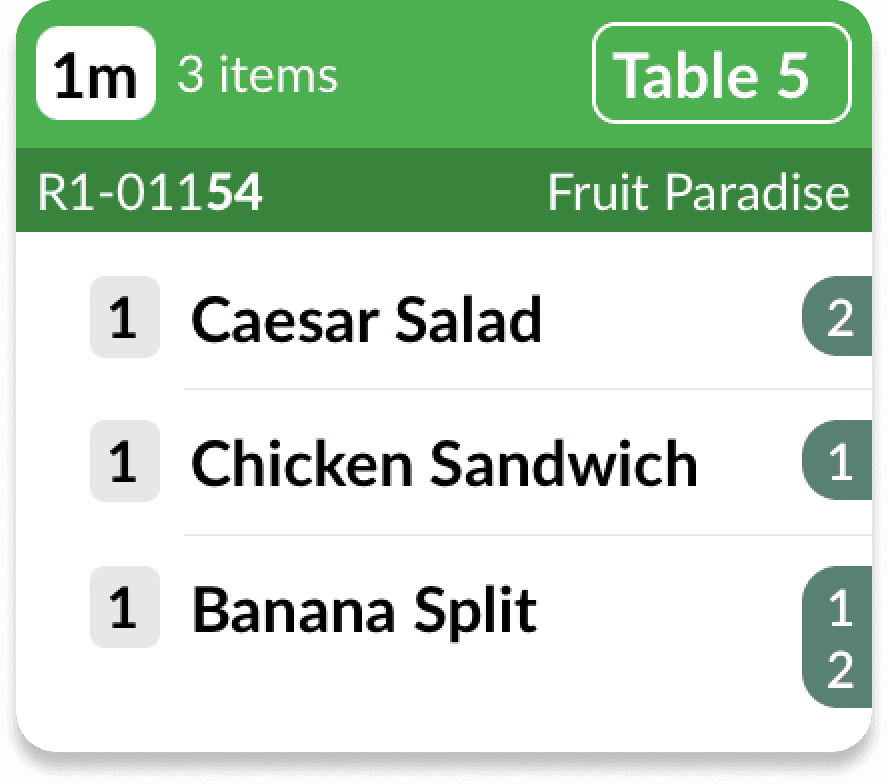
6 - Display Seat Numbers assigned to Items: When a seat is assigned to an item in POS, it will be displayed in KDS on the right side by the item.
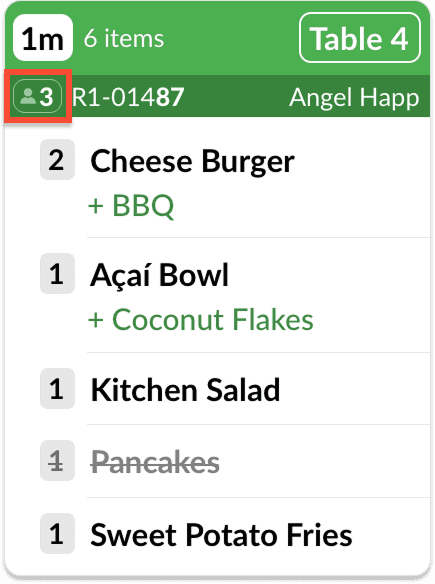
7- Display Guests Count: When enabled, each ticket will clearly show the guest count assigned to the order in POS, helping your team better manage portioning and timing. This can be disabled in KDS' settings.
8 - Alphabetically Sort Receipt Items: Items can be sorted either as they were ordered or alphabetically if this setting is enabled.
9 - Highlight Item/Order notes in Orange: Order notes will become more prominent - orange.
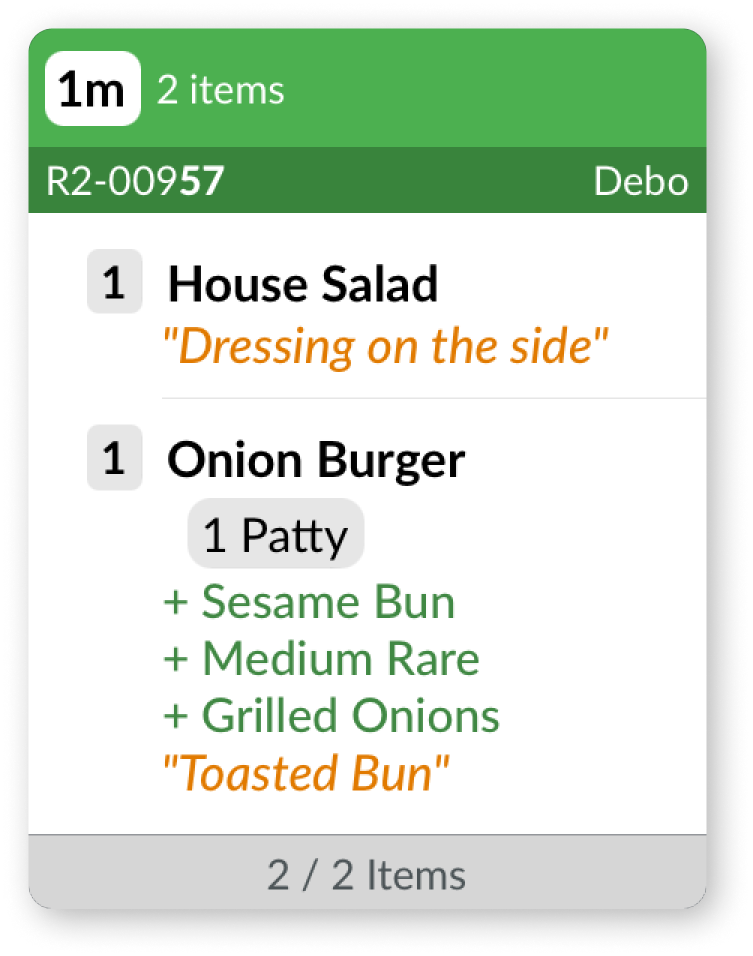
10 - Display Exclusions at the Top: See the exclusions always at the top of the receipt to make sure they will be noticed.
11 - Aggregate Identical Items: If an item is ordered multiple times, it will be aggregated to one line with as multi-quantity item (e.g. '3x Hamburger'). Items must have identical options, modifiers & note.
12 - Hide Done Items in Pending Section: When this setting is enabled, the tapped items will automatically disappear. They can be displayed again by tapping 'Display All' and hid again by tapping 'Hide Done'.
13 - Aggregate Items to Existing Tickets [Single Ticket Mode]: With Single Ticket Mode, you have the flexibility to aggregate items onto existing tickets. Choose between the default mode, which generates new tickets for every added item, or opt for the convenience of combining multiple items into a single ticket.

Expediter KDS
See how to set up the Expediter KDS in THIS ARTICLE.
Expediter KDS introduction
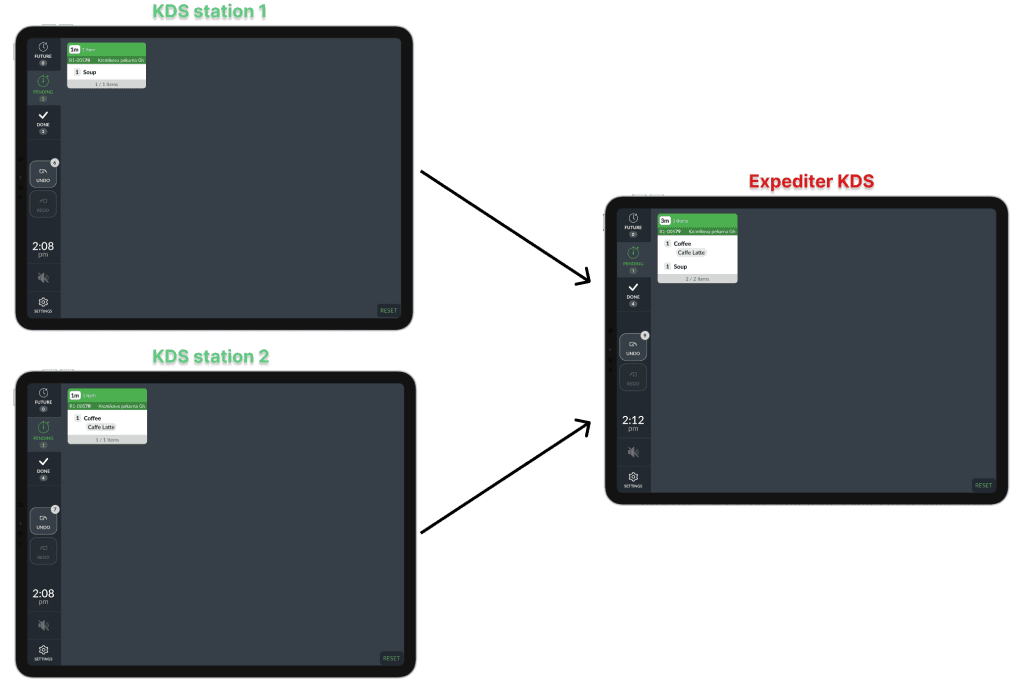
Expediter KDS [Expo KDS] optimizes and streamlines the workflow between the front and back of the house. You can use several KDS stations – eg. Grill Station / Kitchen Station. They all will can be streamlined to one Expediter KDS so the expediter easily knows what to put in one package.
How Expediter KDS works
The Expediter KDS possesses the capability to influence the standard KDS, not the other way around.
The Expediter KDS can see all the tickets sent to any KDS – make sure that all the items which are sent to your regular KDS are sent to the Expediter as well (learn how).
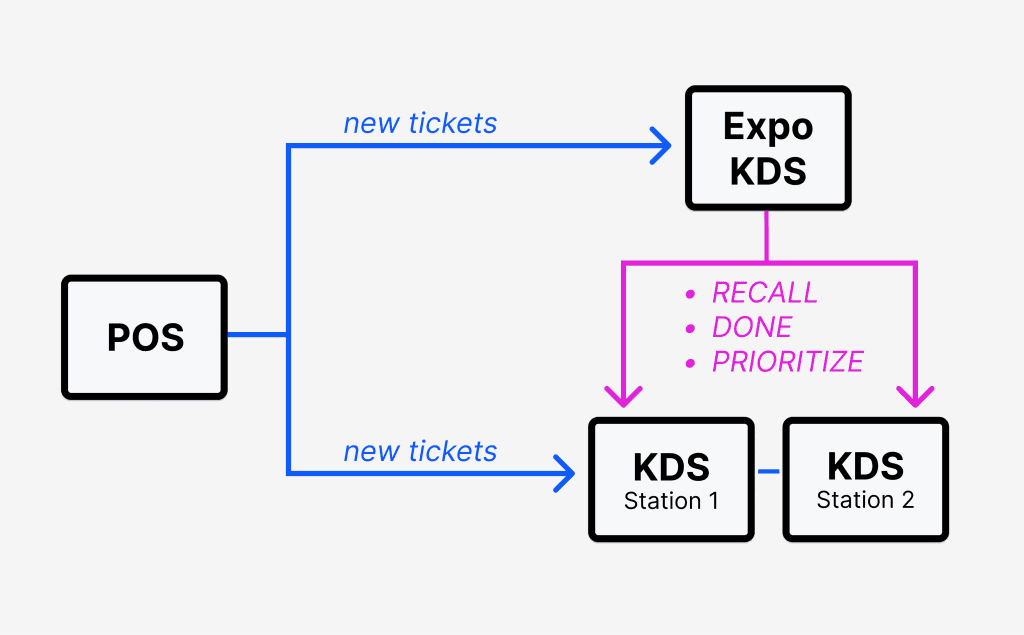
Actions taken on the Expediter KDS and their affect on the Standard KDS:
DONE = the ticket is moved to the DONE section on the Standard KDSes as well
RECALL = the ticket is moved to 'PENDING' tab at all corresponding standard KDSes and will be prioritized – moved to the beginning of the tickets
note that the Expediter must undo a completed (striked-through) item on the ticket on Expediter KDS in order for that recalled ticket to be relayed to the standard KDSes
PRIORITIZE = the ticket is prioritized on the Standard KDS as well
Voids are not synced for the purpose of ensuring that Chefs have seen the voided check. They can dismiss it themselves.
Example of aggregating multiple KDS stations into one Expediter KDS:
A scheme of the KDS and Expo KDS workflow:
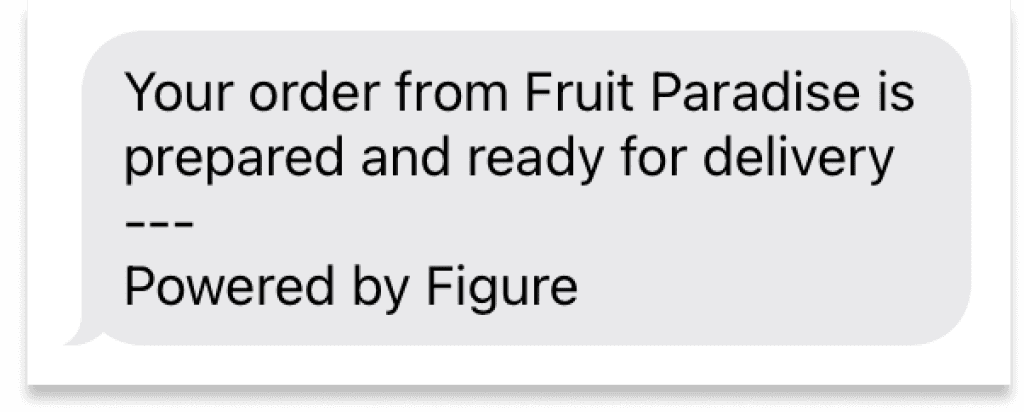
Notifying customers when an order is Ready
When a Delivery or Pick Up order is marked as Done on the Expediter KDS, a text message / email is sent to a customer
It is the same behaviour as if the order is marked as ready on the POS – learn more in this article.
Note:
This functionality applies to Pick Up and Delivery orders only.
The customer's phone number or / and the email address has to be valid.
It's not possible to undo the action – to unmark the order as ready and mark it again.