Recommendation: Manage your permissions and allow only managers to access Figure Manage.
Introduction
With Figure, you can manage your employees and their shifts, track when they clock in and out, view the total hours they’ve worked during a selected time period, and see their salary.
First of all, you need to add employees to the system – see how.
Then, when you have your employees added to Figure system and they have a PIN code assigned, they will use the PIN to clock in/out to POS. Then, you will see their shifts in Figure Manage where you can edit the shifts as needed, download a CSV or add shifts manually.
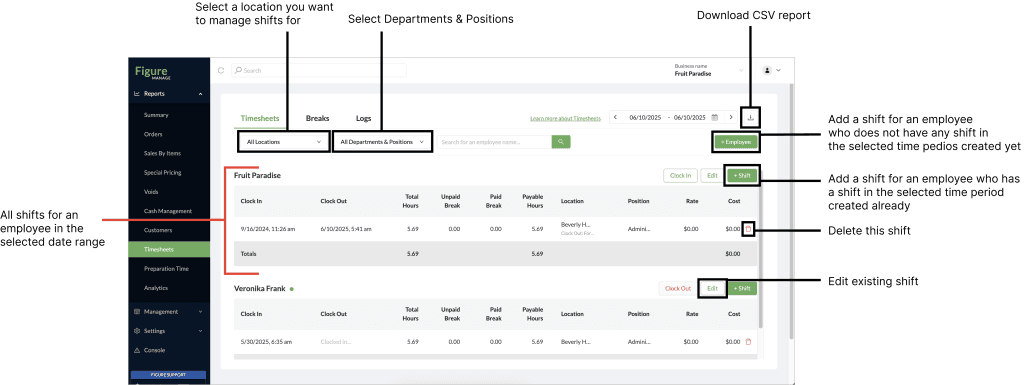
How to navigate in Timesheets
How to add a shift
If the employee clocked in/out in POS with their PIN code, the shift is already created. But you can always create a new shift manually in Figure Manage.
[1] Go to Figure Manage -> Reports -> Timesheets
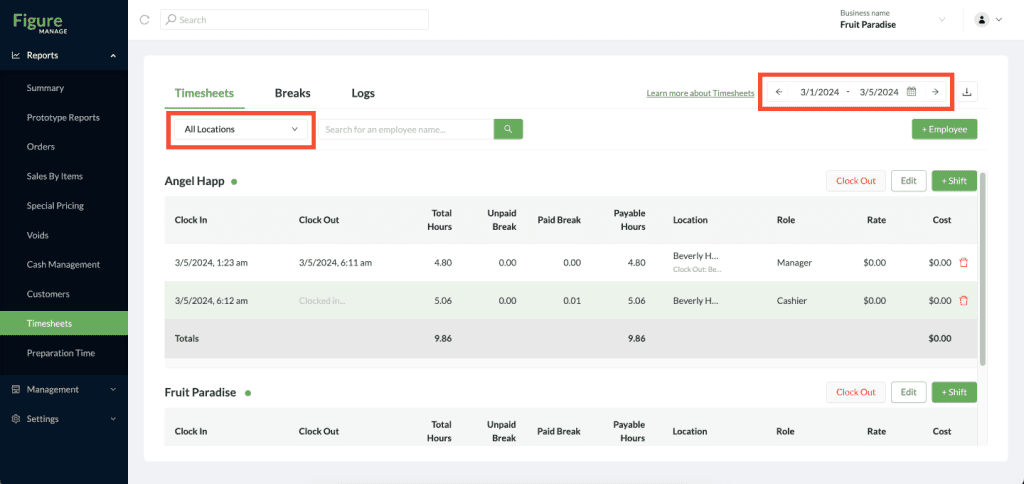
[2] Ideally select a location and the time range you want to be managing now – but it's not necessary, you can always select the location and date when inputting the shift.
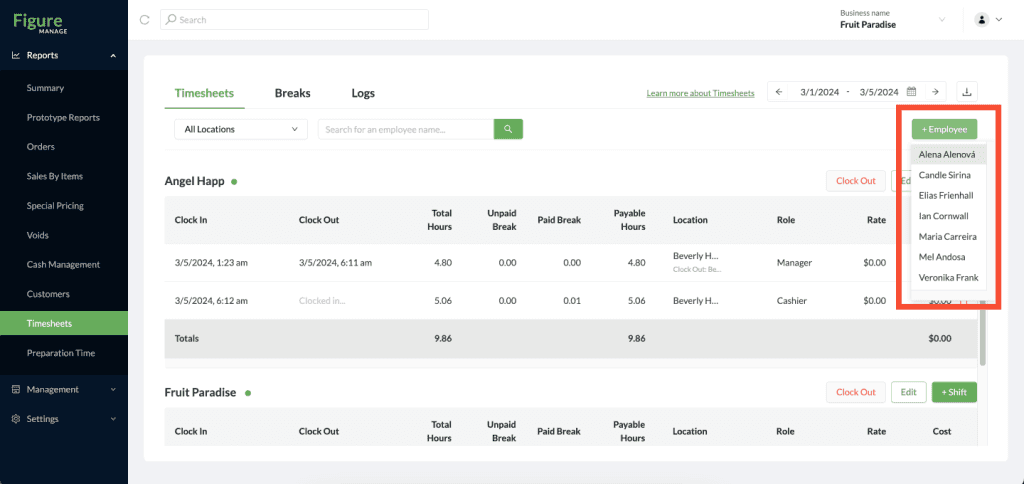
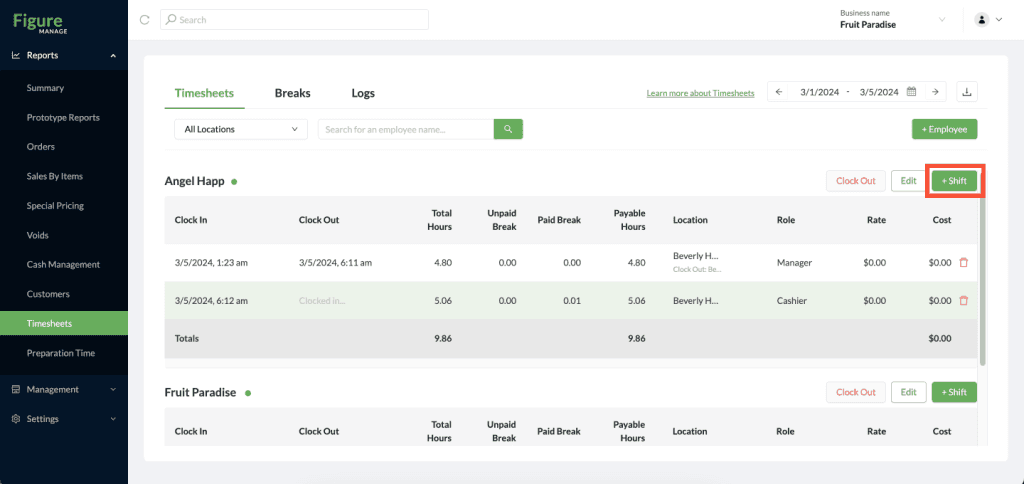
[3a] To add a shift for an employee who does not have any shift created in the selected time range (= the employee and their shift is not listed on the page), hit the '+ Employee' button and choose an employee you want to add the shift for from the list:
[3b] If you want to add a shift for an employee who has a shift already created in the selected time range (= the employee and their shift is listed on the page), hit the + Shift at the row with the employee's name:
[4] Fill all necessary fields – if you haven't selected the location at the beginning, please select it in this step. Add the dates/times of clock in and clock out and hit Create Shift.
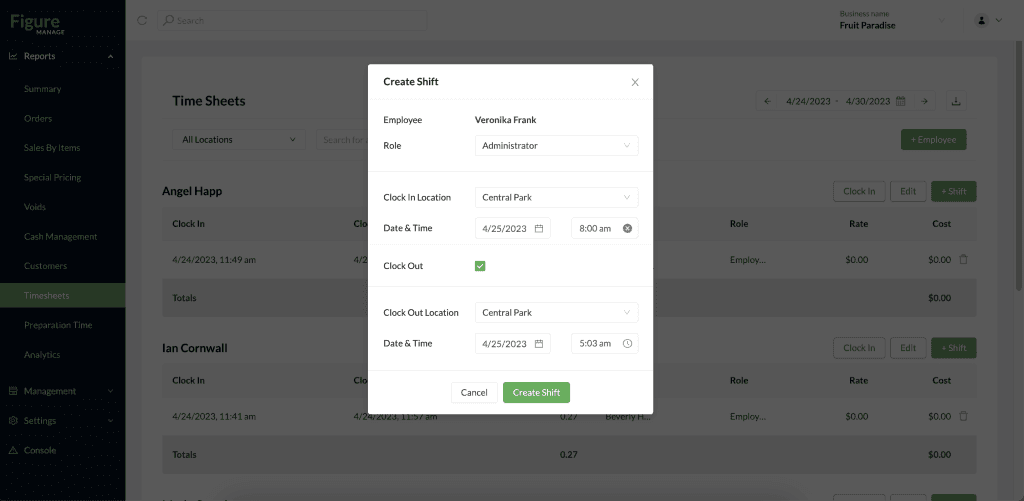
The shift will be added to the list. Tip: If you cannot see the added shift in the list, please, check the date you have selected in the top right corner – in case you added a shift for a different time range, you won't be able to see it.
A recording showing how to add a shift:
How to edit a shift
Once a shift is created, it can always be edit in Figure Manage.
[1] Go to Figure Manage -> Reports -> Timesheets
[2] Find a shift you would like to edit
[3] Click Edit
[4] Adjust time of clock in / clock out, Role or Location
[5] Click Save
Download Timesheets CSV
You can download a CSV report with detailed information about each shift. In CSV, you can find also columns for Card Tips Collected, Gratuity Collected and External Tips Collected.
Download CSV by clicking the button highlighted in the image below.

Timesheet Log
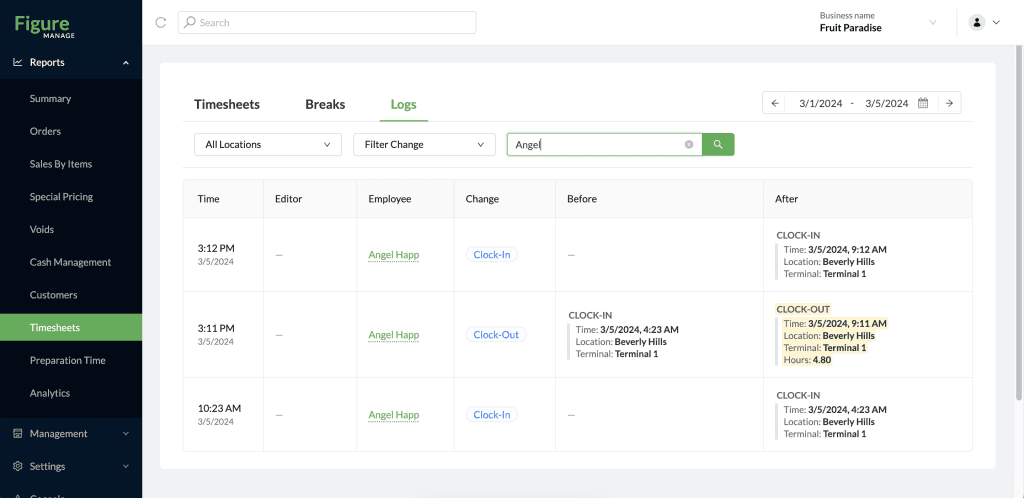
To see the Logs of all actions related to shifts, go to Figure Manage > Reports > Timesheets > Logs.
Change types:
Clock In = clock in made on the iPad / POS
Clock Out = clock out made on the iPad / POS
Create Shift = a shift that has been created in Figure Manage – Timesheets
Update Shift = shift for which the Clock In / Out time, Location or Role has been updated in Figure Manage – Timesheets
Delete Shift = a shift that has been deleted in Figure Manage – Timesheets
Start Break = break start initiated on the POS
End Break = break end initiated on the POS
Update Break = break for which the Start / End time have been updated in Figure Manage – Timesheets
Delete Break = a break that has been deleted in Figure Manage – Timesheet

You can also use a filter to filter out specific change types
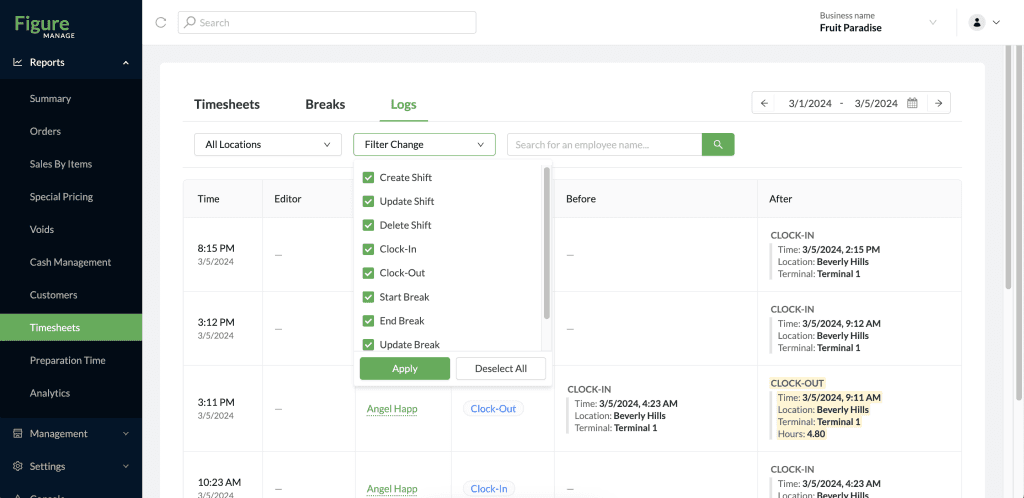
or search by an employee name